Creative ways to decorate a tree stump
Tree stump table

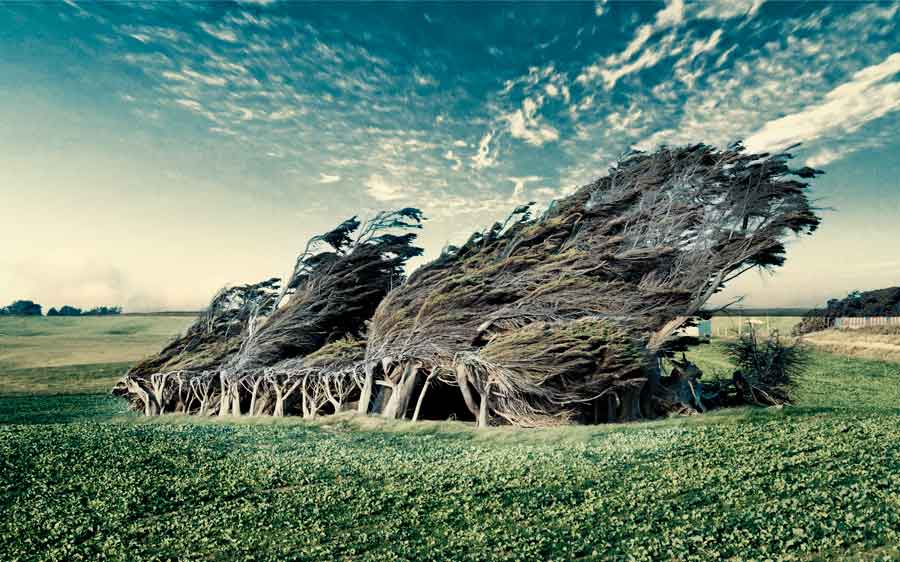
Once you get your tree cutting groove on and decide to remove an unwanted tree from your yard, you may then be wondering what you can do about the tree stump. Left to its own devices, it can begin to sprout and do all kinds of weird and wonderful things. However, if you choose to remove it, you can be left with an unsightly hole and a series of root-sized crevices in your lawn. It can seem, in this case, that the best thing to do with a tree stump after tree cutting is to embrace its presence.

Rather than remove it and have to deal with the resultant crater, you can come up with some ways to repurpose it. Here are a few that may have you wanting to cut down a few more trees.

Bird bath

Buying a birdbath for the local birds in your area can cost a fortune. Even though they are worth every cent, there has to be a cheaper way to bring birds into your neighbourhood to bathe and relax. Now there is, thanks to your tree cutting exercise! All you need to do is buy a stable outdoor bowl or bath that can sit atop your newly created tree stump. The resultant moss and greenery that grows in and around it can add to its charm.

Tree stump as a chair

Playground

If you have been thinking about tree cutting for some time, but you haven’t gone ahead with it, then there’s still time to turn your tree stump into a playground for the kids. However, you have to remember to cut the tree down a little further up the trunk than you usually would. You can then nail pieces of wood into the trunk for little feet to climb up, and add a slide off the stump to the grass area. You will be amazed at how you can create a natural wonderland for your children with something that’s usually quite troublesome!  

Chair

The problem with most outdoor furniture is that it doesn’t last forever. Metal will rust, wood will rot, and plastic goes brittle. A tree trunk, however, is there for the duration. Get creative with your tree stump by cutting out the middle section and leave a raised area around the side and back. You can then create a comfortable cushion for it and enjoy reading a book in your backyard with what nature gave you!

Table

If you’re going to have a chair, then why not have a table as well? A table is always going to be a helpful addition in your backyard. It can see you eating outdoors, using it as a potting desk for tidying your gardens, and even adding more plants on top of it, so it’s a multi-level garden. You can add a glass top that adds a touch of contemporary elegance, or opt for a more natural solution with a slab of wood.

Lighting

Solar lights on their own are cute, but in an entirely natural garden, they can take away from the old-world charm. Get it back again after tree cutting by turning your tree stump into a form of lighting! Drill holes into the base or top and add your preferred source of illumination. Solar works best outdoors and can illuminate the base quite effectively. You can then head outdoors and enjoy the ambience it offers.

An animal on a tree stump

Children’s games

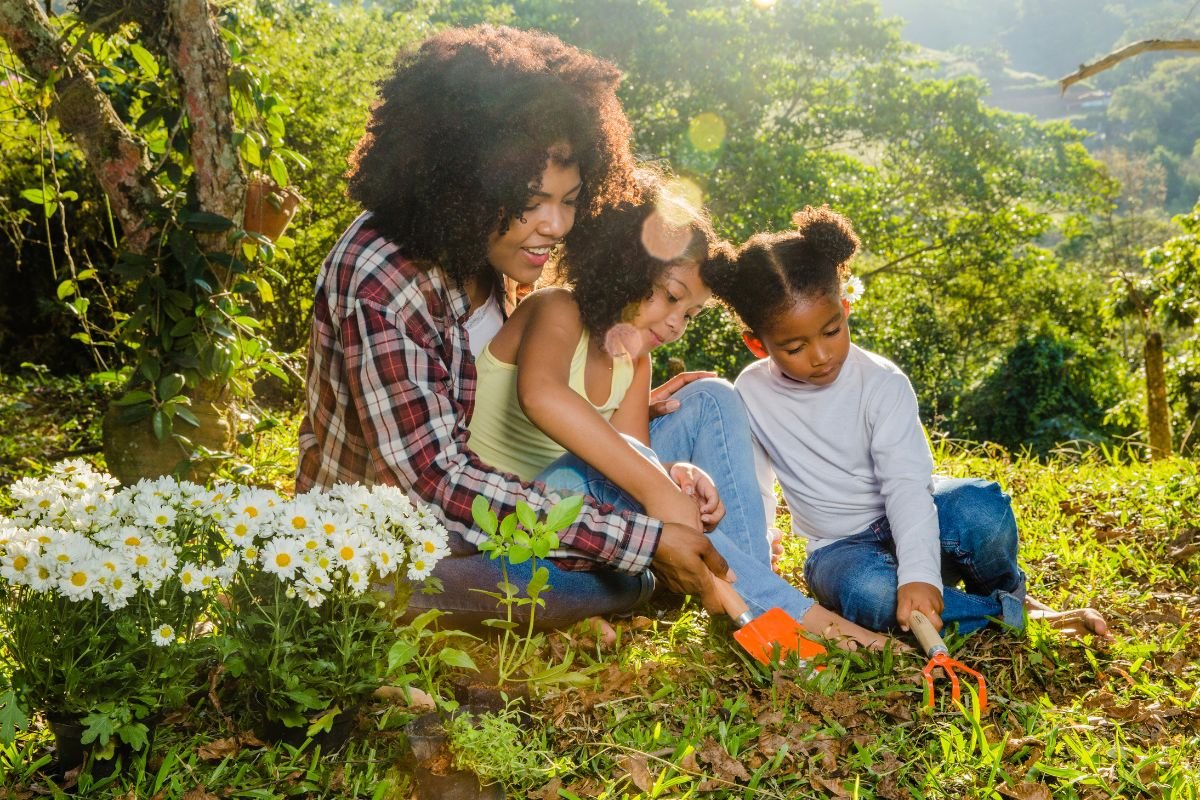
If you’re always telling your children to get outside and enjoy nature, then make sure it’s as inviting as possible. What use is there in giving them their marching orders if your yard isn’t full of things to pique their interest and imagination? Use your old tree stump to create fun games. Tic Tac Toe is an excellent option. You can then get the kids to paint stones, so you have enough of each to fill the squares.

Piece of art

Fancy yourself to be a little bit creative? Then flex your artistic muscles and make something with your tree stump. Fashion it into little woodland creatures, build a magical castle, or even add other items to it to make it a standout statement in your yard. Tree cutting can make people nervous because they don’t know how to deal with the resultant tree stump, but it can end up being a rewarding experience.
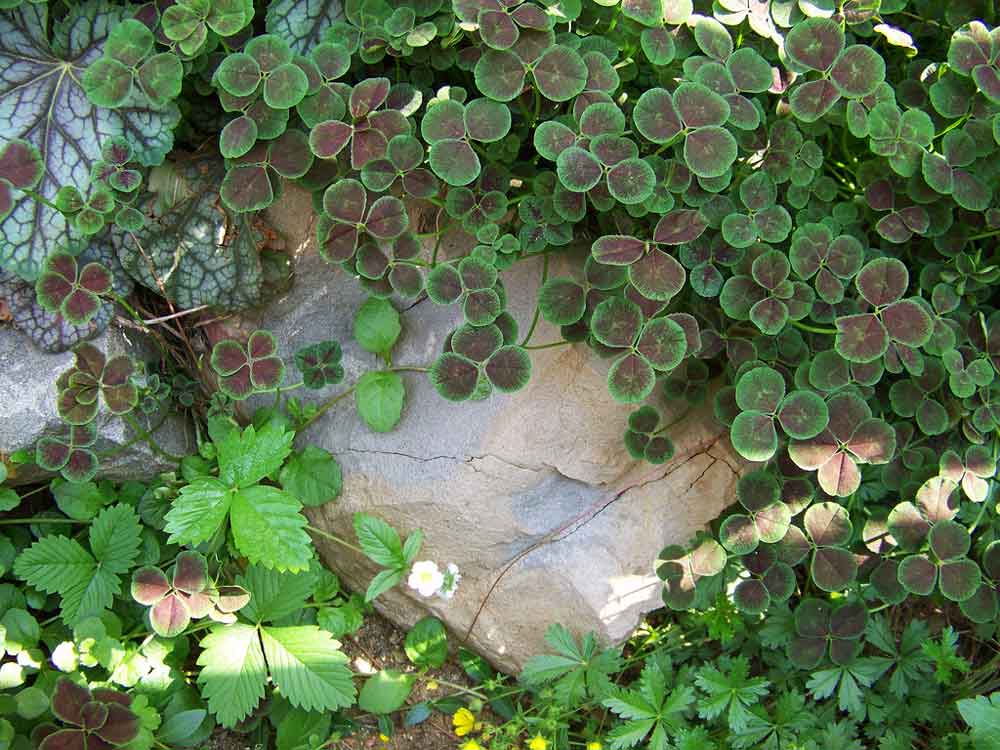
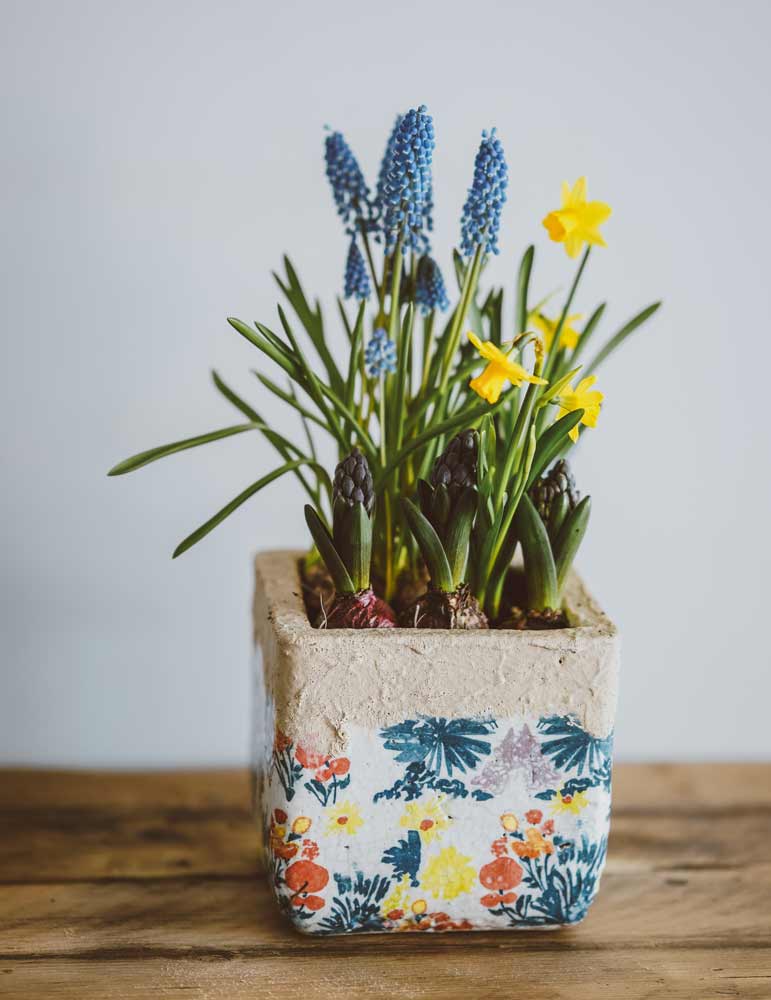
Tree stump planter

If you spend a lot of time in the garden, or you hire someone to make it look as beautiful as possible, then add to the charm with a tree stump planter. Merely by digging out the top surface ever so slightly and adding soil, you can plant your favourite flowers that will thrive in the natural environment. The best part is, you can let the plants become overrun, and it will add to the beauty.

Rather than pull that old tree stump out after tree cutting, why not utilise it? It can become a much-loved feature of your yard as opposed to only an eyesore. Take the time to think of your options, and consider these pointers above. You never know, you could end up benefiting from your new creation in more ways than one.

Contact Us for Garden Services
Guest User
Implementing a crop rotation plan for your garden

It’s always a sight to behold when you’re looking out the window of an aeroplane and see crops planted neatly on farmland below. The effect is like a quilted blanket, with paddock after paddock containing various plants that are bursting with colour and life.

But what you may not know is that if those farmers planted those same crops in those same places the following year, a whole lot of inconvenience might be in store.

If you don’t rotate your plants in what is known as crop rotation, then your soil can suffer. Pests will move in, soil nutrients will almost disappear, and you will need artificial fertiliser to offer any semblance of health and vitality for those plants.

Crops.jpg

This is not a farmer’s problem alone, for even the average gardener can experiences benefits from crop rotation in New Zealand and consequences without one. Those who spend a little bit of time formulating a crop rotation plan can enjoy a reduced need for pest control, a smaller risk of soil-borne disease, and even a reduced risk of nutrient loss.

If the time has come to prepare your vegetable garden for a new year of growth, then read on. It’s time to build a crop rotation plan for the best chance of growth success.

How do I get started?

After you’ve had a bit of a garden clean-up, identify how many garden beds you have to play with in your yard. You can then formulate a new crop rotation plan in NZ based on your garden bed layout. If you have four beds, then that means each crop type will not end up in the area in which it started for four years.

The next step is to work out what you want to plant and how you will group them. Your vegetables should be planted based on their growth, pest preferences, and general requirements. The more similar the plants are, the better they will work together in a separate garden bed (generally!)

Garden-beds.jpg

What plants should I group?

Many gardeners who see the value in crop rotation in NZ stick with a traditional method. This method normally sees you planting legumes, root vegetables, fruit-bearing vegetables, and leafy greens in separate garden beds.

While, for the most part, this form of crop rotation works well, some growth habits of particular plants mean they are better suited together, rather than apart as the traditional rotation plan would have them be.

Therefore, it’s a better idea to plant your vegetables based on the family. For example, the cabbage family, or brassica, would see the pairing of broccoli, cabbage, cauliflower, kale, turnips, swedes, and similar.

Peas and beans would have their own bed, and so too would members of the Solanaceae family. In traditional crop rotations, potatoes and tomatoes would be planted separate (root vegetables and fruit-bearing), but their similarities see them better planted together.

Carrots and celery would fall into the root family, while pumpkin, squash, courgette, and cucumber come under ‘cucurbits’.

It may take some time to familiarise yourself with beneficial vegetable pairings, but once you do, you’ll never go back to any other method. Soil health and rewarding yields will follow.

How do I choose my crop rotation order?

Now that you have grouped your preferred vegetables, you then need to think about the rotation order. Believe it or not, it matters. If you’re not sure you can do this step on your own, you can rest assured there is always a gardening expert on hand to lend some assistance.

After you have finished planting your legumes in one garden bed, make sure your brassica family follows behind. Brassicas love the nutrient-rich soil left behind by the legumes. While potatoes, too, love such soil, they have different pH levels, so you shouldn’t plant them with your brassicas.

If you have put a lot of time and effort into fertilising your soil, then make sure you keep your root vegetables away from these garden beds. The plants’ leafy tops will likely thrive, but at the expense of the delicious root vegetables underneath the soil’s surface.

There are many helpful materials online that can help you plan your crop rotation in New Zealand, such as this one below.

First bed:

Lay down compost and plant tomatoes and potatoes together. Follow with leeks and onions.

Second bed:

Plant members of the Umbelliferae family, such as carrots and parsnips. You can also use this bed for lettuce and follow it up with green manure once winter hits.

Third bed:

In summer, plant your brassicas in the third garden bed, such as kale and cabbage. Once winter hits, plant winter varieties like Brussel sprouts.

Fourth bed:

Sow your legumes then add lime before you plant the brassicas that follow next in the crop rotation.  

beets.jpg

Form your crop rotation plan today!

Having a crop rotation plan is one of the best things you can do for your garden. However, it can be quite tricky. Every gardener has their own ideas of what works and what doesn’t, and the proof is often in the pudding.

Do your homework, talk to friends who have successful crop rotations of their own, and think about the kinds of vegetables you’d like to plant. You can then enjoy an organised and thriving crop that rotates seamlessly for many years to come.

Contact Us for Garden Services
ADMIN
Landscaping ideas and designs for every backyard

There is always going to be a grey area surrounding what adds value to your property and what doesn’t, but you can safely assume that garden landscaping can be at the top of your list of what can. When you consider how little landscaping can cost, it’s pretty much a no brainer.

Imagine this for a situation. Your house is standard, but your yard is overgrown. The lawns are knee-high and in desperate need of care, and the gardens look like they haven’t seen any maintenance in years. People see your yard and immediately think less of the property in general. They may even consider paying less for it based on the amount of work they have to put into it.

You mow the lawns, weed the gardens, and do a bit of a tidy-up with hedge trimming and general rubbish clearing. All of a sudden, your property is now desirable and garners considerable interest. How easy was that?

Easy-Garden-Makeover.gif

Whether you’re planning on selling or not, it’s not hard to see that garden landscaping is a beneficial task to undertake on your weekends at home. Here are some of the best landscaping ideas for your backyard in NZ that may help to get the ball rolling.

trellis.jpg

For Privacy

New Zealand’s population is growing at a rapid rate, which means more houses are popping up on smaller sections than ever before. It’s not uncommon for homeowners to find themselves boxed in on all sides, so where are you supposed to find much-needed privacy in your own backyard?

Some excellent NZ landscaping ideas to combat this problem are privacy-offering plants, trellis, and screens. Plants such as photinia, murraya, and camellia can be excellent choices in the plant world. You can also attach climbing plants to a trellis, or create a peaceful nook with the help of easy-to-install screens.

For the Birds and the Bees

For those who want to focus their attention on landscaping ideas in NZ for insects and birdlife, there are several things you can do here too. Grow wildflowers, hang a bird feeder, and consider the installation of a bird table and bath. It would also help to do your research on the best plants to attract bumblebees.

Poppies, marigold, dahlias, and geraniums are a few of the many annual and perennial plants that bees adore. Birds, on the other hand, will appreciate Kowhai, Pohutukawa, and fruit trees.

birdbath.jpg

For Entertainment

After working a hard 40-hour week, you deserve a weekend to yourself or with family and friends. Without an entertainment area, however, that can be a little tricky. Your backyard is a blank canvas for landscaping ideas in this respect.

Start by outlining the best area in which to place your entertainment hub. Find out where will get the most sun but will also be most private and sheltered from the elements. You can then work out whether you want concrete, paving stones, gravel, or a deck to form the foundation of your entertainment area.

From here, you can focus on lighting, a central point such as a barbecue or spa pool, and furniture for all those who will take advantage of it. A few shade and privacy-offering plants won’t go astray either.

water-feature.jpg

For Peace

Nature can lift your mood, strengthen your wellbeing, help you find your balance, and build resilience. If you are searching for NZ landscaping ideas that can offer peace after a hectic week, then we’ll deliver.

Start by creating a peaceful area in your yard with a focal point. Many people love the gentle babbling of water on rocks, so why not invest in a pond or water feature? You can then fill this with plant life, and a quaint seating area for reflection. Work on this area as your personal project and enjoy immense satisfaction once it’s complete.

For Sale

Finally, if you’re about to put your property on the market – which is not surprising in this buoyant market – then you’ll be looking for tree and hedge trimming that spell profit. It’s easier than you think to make your labour work for you.

Mow the lawns or have someone take care of them for you, and make sure all your garden materials are in tip-top shape. Pull out weeds and dead plants, edge the lawns and gardens, and even consider cleaning and repairing the spouting if it’s been some time since you tackled that task.

Small changes can have a significant impact, so spend a few weeks in the lead up to putting your house on the market, ensuring your yard looks the picture of perfection.

for-sale.jpg

Try these Garden Landscaping Ideas for Yourself

Not everyone is born with a green thumb, which can make it exceptionally challenging to come up with landscaping ideas that suit NZ conditions on your own. Take note of this helpful information above. If you still need a helping hand, why not get in touch with a lawn mowing, gardening, and landscaping expert? You’ll have your own little slice of private paradise in no time.

Contact Us for Garden Services
Guest User
We weed to talk about oxalis

Oxalis, which is also known as shamrock, is a frustrating weed that can make any avid gardener want to tear their hair out while screaming death to oxalis! As soon as you learn how to kill oxalis and think you’ve managed it, it’s back again! Can you ever get rid of this crawling, creeping oxalis weed? 

The more you know, the more likely you are to be in the driver’s seat and take control. Here’s everything you weed, er, need to know about oxalis in NZ – which includes what it takes to say goodbye to it for good!

What is Oxalis?

Oxalis goes by many names. Some people call it shamrocks because of its clover-like appearance, but it also goes by wood sorrels or its Latin name Oxalis Acetosella. For some unknown reason, the name “Good Luck Plant” is thrown around as well. Other standard terms, at least in the gardening world, are “please stop growing back” and “why won’t you die!”

Oxalis is a rhizomatous flowering plant with trifoliate leaves. In summer and spring, small white and pink flowers may appear which can make it quite pretty to look at. Don’t let its beauty fool you, for this plant will show its true colours before long.

Lets-talk-Oxalis.jpg

Is Oxalis Toxic?

In a word – yes. Oxalis is toxic, but it’s not clear-cut. The Shamrock Plant is listed on the ASPCA’s website as toxic to dogs, cats, and horses. It contains soluble calcium oxalates, which can cause tremors, salivation, and kidney failure. The toxicity relates to all parts of the plant. If you own curious pets, you’ll need to be in a hurry to remove this plant permanently.

The oxalis weed can also be toxic to humans, but only in large quantities. You can gather the leaves and stems for salads or cups of tea because they have a lemon-like flavour which can be thirst-quenching. As they contain oxalic acid that binds up your body’s calcium supply, you should never consume oxalis in large doses. If you do, you are at risk of illness with staggering, cramping, and trembling, among many other symptoms.

How Do You Treat Oxalis?

There is a multitude of different approaches you can take to eradicate this plant. From killing oxalis with baking soda, through to putting your roaming chickens on the case; there’s quite the list of things to try. Not all solutions will work for everyone.

Many people used to use glyphosate-based weedkiller because it would travel down the stems and take care of the roots and bulbs. But glyphosate doesn’t discriminate, so it can also be harmful to bees and not safe for use around edible plants.

death-to-oxalis.jpg

If you have oxalis around your succulents or perennials, you can give Death to Oxalis a try. This product burns oxalis leaves, which then weaken the plant and eventually starve it. It doesn’t work on creeping oxalis, however.

Boiling water can work a treat, but can harm your other plants, and black polythene can stunt growth but impact your soil health in the process. It seems that for every solution, there’s a drawback.

If you have a lot of time on your hand (and by time, we mean years), you can remove every single leaf by hand. Shamrock, or oxalis, can’t make food from the sun’s energy (photosynthesis), so if you remove its leaves, it will starve. Alternatively, let your chickens on the loose to clean it up in no time.

Baking soda is another wonderful product with many uses. Mix one tablespoon with one litre of warm water and a single millilitre of Rainguard and spray the leaves to burn them on a hot, sunny day.

Finally, the only other option is to live with it. If you try to attack oxalis like any other weed, it will multiply. Let it sit and act as ground cover and focus on the other, less invasive plants in your garden. You can also get in touch with lawn care experts who may have some other cheeky solutions up their sleeves.

edible.jpg

What Are Some Uses for Oxalis – and Is It Edible?  

Oxalis is a pesky plant that’s challenging to remove, but at least it’s not entirely useless. It actually has a few different uses. The dried or fresh leaves are often used for medicinal purposes, such as for boils or abscesses.

Because oxalis weed leaves contain oxalic acid, they have a tangy bite to them. Therefore, they work well (in small quantities) in tea, salads, soup, and sauces. The flower, when left raw, is a lovely decoration in a salad. If you dry oxalis, it becomes useful as a curdling agent in plant milk. Save the juice for the removal of iron mould stains in linen.

Conclusion

Oxalis can be your worst nightmare, but only if you don’t know how to remove it, treat it, and use it. Take note of these helpful tips for removal above, and consider whether you may be able to use the plants once you remove them. There’s more to this pesky plant than meets the eye.

Contact Us for Garden Services
ADMIN
Some Essential Cooking Herbs to Grow in Your Garden

One of the many reasons why the average home cook doesn’t venture outside of their culinary comfort zone is because they lack the 20 different fresh herbs they need for a single recipe. That egg dish may be a crowd favourite and perfect for a growing family, but with the addition of all those fresh herbs, it becomes more of a hassle than its worth.

Of course, in many cases, you can substitute fresh for dried, but the result is never as good as with fresh herb plants in NZ. What’s more, many of their dried counterparts can end up altering the texture or taste of your dish for the worst.

If you’d love to sink your teeth into a new recipe book with fresh and delicious meals, then it might be time to grow herbs in your garden and planter boxes in NZ. Your family’s stomachs will thank you for it.  

Read on to discover which herbs will get the most use in your home, and how to grow them successfully.

cooking herbs

Parsley

How often do you go to a restaurant and pull that fresh parsley garnish off your dish before you dig in? While parsley adds colour and vibrancy to any meal, it’s also an excellent herb plant in NZ for balancing flavours and adding freshness.

Parsley is something you can include in Middle Eastern cuisine, salads, or even toppings for vegetables. It’s also an excellent herb for digestion and a source of Vitamin A and C. What’s more; it’s easy to grow. This vibrant herb is drought-tolerant, thrives in partial and full sun, and only needs occasional watering.

Mint

If you want fresh herb plants in NZ that you can’t kill, then mint should be at the top of your must-have list. Whether you want new potatoes with mint, mint tea, or a fresh mojito in summer, then this is the essential cooking herb for you. It’s hardy, takes a lot to kill, and can actually be quite invasive. It’s in your best interests to keep mint contained in planter boxes in NZ if you don’t want it to take over.

Rosemary

There’s nothing like the fresh fragrance of rosemary wafting out of your kitchen, so what are you waiting for? If you’re on the hunt for versatile herbs that are both beautifully smelling and divine in a range of dishes, then rosemary is the answer. Use it with poultry, vegetables, meat; the sky’s the limit. Rosemary is also easy-care as it loves only occasional watering. It can also grow into a large bush, so consider a planter box to keep it contained.

chives

Chives

Not everyone knows how to let their fresh herbs do all the talking, but chives do it all on their own. This standout cooking herb is essential for the cook who loves intense flavours and infusion. It works beautifully in egg dishes, with potatoes, and in salads or soups. Even better, chives have a relatively decent nutritional value with both Vitamin C and beta carotene. Provide them with rich, fertile soil in full sun and let them thrive.

Bay Leaves

While bay leaves may not look like much, they can pack a punch in terms of flavour. If you are looking for essential herbs to grow in your garden, then they’ll likely make the cut. They feature in many divine stews and recipes and have a sharp, bitter, and peppery flavour that can balance out the sweetness of a dish. Bay leaves grow on a bay leaf tree, but you can grow the tree in a container or planter box and pick leaves off it as you need.

Sage

If you struggle to add life and zest to your meals, then maybe sage can help. This aromatic herb is one that’s perfect for your vegetables, sauces, and meats. The key with this delightful plant is to balance the flavour properly. It can be quite overbearing if you use too much of it or pair it with another strong flavour. It’s both easy to grow and care for, making it perfect for those neglectful plant parents!

sage

…And Where to Grow Them

Now that you know what essential cooking herbs your kitchen needs, you then need to know where to plant them. You can purchase all manner of planter boxes in NZ, but not everyone has a lot of space. Fortunately, most herbs grow well in mason jars and standard plant pots. Choose the best soil based on your chosen herbs’ needs, then place them either in the sun or partial sun, depending on what helps them to thrive.

It’s Time to Grow Herbs!

Take your culinary expertise to the next level with a range of beautiful and vibrant herbs that are easy to grow (and keep alive). Not only is growing your own herbs a more cost-effective option, but it can mean you’re able to dabble in a whole host of new recipes that your family is bound to love. Happy cooking, everyone!


Contact Us for Garden Services
ADMIN
7 Ground Cover Plants to Suit Your Garden

No one is born with a pair of gardening gloves and a watering can in their hands. Love for gardening blossoms over time - often with the help of green-fingered family members who like to encourage a new passion to prosper.

Whether you’re a passionate gardener or one who likes to dabble when the fancy takes them, you’ll all share one thing in common: a dislike for pesky weeds. It seems like as soon as you get rid of one lot, a new type takes over. There’s only so much herbicide you’ll want to subject your other plants to.

The Benefits of Ground Cover Plants

That’s why more and more gardeners see the value in ground cover plants. Ground cover plants for your garden not only take up all that spare space that weeds usually steal, but can bring about a whole host of other benefits.

They prevent weed seed germination, perennial weeds, and even protect your soil from water loss and erosion. Ground cover plants are also a form of insulation, a living mulch, and an attractive habitat for insects that wish to call your garden home.

Whether you require ground cover plants for clay soil in New Zealand or something a little less demanding, you’re sure to find something to suit. Below, you can learn all about creeping, carpeting, edging, and fringing ground covers for your garden that will surely give weeds their marching orders.

1. Scleranthus Biflorus - New Zealand Cushion Bush

If you can’t pronounce the scientific name for this ground cover plant, then its more common name of NZ cushion bush will do. You won’t need to embarrass yourself when you’re asking for it at your local garden store. New Zealand cushion bush is a moss-like ground cover plant that thrives in all manner of environments.

Give it stones, gravel, or succulent mix, and it’ll live to tell the tale. While it looks soft, plush, and tempting to pat - refrain. Any damage to this ground cover plant can result in partial death, which can ruin the overall look of it as it takes over your bare space.

scleranthus-biflorus
Pimelea Prostrata

2. Pimelea Prostrata - New Zealand Daphne

If you’re looking for ground cover plants for clay soil in NZ, then New Zealand Daphne will come to the rescue. It’s a ground cover plant that originates from coastal dunes, so it’s used to a hard life. It’s also beautiful and produces stunning flowers with a mild scent of honey. However, if you have grazing stock on or near your property, this ground cover plant may not be for you. It’s poisonous for grazing animals. 

3. Soleirolia Soleirolii - Baby’s Tears

If you’re trying to put a stop to pesky weeds taking over your paving stones and pathways, then let Baby’s Tears be of assistance. This ground cover plant for your garden is a master of pathway protection, nestling up to the edges of it to form a barrier against weed invasion.

Baby’s Tears thrives in shady and moist conditions, but without frost. It becomes a stunning carpet-like cover that’s both effective and attractive.

babys-tears
Coprosma

4. Coprosma (Taiko) - Prostrate Mingimingi

If you want to make sure your ground covers for your garden are both attractive and useful, then Coprosma may be for you. When you first buy it, it may not be immediately obvious that it’s going to make the best ground cover. However, once it takes off, there’s no stopping it. It forms a thick rug over your chosen garden area that looks neat and tidy with regular trimming.

5. Liriope Muscari - Lilyturf

If your goal with ground cover for your garden is to help with fringing and edging, then Lilyturf can help. This beautiful plant has gorgeous and long leaves and vibrant purple flowers that look picture-perfect in spring.

However, Lilyturf does have its drawbacks. Slugs and snails love it. What’s more, if frost doesn’t kill it back over winter, then you have to remove dead foliage by hand. Otherwise, there are plenty of reasons why this bushy and vibrant plant could be a firm favourite in your garden.

Liriope-Muscari
dwaft agapanthus

6. Dwarf Agapanthus (Tinkerbell)

Dwarf Agapanthus, also known as Tinkerbell, is a short yet beautiful ground cover plant that can add much life and vibrancy to your garden. It grows in clumps, doesn’t spread without permission, and you can propagate it to build up surrounding areas. Unlike roadside agapanthus, its dwarf cousin is not one to misbehave and can also be useful for stabilising banks that are prone to erosion.

7. Trachelospermum Jasminoides - Star Jasmine

Even though this ground cover plant will take at least two years to mature, it will be worth it when it does. It can climb, form shapes on wires, and provide dense coverage when and where you need it the most. It gets a gold star for versatility. However, it’s not suitable for areas with heavy frost.

Star-Jasmine

It’s Time to Plant

You won’t need much convincing that ground cover plants are a saving grace. Instead of all that back-breaking work to remove weeds, you can rely on ground cover plants to give weeds their marching orders. If you need a helping hand in choosing the right ground cover plants for your garden, then there are plenty of experts who can help. Otherwise, happy planting!

Contact Us for Garden Services


Garden TipsADMIN
The Best Roses to Buy in New Zealand

Roses have been a symbol of love, war, politics, and beauty for as long as they’ve been in existence. That existence spans 35 million years, with evidence of fossilised rose petals found in Crete from 1600BC.

It’s clear to see that roses continue to hold their own in the gardening scene, with them the number one preferred flower in the United States. That may be, in part, due to the country’s first president – George Washington – also having the title of being the country’s first rose breeder.

While the flower’s origins in New Zealand are less exciting, that doesn’t make them any less popular. There’s a New Zealand Rose Society, and it’s even a popular female name as well, not to mention featuring in over 4,000 songs. You’ll also be unlikely to wander down any residential street without seeing at least one beautiful rose plant standing proudly in a garden.

However, that doesn’t mean that all varieties are going to be suitable for you, your climate, or busy schedule. Out of all 150 species and thousands of hybrids, sometimes only a handful will ever truly thrive in your garden. If you want the best chance of finding those rose varieties, then read on. Below, we list some of the best roses to buy in New Zealand – and how to care for them.

Paddy-Stephens.jpg

Paddy Stephens

The Paddy Stephens free-flowering hybrid tea rose got its name from the New Zealand rosarian of the same name. It’s a beautiful, hardy, and disease-resistant flower with orange-salmon petals and a dark green and glossy foliage. It also boasts a slight fragrance which is not overly aromatic, but pleasant all the same.

This is a rose that will thrive in full sunlight and well-draining soil. It also requires organic matter and rose fertiliser to help it reach its full potential. In winter, you will either need to prune it or hire an expert who can, then dead-head it during the flowering season. You’ll see Paddy Stephens in full bloom during spring and through until autumn.

Absolutely Fabulous

As the name suggests, this plant is absolutely fabulous. With butter yellow flowers reminiscent of days gone by, and a beautiful yet unique scent of licorice, it’s a must-have rose in any garden.

Absolutely Fabulous is a neat, self-cleaning flower that takes minimal care and maintenance. It usually has up to 45 petals and loves to sun itself in well-draining soil. As long as you supply it with plenty of organic matter, it will continue to thrive.

Absolutely Fabulous is also an exceptionally heat tolerant breed with blackspot and mildew resistance. Remember to prune it in winter and remove the dead heads during the flowering season. You may also find this is the best variety for borders, garden beds, or stand-alone shrubs.

absolutely-fabulous.jpg
Alberic Barbier.jpg

 Alberic Barbier

If you can’t think of anything more refreshing then a beautiful apple fragrance filling your nostrils daily, then Alberic Barbier might be right for you. This rose boasts dark green foliage and lovely shades of apricot, yellow, and cream. As the flowering season progresses, the kaleidoscope of colours fades out to a brilliant and stark shade of white.

Alberic Barbier also works well in partial sun, shade, hot climes, and well-draining soil. Talk to an expert about staying on top of fertilising and care, as you’ll need to remember to apply new fertiliser both in early spring and summer.

This disease-resistant and coastal-friendly rose is one that loves to climb – so keep it away from fences and buildings if you don’t want it to take over!

 Class Act

If you struggle to get any plants to thrive due to your cold climate, then Class Act could be for you. This hardy rose thrives in temperatures as low as -20 degrees and is entirely frost-hardy. Therefore, if you live in the likes of Southland, you’ll have no problem getting this rose to adjust to the conditions.

It’s a well-behaved rose with delicate hints of red, lemon, and white. Its fragrance is only mild, but its looks more than make up for its lack of perfume. This rose requires fertiliser in spring and summer but is relatively disease-resistant year-round. You can also plant it in a pot, container, or flower bed.

class-act.jpg
csarpet-pink.jpg

Flower Carpet Pink

If you want your gardens to make a statement, then Flower Carpet Pink will come to the party. This carmine pink rose is wide-spreading, with large clusters of semi-double flowers throughout the flowering season. Even its glossy, dark green foliage makes a statement.

Flower Carpet Pink is one of the most easy-care shrubs around. It flowers from spring to autumn, requires minimal trimming, and tends to be more of a ground cover shrub than one of height. It doesn’t have a particularly strong aroma, but it’s a rose that loves to flaunts its looks to make up for it.

Conclusion

Whether you’re new to rose care or you’re a seasoned expert, you’ll find it’s a joy to discover all the different rose varieties we have here in New Zealand. The next time you go to add a new one to your collection, choose one with sturdy canes and isn’t one of the last left in a variety. You can then rely on experts delivering gardening and lawn mowing services near you to maintain them to the highest standard.


Contact Us for Garden Services
Guest User
Tips for Choosing the Right Gardener

As you thumb through the pages of a home and garden magazine, it’s easy to feel jealous. All the properties feature Buxus hedges trimmed to perfection, and all the flower beds are alive with colour. The lawns are always something special too - luscious and as pretty as a picture. Even the local bowling club would be envious.  

Why can’t my gardens look like that? You say. They can, but you need to choose the right gardener - one that can not only do the job but has an eye for detail and a passion for the art of gardening. Because it is an art.

If you’re ready for your own property to look like one that would feature in a magazine, then read on. Below we discover the very way to achieve that goal.

right-gardener.jpg

Where to Find Gardeners in Your Area

Around 13% of Kiwis are working long hours, which leaves very little time for anything else. The time you do have to spare, you want to be doing something fun with it - not elbow deep in soil fishing out weeds.

But once you know you need to hire a gardener, where do you start to look? There isn’t anyone walking around with sandwich board signs saying, “I’m a gardener, hire me!” In the absence of such people, you need to search both locally and online.

Check out noticeboards at your local supermarket and classifieds in the newspaper. You may even find that leading auction sites such as TradeMe offer services that pique your interests.

One of the most effective gardener-finding methods, however, is through local, established lawn care businesses. You would be amazed at how quickly you can make a call and have an expert over in no time.

Take Crewcut, for example. David from Auckland is more than happy to tackle your gardens, while gardening help is only a phone call away in Nelson. Choose the experts for an expert finish.

How to Choose a Gardener?

You want your garden to be one that people admire, and it takes the right type of gardener to achieve that. That might not always be the one you first choose. The perfect gardener for you is one that takes pride in their work and has the experience to know a weed from a watsonia. It’s time to do your homework.

Take a drive or walk around town and hunt out gardens you like. Be nosy and inquire whether a gardening service provider offered the service. You never know, by the end of your adventure, you could be armed with a list of names and numbers.

Once you highlight a few options - such as those from leading garden experts in your area, then ask if they have any references. Many gardeners are only too happy to show you pictures of what they have achieved - or even take you to properties they have managed from the ground up.  

questions-for-gardener

Questions to Ask Your New Gardener

You’ll likely know when you’ve found the best gardener in your area, but it’s helpful to be sure. People’s homes are their castles, and you want only the best to maintain them. Useful questions to ask can relate both to the people’s skill set and their recommended approach. We’ve included a few helpful questions to ask below. 

  1. How often will you tend to the gardens?

  2. Do you have any recommendations for my garden?

  3. How much will your service cost?

  4. Is there anything I need to do for you?

  5. Do you take your green waste with you?

  6. Do you plant new plants?

  7. What happens during winter?  

These are just a few of the many questions you can ask your new gardener. If you require a whole new look for your yard, then it may even help to draw out a plan of what you hope to achieve. It doesn’t have to be a masterpiece, but a sketch can help you and your gardener to be on the same page.  

What Next?

You know what you want, what your garden needs, and you also know you don’t have the time to achieve it on your own. The next step is to hire a gardener that will bring your garden up to a high-quality standard without making you worried with regards to how much for gardening services. Why not get in touch with experts who know what they’re doing? Crewcut, for example, has keen gardeners all around the country who will be more than happy to take on your latest project.

Contact Us for Garden Services
Guest User
Garden Wall Solutions on a Budget
garden-wall.jpg

The average section size is only getting smaller, with many new builds in Auckland on pieces of land as little as 499 square metres. With such a small space to work with, it’s not uncommon to feel like every neighbour encompassing your property can see what you’re doing.

Everyone is entitled to feel like their property is their sanctuary. You should be able to relax outside, hang out your washing, and enjoy a conversation with friends without neighbours hanging on your every word. Fortunately, there are ways that you can get that sought-after privacy without breaking the bank. You can even rely on experts to lend a helping hand.

Read on to learn about the various garden wall solutions on a budget. You would be surprised at what you can now do to protect your privacy.


Supersize Those Pot Plants

Sometimes, it’s not enough to have a fully-fenced backyard. Remember, your fence backs on to other properties, and the positioning of their property may give them the perfect view into your yard.

If you have an entertainment area in your backyard you’d like to protect, then consider supersizing your pot plants. Buy tall planters that you can organise in a fencing style around your patio area.  

Fill them with plants that like to spread out and thrive throughout the year. While your plants won’t create a Fort Knox-like barrier, they can be enough of a separation to offer a touch of privacy and a beautiful dose of colour at the same time.

privacy-screen.jpg
Trellis.jpg

 Try Trellis

Trellis, an open framework of intersecting pieces of wood, is one of the most affordable privacy wall options on the market. It requires minimal DIY knowledge, doesn’t need a lot of installation help, and won’t break the bank either.

Trellis is an affordable option that you can knock up around your patio area in half a day. You can leave it looking natural with plain wood, paint it, or invest in climbing plants that will jump at the chance to take over. Before you know it, you have a beautiful garden wall that blocks off the view of neighbouring properties.


Purchase Privacy Screens

Privacy screens are becoming more and more popular with those who like to entertain on a budget. You can buy them ready-made, call upon an expert to build one for you, or you can easily craft one yourself.

You don’t need any special DIY skills to create a privacy screen from scratch. Head to your local secondhand shop and see what you can find in the way of old shutters or doors.

Buy some hinges, screws, and a tin of paint. You can then join all your panels of choice together with the hinges by using a battery-powered drill. All that’s left to do now is give it a fresh lick of paint to match your home’s exterior. ‘

Privacy-screens.jpg
Bamboo.jpg

Buy Bamboo

You would be surprised at how versatile bamboo is. You can eat it, make a fishing rod out of it, or even use it to shelter your property from another as high as five storeys tall! While you don’t want to get carried away, it’s helpful to know that this affordable plant is one that can act as a fence, hedge, and privacy wall all in one.  

The type of bamboo you need can depend on how you plan on creating a privacy wall in your property. As a form of fencing, you’d likely find that Alphonse Karr, Slender Weavers, and Stripestem Fernleaf are all perfect for the job. They clump together to block the view inside and out of your property.

For balcony privacy, Stripestem Fernleaf, Black, Blue, or Temple bamboo may be worth a closer look. These climbing and running varieties can provide both privacy and a barrier against neighbouring properties.

It can be expensive to establish but pays for itself ten times over with its low maintenance approach and effectiveness at creating a garden wall solution. Plant it in slightly acidic soil, feed it chicken manure or organic lawn food, and water it to keep the soil moist. Running bamboo prefers far less water than clumping bamboo.

Faux Hedges

Don’t have time to tend to plants or build your own privacy screen? You may like to consider a faux hedge. While it looks like you’ve spent hours trimming and creating a faux hedge, you haven’t. It’s a fake plant that allows you to install it anywhere that calls for privacy.

While you may pay a little more for the privilege, it can save you from the hassle of trying to nurse a new plant from scratch - waiting months for it to finally be that privacy solution you needed.

faux-hedge.jpg

Conclusion

The New Zealand population is growing at a rapid pace, which means that lifestyle dream with quarter-acre sections is becoming more out of reach by the day. While you may be stuck with a postage stamp section, that doesn’t mean it can’t be your sanctuary with full privacy and seclusion. Try out these garden wall solutions above and enjoy being able to block out the world. Ask Crewcut for a hedge trimming quote to get started today.

Contact Us for Garden Services
Guest User
Best Symbiotic Plants for Gardens

Symbiotic plants, or the process of symbiosis, is when two plants live closely together in harmony of one kind or another. There are four types of symbiosis - mutualism, parasitism, commensalism, and endosymbiosis/ectosymbiosis. 

The word ‘symbiosis’ comes from the Greek words for ‘with’ and ‘living’. They describe a relationship between two species or organisms that can often be beneficial for both parties. 

Commensalism is where one organism benefits from the relationship, but the other is neither benefiting or harmed by it. An example of commensalism would be a spider forming a web in a tree. It doesn’t hurt the tree, but it benefits the spider. 

Parasitism, on the other hand, is when one organism benefits at the expense of the other. An example of parasitism is an aphid feeding on the sap of a plant. The aphid benefits, but the plant is worse off. 

Better-together.jpg

In the plant world, the best symbiotic relationship is mutualism - where the close relationship benefits both. In the human world, a mutualism relationship would be between a human and a pet dog. The dog offers companionship and the human offers food. 

Finally, there’s ectosymbiosis/endosymbiosis where one species lives inside another. Lice on your skin would be an example of this form of symbiosis.

 Now that you understand what a symbiotic relationship is, you will see that choosing plants that can work hand in hand can enhance your gardening experience. While it’s beneficial if one can provide support for the other, it’s even better if they work together and benefit each other. Below, we uncover some of the more beneficial plants to include in your garden for symbiotic purposes. 

foxglove.jpg

Foxgloves

If you want your plants to grow up big and strong, with minimal risk of succumbing to disease, then foxgloves can be of assistance. Studies show that when you grow foxgloves, the surrounding plants are stronger and with a reduced risk of disease. 

marigolds.jpg

 Marigolds

Marigolds are beneficial for your garden in many ways. Not only do they add a beautiful hit of colour, but they help your other plants as well. Marigolds produce a scent that attracts hoverflies. 

Why would you want a plant that attracts insects? Hoverflies feed on greenfly, twitch grass, and plant lice, all of which attack your plants. What’s more, the roots of marigolds also keep eelworm away. If you grow tomatoes, roses, or tomatoes, plant Marigolds alongside them.

rosemary.jpg

Rosemary

Rosemary is a delicious herb that accompanies many meals nicely. It also works wonders in your vegetable garden. If you grow it with your sage, cabbage, and carrots, it will keep away cabbage moths, beetles and flies. It also makes broccoli thrive and enhances the flavours of your vegetables. However, it doesn’t share a nice bond with potatoes, so plant it well away from them. 

Nasturtium.jpg

 Orange Nasturtium

If you grow cabbage, lettuce, cucumber, tomatoes, or beans, then you may see the value in also planting orange nasturtium. This plant with orange petals attracts all those insects you don’t want near your vegetables. While plant lice and whitefly are feasting on your nasturtium, they’re leaving your delicious veggies alone! 

lavender.jpg

Lavender

There’s nothing more pleasant than wandering out into your garden and getting a beautiful aroma of lavender filling your nostrils. While the smell is one reason to plant lavender, there are many more. Lavender acts as a border against insects, repelling them away from your vulnerable plants.

tomatoes.jpg

Tomatoes

Even though tomatoes can be quite a tricky vegetable to grow in colder climes, it’s a faithful friend to many other vegetables. Basil, asparagus, celery, parsley, onion, and carrots all love being planted near tomatoes as it helps them to thrive. 

The best symbiotic plants for gardens are easier to come by than you think. There are many vegetables, flowers, and herbs out there that can have a mutually beneficial relationship. 


The next time you prepare your garden for the changing season, take a moment to plan your planting. Your plants could thrive better than they ever have before. What’s more, if you get stuck, there are plenty of gardening experts available to help.  

Contact Us for Garden Services
Guest User
Extreme weather and your trees

Here in New Zealand, we are quite lucky to have mild weather for most of the year. While we might get the occasional heavy rainfall, high winds, and a scattering of snow, we are far better off than several other countries in the world. Given that we are also a country that likes to get outdoors, tend to our gardens, and mow the lawns, that suits us quite nicely!

extreme-trees.jpg

However, that doesn’t mean that when we do get extreme weather, it doesn’t affect our possessions, homes, and yards. During high winds, in particular, the trees can be a mess waiting to happen.

Once autumn and winter hit, we must pay careful attention to the health of our trees. Given how long it takes to grow a tree from a sapling or seedling, they are not something you want to have to establish again from the beginning!

Tree care involves tree pruning, hedge trimming, and tree trimming, and failure to understand what this means for you as a tree owner could be the difference between a tree that thrives and one that merely survives (or doesn’t…).

Benefits of Trees

Before we get into the nitty-gritty details of tree pruning, tree trimming, and tree care, it’s a good idea to understand why we need trees, and why they are beneficial for your yard. Without knowing why, you may take to them with a chainsaw to say goodbye to them forever!  

Trees do many things for us socially, environmentally, and economically. Firstly and most importantly, they clean the air, reduce the smog, and give us nice and clean air to breathe.  

Regarding social benefits, trees play a vital role as well. They are responsible for reducing stress, promote increased physical activity in parks, and even help to reduce crimes. Recent studies have also shown that vegetation in urban areas can relax your brainwaves, lower your blood pressure, and improve your quality of life.

Environmentally, however, trees are in their element. One single tree can produce the same amount of cold air as ten residential air conditioning units. Homes with trees as windbreakers can even benefit from reduced heating costs of up to 15 percent.

Finally, homes with well-established trees sell for up to 15 percent more than those without, while tree-lined streets may increase the homes’ values by as much as 25 percent.

Diseased branches can burden or eventually kill a tree.

Diseased branches can burden or eventually kill a tree.

How to Trim Your Trees

It’s clear to see that trees are worth keeping around, but taking care of tree care such as tree trimming and tree pruning is still something that not everyone knows how to do – even with trees galore in their backyard. Below, we cover how to tackle tree trimming and tree pruning by yourself. Not enough time or experience? Then call in the experts.

1. Identify the vital branches – the tree’s skeleton

You want to avoid cutting these branches off as they keep the tree’s form.

2. Identify damaged or broken branches

Remove any damaged or broken branches. By doing so, you are enabling the rest of the tree to benefit from the nutrients that would have gone to the broken or damaged portion

3. Thinning

During tree trimming, one of the most important things to do is make sure the trees can get as much light and air as possible. To do so, you need to thin out areas with thick branches that cross over each other. Dense parts of your trees can harbour fungus and unwanted insects. Thin these spots out and give them room to breathe and grow.

4. Taking Care of Obstructions

Trees, while lovely and beneficial, can also be a hazard. Low branches can block walkways, while high ones can damage your roof, power pole wires, and parts of your home’s exterior. If you don’t feel confident getting up high to trim, call in tree pruning experts who have the best equipment to take care of the job for you.

5. Don’t be Trim-Happy

When you get into the rhythm of tree trimming and tree care, it’s all too easy to get a little chop-happy, giving your trees more of a haircut than they need. Every cut you make can be compromising your tree’s ability to care for itself. Aim to remove less than a quarter of your tree’s branches.

tree-road.jpg


How to Take Care of Your Trees During High Winds?

Examine-your-tree.jpg

In many storm-related insurance claims in New Zealand, trees are to blame. While they do much good in our lives, they are also responsible for damaged roofing, fences, vehicles, and homes. That’s why it’s important to be proactive with your tree care. Failure to get on top of tree trimming and pruning can be the difference between a hefty bill and getting through a storm unscathed. Below, we have a few helpful tips you may find useful.

1. Check Your Tree’s Health

On a regular basis, take a look at your trees. Do they look healthy and robust? Are they straight and not leaning precariously toward someone’s home or property? If you don’t think your tree is strong enough to withstand adverse weather, take action before that bad weather arrives. Consider tree trimming, pruning, or removal if necessary.

2. Know the Rules and Regulations

Many people want to take care of their trees during lousy weather for the sake of the trees themselves, but it’s also crucial for other people as well. All councils have rules and regulations. You may be liable if your tree, for example, falls on a power line.

3. Natural Shelter

If you are planting your seedling or sapling, consider its growth. You may like to plant it somewhere sheltered from the wind, such as behind a house, garage, or shelter belt.

4. Keep up with Maintenance

Trees need a helping hand from time to time, especially if natural critters are trying to take up residence. Take the time to give your trees fertilizer alongside taking care of trimming and pruning. Insects can also weaken your tree, so invest in tree-friendly insecticides if you are concerned.

We have some beautiful trees here in New Zealand, and the more we have, the better it is for our environment. If you want to take care of your trees properly, speak to a Crewcut professional about how you can manage your trees during the wild weather.


tree-help.jpg
Contact Us for Garden Services
 
Guest User
Your responsibility with trees

Did you know that many of the insurance claims relating to storm damage in New Zealand involve trees? It can be easy to blame the trees for falling over onto homes, roofing, fencing, and cars, but could the owners of those trees also be responsible?  

Believe it or not, when you decide to plant a tree, you are signing up for a whole host of responsibilities. It’s almost like becoming a tree parent. You have to research what you can grow, how tall you can grow it, how to take care of tree trimming, and what your local council has to say about it as well. Then, if you want to cut it down, you may find you can’t, or you have to do it in a particular way or talk to the neighbours. It’s clear to see that to own trees you have to do your homework.                                                                                                             

Fortunately, we’re here to help. Below, we outline some of the more frequent problems homeowners face with trees, and what their responsibilities are with them. From tree pruning and trimming through to council regulations and “check before you chop” rules, there is a lot to learn, so get reading!

Tree-responsibility.jpg
check-before-you-chop.jpg

 Check Before You Chop

The Auckland Council created a public message known as Check Before You Chop. Essentially, it made homeowners abide by a set of rules relating to the chopping down of trees – and even tree pruning. You would need to ring the council hotline if you were unsure of your duty to the trees.

The Auckland Council didn’t put such rules in place to be difficult. Instead, they were making sure that trees that needed protection were protected.

These include:

  • Heritage or notable trees identified in District Plans

  • Trees in areas requiring an additional level of protection, such as cliff line tree amenity areas.

  • Trees under the protection of a covenant or consent notice

  • Trees outside urban environments

  • Trees in planning zones

If you plan on doing any chopping, tree pruning, tree trimming, or altering of any kind on your property, it may pay to check with your local council.

What About Tree Trimming, Chopping, or Pruning on a Neighbouring Property?

Trees make our air breathable, they conserve water, support slopes, protect properties from erosion, and absorb pollution. It’s clear to see they serve more of a purpose than adding shade for picnics during a hot summer’s day. However, there are also going to be occasions where they are more of a hindrance than a help. 

If you have a tree with branches or roots that cross your boundary into your neighbour’s property, then they have a right to cut and alter the tree. However, they fall under the same obligation of consulting council to see if it’s okay to do so.

If your tree is diminishing their property, endangering their property or their life, then they can not only ask you to remove it but can get a court order to undertake tree trimming or ask for its removal altogether. If you have a tree that sits directly on the boundary, both you and your neighbour own the tree. You both must take care of maintenance and any problems relating to the tree’s existence.

I Have a Problem with My Tree (And My Neighbour)

If you’re not on sugar borrowing terms with your neighbour all thanks to a tree, then it’s time to get the process for discussion underway. Firstly, talk to your neighbour about the problem tree. Be aware that trees can be a precious subject for some, make sure you discuss matters calmly and considerately to ensure you don’t endanger a relationship. If discussions come to nothing, then it’s time to talk to your council. Find out if the tree is protected under any of the “Check Before You Chop” regulations. If it’s not, then either you (or them, depending on who has a problem with the tree), can apply for a court order for tree pruning or its removal.

neighbour-problems.jpg

How to Take Care of Tree Pruning?

If you don’t have time, patience, or the inclination for tree care, then you will be pleased to know there are plenty of tree trimming experts who can help. However, if you’re dead-set on taking care of business on your own, here are a few useful tree trimming tips that might help.

1. Carefully Examine Your Tree

It might seem silly, but you need to look at your tree objectively. Identify the structural branches that form the tree’s skeleton. The last thing you want to do during a “quick” tree pruning exercise is remove one of its vital ‘organs’.  

2. Remove Damage

Tree damage can occur for many reasons – such as poor weather or wildlife. Take care of the damaged, dead, dying, or diseased branches first. You will be surprised at how good your trees look once they only have healthy branches left.

3. Thin it Out

If your tree is getting a bit out of control, you may have to get heavy-handed with tree trimming. Identify dense areas with branches that interlock. They may be identifiable by fungus and insects. Clear this area to allow light and air through. If you’re unsure about doing this, consider hiring a professional and get a tree trimming quote.

careful-trimming.jpg

4. Remove Dangers

If you are taking care of tree trimming because your tree is becoming a danger, then make sure you remove all those hazards immediately. Low lying branches that could impinge on walkways are a must-fix, while any high branches that reach into your neighbour’s property or onto roofs, power lines, etc., are also in the firing line for removal. You may like expert help for this part also.

5. Not Too Much

Don’t get too excited with your loppers – you may do more harm than good. Cut no more than a quarter of your tree’s branches off if you can avoid it.

 If you are having problems with your trees growing out of control, then it might be time to get professional help. Talk to the council and then speak to a Crewcut professional about tree trimming prices and how you can manage your trees now and into the future.

Contact Us for Garden Services
Guest User
Economic and eco-friendly garden waste disposal

The ideal way to manage green waste by-product is to reinvest it in your garden, or in the case of wood matter, into your fireplace to keep you warm this winter. We’ve got some helpful tips below, but if home waste disposal isn’t an option then keep reading for the cheapest and most accessible green waste recycling centres in your area.

home-compost.jpg

Consider these methods of repurposing garden waste and distributing it in your own garden or among neighbours and friends:  

  • Leave your grass clippings on the lawn after mowing, returning vital nutrients to the soil. This can be achieved with a mulch mower - something that Crewcut operators can help with.

  • Put your grass clippings into the compost bin.

  • Rake dead leaves into the soil under trees, where they’ll decompose quickly.

  • After heavy pruning, select big branches for firewood and smaller branches for strong, sturdy stakes that will be suitable for beans, bulbs and next year’s tomatoes.

  • You can put hedge trimmings in the compost. “They’re not as good as grass, but if the hedge is cut often then the clippings will be okay for compost,” says Crewcut hedge expert Larry.

  • If you have a tree cut down, either chainsaw the trunk and branches into firewood-sized pieces yourself or ask the arborist to do it for you. No fireplace? You’ll find friends and relatives more than willing to come and take it off your hands. Keep the sawdust and chips as mulch for your own garden.

If you live in Kerikeri, Rotorua, Hawkes Bay, Wanganui, Manawatu, Wellington, Timaru or Otago then you’re in luck, because the Crewcut garden bag service is available in your area and one of our franchisees will personally collect and dispose of your green waste.

Elsewhere, councils are around New Zealand are working hard to reduce the amount of organic waste going into the landfill and providing or contracting out garden waste services.

bulldozer-operator.jpg

Northland

Far North District Council charges $22 for 1m3 of green waste. For a list of all transfer stations and hours, see here

Whangarei District Council has six transfer stations, charging from $1.60 for a 65L bag of garden waste, $12 for a car boot to $22.50 for a trailer-load. Locations and opening hours here. Dargaville transfer station charges $25 per m3 of green waste.

 Auckland

Auckland City Council has Community Recycling centres in Devonport, Helensville, Henderson, Waiuku that accept green waste:

  • $6 - $8 per 50L bag of garden waste.

  • $26 per 1m3

  • Car - $27.50 per load.

  • 4WD, wagon - $38 per load.

  • Ute or trailer up to 2m3 - $52 per load.

truck-driver.jpg

What’s more, all centres upcycle and resell household goods, with profits going to community projects. Check the link above for locations and opening hours.

green-waste.jpg

Waikato

In the Waikato? Take your garden waste to Hamilton Organic and pay $9 for .5m3 and from $20 for 1m3. The Frankton operation says it is Hamilton’s only purpose-built composting facility. “We take your grass clippings, hedge trimmings, leaves and other garden waste and turn it into high-quality organic gardening products.”


Canterbury

If you live in Christchurch and you’ve got more green waste than will ft in the weekly organic bin collection, the Christchurch City Council provides EcoDrop centres in the north, south and west of the city and on Banks Peninsula. Green waste fees are $9.80 per car/4WD or $106.50 per tonne.


Contact Us for Garden Services
Guest User
11 Tips for an Effortless Garden

Do you wish you could turn your lawn into a low-maintenance haven where you hardly need to mow it?

How about a garden where you don’t have to fight against weeds?

It’s possible to get an effortless garden with different types of plants and gravel. In this article, you’ll receive 11 tips to transform your garden from a lot of work to a low-maintenance backyard.

Unless you want to pave over your lawn—and maybe you do—it’s unrealistic to expect not to do anything with it. Instead of converting your lawn into a parking lot, you can install ground covers to replace your lawn grass. Ground covers are verdant, slow growing and hardly need any maintenance.

Some ground covers also have small blossoms or oils that when stepped on release a heady fragrance.

Here are 11 Exchange options for durable ground covers that don’t require mowing!

ground-cover-lawns.jpg
2. Mercury Bay weed

2. Mercury Bay weed

1. Selliera Microphylla: A native of New Zealand, selliera microphylla is a no-mow ground cover. It looks like lawn grass, but on closer inspection, it’s a succulent. Selliera microphylla needs to be continuously damp and planted in semi-shade. It’s also known as mountain selliera.

2. Mercury Bay Weed: Another native creeper, mercury bay weed (Dichondra repens) does well in some lawns. You can plant with seed or root cuttings. It’s prone to powdery mildew in the summer when humidity levels are high. You may be lucky enough to have it growing naturally in your garden.

3. Dichondra brevifiola Buchanan: This groundcover is easy to grow from seed or root pieces. It fares better than mercury bay weed as a lawn cover. It tolerates poorly drained, but fertile soil, and it grows in full sun.

4. Fragrant Thyme: In New Zealand, you have many choices of thyme to choose from as a ground cover for your lawn. White thyme, for instance, is a great creeper. It stays low to the ground, doesn’t require a lot of mowing and gives you fragrant white blossoms that leave off their oils when mowed or stepped on.

5. Corsican Mint: An excellent ground cover, Corsican mint has tiny leaves. It grows well as a lawn substitute. It likes well-drained soils and sunshine. And when you mow it or walk over it, you’re treated to a minty scent.

6. Native Pratia Angulata: This ground cover will grow to 10cm x 2m. It’s also called lobelia angulate. It’s a pretty ground cover that produces white flowers in spring and red berries in the fall.

5. Corsican Mint

5. Corsican Mint

Get creative with Stone or Gravel

Get creative with Stone or Gravel

7. Blechnun Penna-Marina: This fern is a native of New Zealand. Another low-growing, easy-to-take care of plant provides dense leaves and spreads throughout your lawn via the plant’s rhizomes.

8. Gravel Garden: A gravel garden is another alternative to a typical Kiwi garden. Instead of lawn grass, your lawn has a thick layer of gravel added to it. Gravel does a great job of keeping weeds out of your garden. Better yet, you won’t need to mow it. Drought-friendly plants are planted in the gravel. They need some extra tender loving care for the first two years. In the third year, you can leave them alone, and they’ll survive.

9. Artificial Turf: Astroturf, fake grass, call it what you will. It’s the ultimate in a no-mow lawn. You replace your turfgrass with fake grass. When the sun beats down on artificial turf, it does get pretty hot to the feet. But the only maintenance needed includes hosing off pet waste and using a leaf blower to remove debris. No weed control and no fertilizing needed.

10. Perennials: Spruce up your flowerbeds with perennials. You get more return on investment than annuals because perennials come back every year. Plus, you cut down on garden maintenance by planting native perennial flowers. Native perennials are even better because they can survive drought conditions, and other weather stresses better than non-natives.

Artificial grass can grow on you.

Artificial grass can grow on you.

11. Stone Mulch: Skip natural mulch for stone mulch. Gravel mulch keeps weeds from popping up, provides a low-maintenance alternative and gives colour to your backyard landscape. Plus, stone doesn’t break down or need to be replaced twice a year.


Indeed, you’re not required to have a typical grass lawn in your garden. Instead, exchange your lawn grass into one of the 11 options above to give you more time to dedicate to your weekend.

If you still want to keep your lawn grass, you can skip the mow. Instead, call your local Crewcut to provide you with a lawn care service. Call us today at 0800 800 286 or fill out our contact form.

At Crewcut, we service the following New Zealand regions: Auckland, Bay of Islands, Christchurch, Dargaville, Franklin, Hawkes Bay, Hokianga, Hutt Valley, Kapiti, Manawatu, Nelson, New Plymouth, Otago, Rodney, Rotorua, Taupo, Tauranga, Timaru, Waikato, Wanganui and Wellington.


Contact Us for Garden Services
Guest User
What Plants to Plant in Autumn?

As temperatures plummet and the nights draw in quicker than they did over December and January, it can only mean one thing. Autumn is here. It will just be a matter of time before daylight saving kicks in and trees say goodbye to their vibrant green leaves for stunning shades of gold, red, and yellow.

However, for the avid gardener, Autumn has so much more meaning. It’s the time for harvesting crops and preparing for a new season’s growth on the back of it. If you need a helping hand knowing what plants to plant this Autumn, or you’re not sure what the next step is, then read on. The experienced and knowledgeable Crewcut team is here to help.

autumn-trees.jpg

Harvesting Time 

Take a look out into your garden and check out the fruits of your labour. Are they ready for picking? If you have been growing pumpkin or squash, rhubarb, rocket, silverbeet, beans, courgettes, cucumbers, or lettuce, then it’s time to harvest. All of these delicious produce should now be ready to consume. Harvesting time also provides an opportunity for pickling, making sauces, jams, and marinades to share with family and friends.


What Plants to Plant in Autumn? 

Now that you’ve harvested all your produce and had a garden tidy up, it’s time to consider what you are going to plant for the next growing season. Will you stick with vegetables, plants, or flowers? Or, will you opt for a mixture of all three? Below, we’ve included some of the most popular things to plant once the cold weather hits. 

Broccoli.jpg

Broccoli

Broccoli is one of the easiest vegetables to grow, while also being one of the most nutritious. Start the growing process in seed trays before planting them in your vegetable patch within 1-1.5 months. 

beans.jpg

Beans 

You can sow bean seeds directly into the ground now, but ensure you use stakes to help them grow upward as they start to sprout. 

pansies.jpg

Pansies

If you want to add a splash of color to your garden over Autumn, then consider planting pansies. You can start the growth process in Autumn and enjoy them through winter, spring, and summer. You can plant them in hanging baskets, window pots or boxes, or even garden borders. They grow beautifully in well-draining soil with potting mix. This heat-tolerant plant is stunning and easy-care. 

lettuce.jpg

Lettuce

Lettuce forms the foundation for any sandwich or salad, which is why it’s a must-have in any autumn garden you’re getting ready. You can sow lettuce seeds directly into the ground, but ensure you cover them with a drink bottle cut in half to protect them from hungry birds.

sweetpea.jpg

Sweet Peas

Sweet peas are a beautifully fragrant flower that you sow in autumn for flowering in spring. Make a tentfrom bamboo stakes and plant the seed directly into the ground. Once they grow, they cling onto the tent. 

Brussel-sprout.jpg

Brussel Sprouts

While they’re not everyone’s favourite childhood vegetable, brussel sprouts can be quite a worthy ingredient. They are also exceptionally easy to grow and work beautifully with other seasonal vegetables lightly sautéed in a pan. Start the growth process in a seed tray before planting out in four or six weeks. You may also like to add lime or nitrogen when they are halfway through their growing process. 

carrots.jpg

Carrots

If you’re a novice gardener, then carrots are going to be one of the most lucrative plants to grow. It can take a disaster of mammoth proportions to see your carrots fail to thrive. Plant them in well-draining soil and water them daily until they start to grow. Before long, you’ll have fresh baby carrots for a range of delicious menu items.


Autumn Planting Maintenance

Autumn can be quite a busy time for the average gardener. If you’re not perusing the rows of seed options at your local vegetable store, you’re trying to get your garden beds ready for a new crop of plants. If you’re feeling a little frazzled, and don’t know what to do next, then stick to this list. It can see you on your way to a prosperous autumnal planting season. 


  1. Dry your seeds in preparation for spring sowing. If you save and store your bean, melon, and tomato seeds, you don’t have to buy more when it comes time to plant them. 

  2. Add a new layer of compost to your garden to replenish the soil.

  3. Thin your carrots to reduce the risk of uneven root development.

  4. Don’t be afraid to grow lettuces in cold weather. Protect them, and they will be fine.

  5. Cut long and leafy stems from your tomato plants to promote fruit growth on the lower stems.

  6. Feed your established plants with nutrient-rich plant tonic to promote healthy growth. 

  7. Use a mildew spray from your local garden store to prevent mildew from affecting your courgettes, cucumbers, and marrows. 

It has been hard to say goodbye to the blue skies, festive fun, and games of backyard cricket that summer brought us. Autumn is here, and it’s now time to embrace the season by planting beautiful vegetables and flowers to carry us through a new season of growth. 

new-plant.jpg
Contact Us for Garden Services
Guest User
Should I get my tree trimmed or cut down?
what-to-trim.jpg

Because trees take such a long time to grow, deciding whether to cut one down or trim it can be a tough call. There could be advantages and disadvantages for both situations, but what if you don’t make the right decision? You may have cut down a tree for no reason.

Before you go ahead with tree cutting or tree pruning, think of the following points. They may help you to make a decision quickly!

pruning-branches.jpg

Why Undertake Tree Pruning?

There are many reasons why you would decide to prune your tree, and knowing how tree pruning can solve problems may stop you from hiring tree cutting services. There are three main reasons for pruning: tree health, aesthetics, and safety. You may like to trim branches if they look terrible or you want to benefit from better fruit yields.

You may also like to prune your trees if the branches are damaged, cracked, or don’t look safe. In this case, you have to ascertain whether the damage is severe enough to consider tree cutting as opposed to only tree pruning.

Finally, tree pruning is beneficial for the health of your tree. It encourages growth, removes dead and dying branches, and can end up being the more suitable option – instead of having to call someone to come cut it down!


When Should You Undertake Tree Pruning?

If you have decided that tree pruning is far better than having to cut your tree down, then you will want to know when the best time of year is. However, that can depend on the type of tree you have.

Winter tends to be an excellent time to trim trees as they are dormant and don’t have new growth. In summer, pruning can slow down unwanted growth, while helping you to identify problem branches as well. Autumn tends to be less suitable as trees heal slowly and can succumb to air-borne fungi. If you decide to prune in spring, wait until the flowers begin to lose color or structure.


Why Insist on Tree Cutting?

Knowing how much good you can achieve by pruning your trees, why should you still go ahead with tree cutting? There are many reasons why tree cutting is a better option than getting out the secateurs and giving your tree a haircut.

1. Disease

Trees can succumb to all types of illnesses – some that you can’t fix through tree pruning and removing diseased branches. A sick tree is a dangerous tree, as it’s not as strong as a healthy one and can spread its disease to other trees as well. The best thing you can do is chop it down. Ask for expert help on how to achieve this safely.

2. Danger

Trees don’t always grow how you want them to. Some end up on precarious angles which can be dangerous in the wind, while others end up too close to your personal property, power lines, or neighbouring properties. If tree pruning cannot rectify the problem and remove the hazard, removing the tree is the best option.

Left untended, tree branches can cause damage to people, property or power lines.

Left untended, tree branches can cause damage to people, property or power lines.

3. It’s Not Thriving

If you plant several trees and they grow up together, you may find that they are fighting for their share of nutrients, sun, and water. Unfortunately, there is going to be a loser in this situation. You can remove a healthy tree to let the smallest one access what it needs, or you can remove the one that’s not thriving.

4. Shade

While trees can add so much beauty to your backyard, they can also create just a little bit too much shade. Shade can cause mould and dampness, and can even create the right conditions moss to grow and spread as well. If you have other trees in your yard that are less of a problem, you may wish to chop the troublesome one down and focus on the others.

5. Wood

Trees have many benefits. They offset our carbon footprint, improve our mental wellbeing, and brighten up any public park as well. However, they also provide us with wood for building and burning. If you want to stock up on winter firewood or you need supplies for woodwork, then you would go down the tree cutting route instead of tree pruning – as it’s serving a purpose.

tree-safety.jpg

Safety

Whether you decide to cut down your tree or only prune it, make sure you are up to the task. Even tree pruning can be labour-intensive, so you may find that calling in the tree experts may be the best option. The same rule applies to tree cutting. If you don’t own the correct safety gear or a chainsaw, you may find that hiring someone with the right tools and experience can make for a successful tree cutting exercise.

Knowing whether to trim or cut your tree down can be a personal choice. Believe it or not, in some cases it can also be an emotional one. Weigh up the pros and cons and find out whether pruning can solve your problems or whether tree cutting is the best and final solution.  

Contact Us for Garden Services
Guest User
How to prune fruit trees

In New Zealand’s warmer climes, fruit trees are a Kiwi backyard staple. From lemons and grapefruit, through to apple and feijoa, there is certainly no shortage of options to fill the fruit bowl. However, not every homeowner knows how to make sure their tree produces the best fruit – which is paramount if you’re an average Kiwi kid trying to sell homemade lemonade outside your house.


If you only planted fruit trees to see what would happen, or you inherited them from a previous homeowner, then you may not have inherited the knowledge that goes with them. No matter how you came to be in possession of a fruit tree, however, it’s a good idea to find out how to treat it right. Below, you will find all the information you require on pruning fruit trees and general fruit tree care.


Why You Need to Carry Out Tree Pruning on Fruit Trees

Even if you’re not much of a gardener, it’s important to know the basics of tree trimming or have contact information for someone who does. Otherwise, you may not bear the best fruit – or have the best-looking fruit trees either.


Pruning trees is essential for many reasons. Firstly, it makes the time for harvesting that much easier. If you let your fruit trees grow large and unwieldy, then how can you possibly hope to collect the fruit from them? Reducing the size of your tree every year, while keeping it in healthy growth, helps to make harvesting the literal fruits of your labour that much less labour-intensive.


However, tree trimming can also have some surprising side effects for the health of your fruit trees. When you undertake tree pruning, you are encouraging new stems to grow, which help to create a bountiful harvest. You are also enabling better airflow and light to promote ripening. As a rule of thumb, there should be a gap through the center of the tree large enough for a small bird to fly through.


Finally, tree pruning is beneficial for achieving the desired shape in your yard, as well as removing any branches that are dead, dying, damaged, or diseased.


When Do Fruit Trees Not Require Tree Trimming?

Believe it or not, there are now new fruit tree varieties available that require no pruning. These include dwarf cultivars such as nectarine, peach, apple, and apricot trees. Ask a gardening expert whether your fruit trees need tree pruning or if they are of the prune-free variety.


When to Begin Tree Pruning of Fruit Trees

If you are new to fruit tree ownership, or you are beginning to take an interest in the ones you have, then you may wonder when a good time is to undertake tree pruning. The best time for pruning trees can depend on the type of fruit they bear.


Apple and pear trees require annual tree trimming every winter to help prepare for an even better crop than the year before. Kiwifruit trees, however, need pruning in winter back to five buds. You then have to tie long branches back so you can train them to follow a particular shape. You will also need to do the same for cherry trees.


With feijoa and citrus trees, you can start tree trimming right after harvesting. Wait until frosts pass and you may also get away with biennial pruning.  If you are lucky enough to have a thriving nectarine, peach, or plum tree, then ensure you undertake tree pruning in summer. If you choose to prune in winter, you may end up spreading disease which ruins crops.


How to Get Started with Pruning Your Fruit Trees

While you can begin tree pruning yourself, there are also plenty of expert gardeners who can help with tree trimming and all manner of tasks. If you lack the time, tools, or confidence to trim your fruit trees yourself, then make a call to avoid your fruit trees getting neglected. Alternatively, in a few steps, you can be on your way to confident tree pruning on your own.


1. Choose the best day

The best day for tree trimming is a dry day with no wind. Wait until the grounds are dry and there is no hint of rain in the air. By doing so, you can limit the spread of any diseases or fungal spores which could ruin your crops.


2. Prune properly

The best way to prune your fruit trees is by using a pair of sharp secateurs. These can help you achieve a clean, angled cut above the buds. Don’t prune to excess.


3. Clean up

While garden tidy-ups are something you can hire someone else to take care of, you can also do it yourself. Remove all the clippings and dispose of all the mess you made. You may also like to clean your secateurs after use and before storage.


4. Set them up for winter

Fruit trees are prone to winter diseases, so after you finish with tree trimming, you may like to set them up to survive. If you have any deciduous fruit trees, spray them with a copper-based concoction to prevent winter disease.


Whether you’ve had fruit trees for a long time or you’re new to gardening altogether, you will enjoy your new-found hobby. However, not everyone has the time for tree trimming and taking care of fruit trees. Need extra help with your fruit tree? Get in contact with a Crewcut specialist!

Contact Us for Garden Services
Guest User
Planting trees for climate change

You may wonder what climate change and global warming have to do with tree care and planting trees, but you will be surprised at the connection. However, firstly, it’s important to understand what climate change is and what it means to you.


What is Climate Change?

Climate change relates to climate patterns, natural processes that are a part of our earth’s history. They became more apparent around the late 20th century, and are thought to be caused by the sun’s energy, earth surface changes, the greenhouse effect, and atmospheric carbon dioxide linked to the use of fossil fuels.


What is The Greenhouse Effect?

The greenhouse effect is a process that warms up the surface of the earth. It’s both natural, through the likes of volcanic eruptions, and caused by humanity. Earth is only warm enough for us to inhabit it because of the greenhouse gases, equating to a temperature of around 15 degrees. However, because humans are creating more greenhouses gases, they are warming up the earth. So far, humanity has increased the earth’s temperature by around 35 per cent.


What Can Tree Care and Planting Trees do for Climate Change?

It can still be confusing to understand how planting trees and partaking in tree care can make a difference to climate change, but trees play a pivotal role. One of the major gases responsible for much of global warming is carbon dioxide, produced by humans burning coal and oil and other fossil fuels. It’s also natural, but not at the same high levels.


By planting trees, you can offset the greenhouse gasses you are putting into the environment. Trees absorb carbon dioxide, storing it within themselves. The more trees we plant and grow, the more we can benefit from fewer emissions and more forested land.


How New Zealanders Can Do Their Part

You might think that you, one lone Kiwi, can’t do a lot to help climate change or our country. However, there is plenty you can do. You can gift native trees to loved ones for birthdays and other special events, start tree registries for special events and become involved in your community meetings with a focus on planting more trees.


You can also fund trees if you have the opportunity and ability to donate to a good cause, and ask councils to plant trees for the benefit of waterways, erosion reduction, and biodiversity. You might think that one person can’t do much, but planting trees and tree care is something that everyone can do.


However, beyond tree care and tree planting, there are also other things you can do. You can reduce energy consumption in your home or business, opt for alternative sources of power such as solar, and travel smarter by walking or biking instead of driving your car. New Zealand wants to reduce its greenhouse gas emissions by 30 percent below its 2005 level, but we need your help to do it.


Where Does New Zealand Stand with Climate Change?

Being isolated from the rest of the world in little ol’ New Zealand can make many people feel like significant world events don’t impact them. When it comes to climate change and global warming, however, they do. We are blessed here in New Zealand to be able to produce 80 percent of our energy through renewable sources, but we also have a much higher portion of production in the food industry which emits a significant amount of greenhouse gases. It takes ten times more energy to produce one kilogram of meat than it does to produce one kilogram of grains.


How to Plant a Native Tree

If you want to do your part for New Zealand, climate change, and the world, then you can start by planting a native tree. However, as not everyone is born with green fingers, it’s a process that might take some figuring out. You can ask for expert assistance, or you can talk to your local garden store worker when you buy a beautiful native tree.


1. Time of year

The best time of year for tree planting is between April and May or August to September. If you plant in a drier time of year, you will spend much of your time watering them to keep them alive.


2. Get the site ready

Prepare the site by watering it and keeping the plant cool. Dig a wide hole with room for the tree’s roots to grow.


3. Plant the tree

Remove the tree from its bag and place it in the hole. Cover the roots with a thin layer of soil, compacting it down on each layer. Plant it up to the same area as it came in the garden bag. Make the top layer loose soil and water it.


4. Tree care

Now the fun begins! Create a mulch out of old newspapers, cardboard, and carpet, covering it with wet bark chips and straw or compost. Doing so helps to keep moisture in the ground while protecting the tree’s roots and stopping the growth of weeds. If you manage to retain moisture well, you will only need to water once per week in hot conditions, or less with correct mulch layers. Shade and cover the ground until the trees are well established – at around two or three years old.


Climate change is all of our problem, and the more we can do to fix it, the better off the planet will be. Take the time to find out more about climate change today, or get involved in planting trees and tree care. You will be glad you did.

Contact Us for Garden Services
Guest User
Start Spring on the right foot with daffodils
 
daffodil-spring-garden.jpg

With daffodils beginning to pop up everywhere, it’s clear to see that can only mean one thing: spring is on its way. There is nothing that brings more joy and hope than the sight of yellow and white flowers scattered throughout gardens and fields and the knowledge that the cold and dismal weather of winter is now behind us.

What’s more, daffodils also signify new lambs being born, and the Cancer Society’s biggest fundraiser: Daffodil Day. This year, Daffodil Day falls on August 31, which means volunteers will be out in their droves, offering daffodils in exchange for donations. Click here if you want to be a part of Daffodil Day, or support the noble cause.


What Does the Daffodil Mean?

Daffodils, while beautiful, also have many meanings. They are typically the first flower to bloom as winter turns to spring, and they are also the symbol of rebirth, new beginnings, awareness, memory, forgiveness, and vitality.

For the Cancer Society, however, the daffodil is used for Daffodil Day to signify and symbolise hope for a cure. Cancer claims the lives of thousands of people in New Zealand every year, but with research – for which funding is necessary – there is hope for a cure, prevention, and education.


How to Grow Daffodils

If nothing would bring you more pleasure than opening your curtains in the morning to see striking white and yellow fresh blooms in your garden, then it might be time to learn how to grow daffodils. Daffodil care is easier than you think, but if you need help, there is always an expert on hand to lend their advice.


What You Will Need:

  • Gardening gloves

  • Soil or potting mix

  • Pots and planters

  • Mulch or compost

  • Fertiliser

  • Daffodil bulbs


Step one: Choose the variety

Contrary to popular belief, daffodil types differ depending on your area. That’s why when you see people out collecting money for Daffodil Day, you find that some are yellow with orange centres, or white with yellow centres. Talk to a garden store attendant about the best variety to suit your region.


Step two: The Pre-planting Stage

If you’re not an avid gardener, never fear. The pre-planting stage of daffodils is easy. However, if you don’t feel confident completing this task yourself, contact daffodil care experts who can help. Pre-planting your daffodils involves waiting until Autumn, around daylight saving. When the soil is cold enough, you can plant your bulbs so that they will lie dormant over the colder months.

Make sure the bulbs are decent in size for a better chance of a successful bloom. Learning how to grow daffodils properly can often take more than one planting season to get the hang of it.

When you’re looking for a site in which to plant your bulbs, pay attention to the positioning. Make sure it’s an area that gets plenty of sunlight but also has free-draining soil. Some varieties like a bit of shade, so pay attention to what the packaging of your bulbs state.


Read more → Save mega bucks and grow your own avocados


daffodils-pot.jpg

How to Grow Daffodils in a Pot

If you don’t have a lot of space to spare in your garden, or you prefer to plant your flowers in pots, then it’s also possible to learn how to grow daffodils in containers as well. However, you will need to opt for bulbs that grow shorter with smaller flowers.

Find a large pot or container with excellent drainage holes and fill it with soil or potting mix with fertiliser. The slow-releasing variety is the best.

Plant the bulbs evenly in the pot but ensure that none of them touch each other or even the edges of the container. Give them plenty of water and shade until you see shoots beginning to form. Once they start to grow, you can move the pot into the sunlight.

Then, when you begin to see foliage, you can apply liquid fertiliser to help with flowering. Before long, you will have a pot filled with beautiful daffodils – just in time for spring and Daffodil Day.


How to Reuse Daffodil Bulbs

Rather than buy new bulbs every year, did you know you can reuse the ones you already bought? Below is a step-by-step guide for daffodil bulb care.

  1. Once your bulbs have finished flowering, fertilise them with bulb food.

  2. Tie the bulb’s foliage around itself and secure it in a rubber band.

  3. When the leaves encompassing it have died off, remove the bulbs from the soil.

  4. Remove the foliage once it has completely dried out and starts to come away naturally

  5. Store your bulbs in a mesh bag in a dry, cool place until the next planting season


A Passion for Daffodils

Seeing volunteers selling vibrant posies of daffodils for Daffodil Day can bring a smile to anyone’s face. However, if you find yourself passionate about this stunning flower for more than one day a year, then why not make it a real hobby?

In New Zealand, the New Zealand Daffodil Society provides a host of information for daffodil care, how to grow daffodils, and how to join a Daffodil Club.

If you become part of a club along with others passionate about the flower, you can attend daffodil shows, see various displays, learn where to buy the best bulbs, and even how to grow specialist daffodils from high-quality bulbs. You can also learn more about upcoming events.


What started out as an indicator that better weather was on the horizon has now turned into a symbol for hope and a chance to make money for cancer research and resources with The Cancer Society. If you want to grow daffodils for yourself and you’re not sure how, you will find this information above can go a long way toward helping you realise a new passion. You never know, it could be the very thing you need to uncover a hidden garden talent. 


Related Articles

Contact Us for Garden Services
ADMIN
Teach your children these enviro friendly garden hacks
Small child and parent growing sapling from ground

The world is becoming more and more like a concrete jungle by the minute. Luscious lawns are turned into residential high-rise buildings, while even forests are being cut down to provide the resources to make it happen. Therefore, it can be hard for your children to learn how to be environmentally friendly, especially in a world that hasn’t quite welcomed the concept with open arms yet.


If you want your children to appreciate nature and all its beauty, while encouraging them to do their part to hold onto it, then teach them these gardening hacks. You may find their interest in the environment blossoms before your very eyes.


Use Organic Products

If you want your children to be environmentally friendly, then you need to practice what you preach. Rather than douse your garden in the most toxic chemicals on the market to rid them of insects, always hunt for organic alternatives. You can buy pre-made natural products designed to stop bugs in their tracks, or you can sit down with your children and create your own bug deterrents.

Tip: Insects hate coffee grounds, so consider stocking up on these!


Wooden bird house against a tree

Build a Birdhouse

Teaching your children to be environmentally friendly doesn’t have to be a classroom lesson. They are sure to get plenty of these at school. Instead, you can make it a fun experience. Building a birdhouse is not only a way in which to spend time with your children outside, but it educates them on the importance of birds.


We need birds for controlling pests and pollinating flowers, but also for weed control and help with the gardening too. Birds love to eat the seeds of weeds on your lawn, so it’s a win-win for both bird and property owner. What’s more, if you build birdhouses for your property amongst your lawn and garden area, you benefit from conserving the bird population which can be rare in a residential area.


Build a Rainwater Collection System

Children love to build things. It’s an inquisitive part of their nature that sees them like to find out how something begins, works, and ends. Therefore, if you find yourself in need of a cost-effective water collection system for when you’re gardening, the kids can learn an awful lot by helping you build one.  Not only does having such a setup save you from having to use the town’s water supply for your garden, but it means you can use a sprinkler and hose to your heart’s content.

When the time comes to get the children together and learn how to be more environmentally friendly, you may find a few of these collection systems are within your skill set to produce.


Plant Flowers

Small girl taking photo of flowers in flower box

Whether you contact an expert to help with the process, or you and the kids want to give it a go on your own, you will find that planting flowers has many benefits. Of course, the main advantage is that you’re doing your part by being environmentally friendly. However, did you know there were so many other reasons why planting flowers is a good idea?  


When you get the gardening gloves and head out to your lawn, you will marvel at the beauty of the flowers. They’re bright, vivacious, and add so much colour and fun to your yard. What’s more, their environmental benefits are unparalleled.


Flowers help to remove pollutants from the air during photosynthesis. The leaves of the plant absorb carbon dioxide, releasing oxygen in return. And, if you and kids head outdoors and plant your favourite flowers, you also benefit from knowing they can help to reduce flooding and soil erosion as well. For the birds, the kids, the bees, and yourself, there are so many reasons to head to your local gardening store and get planting.


Start a Vegetable Garden

If you haven’t already got a vegetable garden, you may find starting one with your children is rewarding in so many ways. Firstly, it gets the kids off their mobile devices and out into the garden – something you may find difficult on a regular basis. However, showing your children how to start a vegetable garden can also set them up for life. When they grow up and move out of the family home, they will be able to provide fresh vegetables for their family in the way you did for them. What’s more, you’re doing your part for the environment by opting out of plastic-packaged vegetables from the supermarket.


Gardening can be a rewarding job, but it does take patience. Therefore, it’s a good idea to try and make the entire process as fun as possible. Let the kids choose what they want to grow and buy them children’s gardening equipment so they can feel and look the part.

After weeks or months of care – something you may need to actively encourage to stop them forgetting  - you can then let them enjoy the fruits of their labour. For mum and dad, it’s another win, as the kids may be more likely to eat their greens when they know they’ve grown them themselves.


Being environmentally friendly doesn’t have to be a hard task, but it does require you to think outside the square a little. If you’re ready to get outdoors and teach your children to be responsible for nature, consider trying out any of these tips and tricks above. You may find your children have hidden green thumbs that just need a little bit of nurturing.


Want a little bit more help in the garden?

Contact Crewcut

Related Articles

Contact Us for Garden Service
ADMIN