Posts by ADMIN
Implementing a crop rotation plan for your garden

It’s always a sight to behold when you’re looking out the window of an aeroplane and see crops planted neatly on farmland below. The effect is like a quilted blanket, with paddock after paddock containing various plants that are bursting with colour and life.

But what you may not know is that if those farmers planted those same crops in those same places the following year, a whole lot of inconvenience might be in store.

If you don’t rotate your plants in what is known as crop rotation, then your soil can suffer. Pests will move in, soil nutrients will almost disappear, and you will need artificial fertiliser to offer any semblance of health and vitality for those plants.

Crops.jpg

This is not a farmer’s problem alone, for even the average gardener can experiences benefits from crop rotation in New Zealand and consequences without one. Those who spend a little bit of time formulating a crop rotation plan can enjoy a reduced need for pest control, a smaller risk of soil-borne disease, and even a reduced risk of nutrient loss.

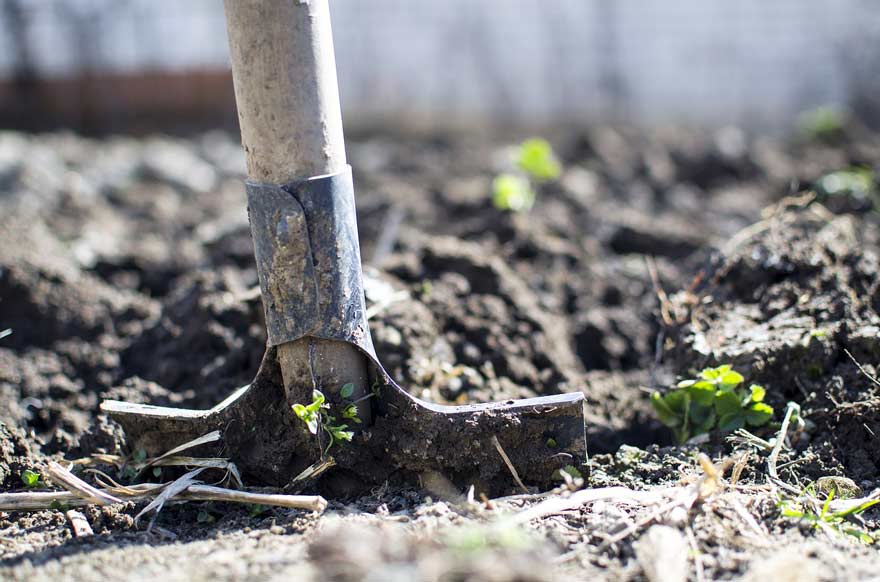
If the time has come to prepare your vegetable garden for a new year of growth, then read on. It’s time to build a crop rotation plan for the best chance of growth success.

How do I get started?

After you’ve had a bit of a garden clean-up, identify how many garden beds you have to play with in your yard. You can then formulate a new crop rotation plan in NZ based on your garden bed layout. If you have four beds, then that means each crop type will not end up in the area in which it started for four years.

The next step is to work out what you want to plant and how you will group them. Your vegetables should be planted based on their growth, pest preferences, and general requirements. The more similar the plants are, the better they will work together in a separate garden bed (generally!)

Garden-beds.jpg

What plants should I group?

Many gardeners who see the value in crop rotation in NZ stick with a traditional method. This method normally sees you planting legumes, root vegetables, fruit-bearing vegetables, and leafy greens in separate garden beds.

While, for the most part, this form of crop rotation works well, some growth habits of particular plants mean they are better suited together, rather than apart as the traditional rotation plan would have them be.

Therefore, it’s a better idea to plant your vegetables based on the family. For example, the cabbage family, or brassica, would see the pairing of broccoli, cabbage, cauliflower, kale, turnips, swedes, and similar.

Peas and beans would have their own bed, and so too would members of the Solanaceae family. In traditional crop rotations, potatoes and tomatoes would be planted separate (root vegetables and fruit-bearing), but their similarities see them better planted together.

Carrots and celery would fall into the root family, while pumpkin, squash, courgette, and cucumber come under ‘cucurbits’.

It may take some time to familiarise yourself with beneficial vegetable pairings, but once you do, you’ll never go back to any other method. Soil health and rewarding yields will follow.

How do I choose my crop rotation order?

Now that you have grouped your preferred vegetables, you then need to think about the rotation order. Believe it or not, it matters. If you’re not sure you can do this step on your own, you can rest assured there is always a gardening expert on hand to lend some assistance.

After you have finished planting your legumes in one garden bed, make sure your brassica family follows behind. Brassicas love the nutrient-rich soil left behind by the legumes. While potatoes, too, love such soil, they have different pH levels, so you shouldn’t plant them with your brassicas.

If you have put a lot of time and effort into fertilising your soil, then make sure you keep your root vegetables away from these garden beds. The plants’ leafy tops will likely thrive, but at the expense of the delicious root vegetables underneath the soil’s surface.

There are many helpful materials online that can help you plan your crop rotation in New Zealand, such as this one below.

First bed:

Lay down compost and plant tomatoes and potatoes together. Follow with leeks and onions.

Second bed:

Plant members of the Umbelliferae family, such as carrots and parsnips. You can also use this bed for lettuce and follow it up with green manure once winter hits.

Third bed:

In summer, plant your brassicas in the third garden bed, such as kale and cabbage. Once winter hits, plant winter varieties like Brussel sprouts.

Fourth bed:

Sow your legumes then add lime before you plant the brassicas that follow next in the crop rotation.  

beets.jpg

Form your crop rotation plan today!

Having a crop rotation plan is one of the best things you can do for your garden. However, it can be quite tricky. Every gardener has their own ideas of what works and what doesn’t, and the proof is often in the pudding.

Do your homework, talk to friends who have successful crop rotations of their own, and think about the kinds of vegetables you’d like to plant. You can then enjoy an organised and thriving crop that rotates seamlessly for many years to come.

ADMIN
We weed to talk about oxalis

Oxalis, which is also known as shamrock, is a frustrating weed that can make any avid gardener want to tear their hair out while screaming death to oxalis! As soon as you learn how to kill oxalis and think you’ve managed it, it’s back again! Can you ever get rid of this crawling, creeping oxalis weed? 

The more you know, the more likely you are to be in the driver’s seat and take control. Here’s everything you weed, er, need to know about oxalis in NZ – which includes what it takes to say goodbye to it for good!

What is Oxalis?

Oxalis goes by many names. Some people call it shamrocks because of its clover-like appearance, but it also goes by wood sorrels or its Latin name Oxalis Acetosella. For some unknown reason, the name “Good Luck Plant” is thrown around as well. Other standard terms, at least in the gardening world, are “please stop growing back” and “why won’t you die!”

Oxalis is a rhizomatous flowering plant with trifoliate leaves. In summer and spring, small white and pink flowers may appear which can make it quite pretty to look at. Don’t let its beauty fool you, for this plant will show its true colours before long.

Lets-talk-Oxalis.jpg

Is Oxalis Toxic?

In a word – yes. Oxalis is toxic, but it’s not clear-cut. The Shamrock Plant is listed on the ASPCA’s website as toxic to dogs, cats, and horses. It contains soluble calcium oxalates, which can cause tremors, salivation, and kidney failure. The toxicity relates to all parts of the plant. If you own curious pets, you’ll need to be in a hurry to remove this plant permanently.

The oxalis weed can also be toxic to humans, but only in large quantities. You can gather the leaves and stems for salads or cups of tea because they have a lemon-like flavour which can be thirst-quenching. As they contain oxalic acid that binds up your body’s calcium supply, you should never consume oxalis in large doses. If you do, you are at risk of illness with staggering, cramping, and trembling, among many other symptoms.

How Do You Treat Oxalis?

There is a multitude of different approaches you can take to eradicate this plant. From killing oxalis with baking soda, through to putting your roaming chickens on the case; there’s quite the list of things to try. Not all solutions will work for everyone.

Many people used to use glyphosate-based weedkiller because it would travel down the stems and take care of the roots and bulbs. But glyphosate doesn’t discriminate, so it can also be harmful to bees and not safe for use around edible plants.

death-to-oxalis.jpg

If you have oxalis around your succulents or perennials, you can give Death to Oxalis a try. This product burns oxalis leaves, which then weaken the plant and eventually starve it. It doesn’t work on creeping oxalis, however.

Boiling water can work a treat, but can harm your other plants, and black polythene can stunt growth but impact your soil health in the process. It seems that for every solution, there’s a drawback.

If you have a lot of time on your hand (and by time, we mean years), you can remove every single leaf by hand. Shamrock, or oxalis, can’t make food from the sun’s energy (photosynthesis), so if you remove its leaves, it will starve. Alternatively, let your chickens on the loose to clean it up in no time.

Baking soda is another wonderful product with many uses. Mix one tablespoon with one litre of warm water and a single millilitre of Rainguard and spray the leaves to burn them on a hot, sunny day.

Finally, the only other option is to live with it. If you try to attack oxalis like any other weed, it will multiply. Let it sit and act as ground cover and focus on the other, less invasive plants in your garden. You can also get in touch with lawn care experts who may have some other cheeky solutions up their sleeves.

edible.jpg

What Are Some Uses for Oxalis – and Is It Edible?  

Oxalis is a pesky plant that’s challenging to remove, but at least it’s not entirely useless. It actually has a few different uses. The dried or fresh leaves are often used for medicinal purposes, such as for boils or abscesses.

Because oxalis weed leaves contain oxalic acid, they have a tangy bite to them. Therefore, they work well (in small quantities) in tea, salads, soup, and sauces. The flower, when left raw, is a lovely decoration in a salad. If you dry oxalis, it becomes useful as a curdling agent in plant milk. Save the juice for the removal of iron mould stains in linen.

Conclusion

Oxalis can be your worst nightmare, but only if you don’t know how to remove it, treat it, and use it. Take note of these helpful tips for removal above, and consider whether you may be able to use the plants once you remove them. There’s more to this pesky plant than meets the eye.

ADMIN
Some Essential Cooking Herbs to Grow in Your Garden

One of the many reasons why the average home cook doesn’t venture outside of their culinary comfort zone is because they lack the 20 different fresh herbs they need for a single recipe. That egg dish may be a crowd favourite and perfect for a growing family, but with the addition of all those fresh herbs, it becomes more of a hassle than its worth.

Of course, in many cases, you can substitute fresh for dried, but the result is never as good as with fresh herb plants in NZ. What’s more, many of their dried counterparts can end up altering the texture or taste of your dish for the worst.

If you’d love to sink your teeth into a new recipe book with fresh and delicious meals, then it might be time to grow herbs in your garden and planter boxes in NZ. Your family’s stomachs will thank you for it.  

Read on to discover which herbs will get the most use in your home, and how to grow them successfully.

cooking herbs

Parsley

How often do you go to a restaurant and pull that fresh parsley garnish off your dish before you dig in? While parsley adds colour and vibrancy to any meal, it’s also an excellent herb plant in NZ for balancing flavours and adding freshness.

Parsley is something you can include in Middle Eastern cuisine, salads, or even toppings for vegetables. It’s also an excellent herb for digestion and a source of Vitamin A and C. What’s more; it’s easy to grow. This vibrant herb is drought-tolerant, thrives in partial and full sun, and only needs occasional watering.

Mint

If you want fresh herb plants in NZ that you can’t kill, then mint should be at the top of your must-have list. Whether you want new potatoes with mint, mint tea, or a fresh mojito in summer, then this is the essential cooking herb for you. It’s hardy, takes a lot to kill, and can actually be quite invasive. It’s in your best interests to keep mint contained in planter boxes in NZ if you don’t want it to take over.

Rosemary

There’s nothing like the fresh fragrance of rosemary wafting out of your kitchen, so what are you waiting for? If you’re on the hunt for versatile herbs that are both beautifully smelling and divine in a range of dishes, then rosemary is the answer. Use it with poultry, vegetables, meat; the sky’s the limit. Rosemary is also easy-care as it loves only occasional watering. It can also grow into a large bush, so consider a planter box to keep it contained.

chives

Chives

Not everyone knows how to let their fresh herbs do all the talking, but chives do it all on their own. This standout cooking herb is essential for the cook who loves intense flavours and infusion. It works beautifully in egg dishes, with potatoes, and in salads or soups. Even better, chives have a relatively decent nutritional value with both Vitamin C and beta carotene. Provide them with rich, fertile soil in full sun and let them thrive.

Bay Leaves

While bay leaves may not look like much, they can pack a punch in terms of flavour. If you are looking for essential herbs to grow in your garden, then they’ll likely make the cut. They feature in many divine stews and recipes and have a sharp, bitter, and peppery flavour that can balance out the sweetness of a dish. Bay leaves grow on a bay leaf tree, but you can grow the tree in a container or planter box and pick leaves off it as you need.

Sage

If you struggle to add life and zest to your meals, then maybe sage can help. This aromatic herb is one that’s perfect for your vegetables, sauces, and meats. The key with this delightful plant is to balance the flavour properly. It can be quite overbearing if you use too much of it or pair it with another strong flavour. It’s both easy to grow and care for, making it perfect for those neglectful plant parents!

sage

…And Where to Grow Them

Now that you know what essential cooking herbs your kitchen needs, you then need to know where to plant them. You can purchase all manner of planter boxes in NZ, but not everyone has a lot of space. Fortunately, most herbs grow well in mason jars and standard plant pots. Choose the best soil based on your chosen herbs’ needs, then place them either in the sun or partial sun, depending on what helps them to thrive.

It’s Time to Grow Herbs!

Take your culinary expertise to the next level with a range of beautiful and vibrant herbs that are easy to grow (and keep alive). Not only is growing your own herbs a more cost-effective option, but it can mean you’re able to dabble in a whole host of new recipes that your family is bound to love. Happy cooking, everyone!


ADMIN
7 Ground Cover Plants to Suit Your Garden

No one is born with a pair of gardening gloves and a watering can in their hands. Love for gardening blossoms over time - often with the help of green-fingered family members who like to encourage a new passion to prosper.

Whether you’re a passionate gardener or one who likes to dabble when the fancy takes them, you’ll all share one thing in common: a dislike for pesky weeds. It seems like as soon as you get rid of one lot, a new type takes over. There’s only so much herbicide you’ll want to subject your other plants to.

The Benefits of Ground Cover Plants

That’s why more and more gardeners see the value in ground cover plants. Ground cover plants for your garden not only take up all that spare space that weeds usually steal, but can bring about a whole host of other benefits.

They prevent weed seed germination, perennial weeds, and even protect your soil from water loss and erosion. Ground cover plants are also a form of insulation, a living mulch, and an attractive habitat for insects that wish to call your garden home.

Whether you require ground cover plants for clay soil in New Zealand or something a little less demanding, you’re sure to find something to suit. Below, you can learn all about creeping, carpeting, edging, and fringing ground covers for your garden that will surely give weeds their marching orders.

1. Scleranthus Biflorus - New Zealand Cushion Bush

If you can’t pronounce the scientific name for this ground cover plant, then its more common name of NZ cushion bush will do. You won’t need to embarrass yourself when you’re asking for it at your local garden store. New Zealand cushion bush is a moss-like ground cover plant that thrives in all manner of environments.

Give it stones, gravel, or succulent mix, and it’ll live to tell the tale. While it looks soft, plush, and tempting to pat - refrain. Any damage to this ground cover plant can result in partial death, which can ruin the overall look of it as it takes over your bare space.

scleranthus-biflorus
Pimelea Prostrata

2. Pimelea Prostrata - New Zealand Daphne

If you’re looking for ground cover plants for clay soil in NZ, then New Zealand Daphne will come to the rescue. It’s a ground cover plant that originates from coastal dunes, so it’s used to a hard life. It’s also beautiful and produces stunning flowers with a mild scent of honey. However, if you have grazing stock on or near your property, this ground cover plant may not be for you. It’s poisonous for grazing animals. 

3. Soleirolia Soleirolii - Baby’s Tears

If you’re trying to put a stop to pesky weeds taking over your paving stones and pathways, then let Baby’s Tears be of assistance. This ground cover plant for your garden is a master of pathway protection, nestling up to the edges of it to form a barrier against weed invasion.

Baby’s Tears thrives in shady and moist conditions, but without frost. It becomes a stunning carpet-like cover that’s both effective and attractive.

babys-tears
Coprosma

4. Coprosma (Taiko) - Prostrate Mingimingi

If you want to make sure your ground covers for your garden are both attractive and useful, then Coprosma may be for you. When you first buy it, it may not be immediately obvious that it’s going to make the best ground cover. However, once it takes off, there’s no stopping it. It forms a thick rug over your chosen garden area that looks neat and tidy with regular trimming.

5. Liriope Muscari - Lilyturf

If your goal with ground cover for your garden is to help with fringing and edging, then Lilyturf can help. This beautiful plant has gorgeous and long leaves and vibrant purple flowers that look picture-perfect in spring.

However, Lilyturf does have its drawbacks. Slugs and snails love it. What’s more, if frost doesn’t kill it back over winter, then you have to remove dead foliage by hand. Otherwise, there are plenty of reasons why this bushy and vibrant plant could be a firm favourite in your garden.

Liriope-Muscari
dwaft agapanthus

6. Dwarf Agapanthus (Tinkerbell)

Dwarf Agapanthus, also known as Tinkerbell, is a short yet beautiful ground cover plant that can add much life and vibrancy to your garden. It grows in clumps, doesn’t spread without permission, and you can propagate it to build up surrounding areas. Unlike roadside agapanthus, its dwarf cousin is not one to misbehave and can also be useful for stabilising banks that are prone to erosion.

7. Trachelospermum Jasminoides - Star Jasmine

Even though this ground cover plant will take at least two years to mature, it will be worth it when it does. It can climb, form shapes on wires, and provide dense coverage when and where you need it the most. It gets a gold star for versatility. However, it’s not suitable for areas with heavy frost.

Star-Jasmine

It’s Time to Plant

You won’t need much convincing that ground cover plants are a saving grace. Instead of all that back-breaking work to remove weeds, you can rely on ground cover plants to give weeds their marching orders. If you need a helping hand in choosing the right ground cover plants for your garden, then there are plenty of experts who can help. Otherwise, happy planting!


Garden TipsADMIN
Start Spring on the right foot with daffodils
 
daffodil-spring-garden.jpg

With daffodils beginning to pop up everywhere, it’s clear to see that can only mean one thing: spring is on its way. There is nothing that brings more joy and hope than the sight of yellow and white flowers scattered throughout gardens and fields and the knowledge that the cold and dismal weather of winter is now behind us.

What’s more, daffodils also signify new lambs being born, and the Cancer Society’s biggest fundraiser: Daffodil Day. This year, Daffodil Day falls on August 31, which means volunteers will be out in their droves, offering daffodils in exchange for donations. Click here if you want to be a part of Daffodil Day, or support the noble cause.


What Does the Daffodil Mean?

Daffodils, while beautiful, also have many meanings. They are typically the first flower to bloom as winter turns to spring, and they are also the symbol of rebirth, new beginnings, awareness, memory, forgiveness, and vitality.

For the Cancer Society, however, the daffodil is used for Daffodil Day to signify and symbolise hope for a cure. Cancer claims the lives of thousands of people in New Zealand every year, but with research – for which funding is necessary – there is hope for a cure, prevention, and education.


How to Grow Daffodils

If nothing would bring you more pleasure than opening your curtains in the morning to see striking white and yellow fresh blooms in your garden, then it might be time to learn how to grow daffodils. Daffodil care is easier than you think, but if you need help, there is always an expert on hand to lend their advice.


What You Will Need:

  • Gardening gloves

  • Soil or potting mix

  • Pots and planters

  • Mulch or compost

  • Fertiliser

  • Daffodil bulbs


Step one: Choose the variety

Contrary to popular belief, daffodil types differ depending on your area. That’s why when you see people out collecting money for Daffodil Day, you find that some are yellow with orange centres, or white with yellow centres. Talk to a garden store attendant about the best variety to suit your region.


Step two: The Pre-planting Stage

If you’re not an avid gardener, never fear. The pre-planting stage of daffodils is easy. However, if you don’t feel confident completing this task yourself, contact daffodil care experts who can help. Pre-planting your daffodils involves waiting until Autumn, around daylight saving. When the soil is cold enough, you can plant your bulbs so that they will lie dormant over the colder months.

Make sure the bulbs are decent in size for a better chance of a successful bloom. Learning how to grow daffodils properly can often take more than one planting season to get the hang of it.

When you’re looking for a site in which to plant your bulbs, pay attention to the positioning. Make sure it’s an area that gets plenty of sunlight but also has free-draining soil. Some varieties like a bit of shade, so pay attention to what the packaging of your bulbs state.


Read more → Save mega bucks and grow your own avocados


daffodils-pot.jpg

How to Grow Daffodils in a Pot

If you don’t have a lot of space to spare in your garden, or you prefer to plant your flowers in pots, then it’s also possible to learn how to grow daffodils in containers as well. However, you will need to opt for bulbs that grow shorter with smaller flowers.

Find a large pot or container with excellent drainage holes and fill it with soil or potting mix with fertiliser. The slow-releasing variety is the best.

Plant the bulbs evenly in the pot but ensure that none of them touch each other or even the edges of the container. Give them plenty of water and shade until you see shoots beginning to form. Once they start to grow, you can move the pot into the sunlight.

Then, when you begin to see foliage, you can apply liquid fertiliser to help with flowering. Before long, you will have a pot filled with beautiful daffodils – just in time for spring and Daffodil Day.


How to Reuse Daffodil Bulbs

Rather than buy new bulbs every year, did you know you can reuse the ones you already bought? Below is a step-by-step guide for daffodil bulb care.

  1. Once your bulbs have finished flowering, fertilise them with bulb food.

  2. Tie the bulb’s foliage around itself and secure it in a rubber band.

  3. When the leaves encompassing it have died off, remove the bulbs from the soil.

  4. Remove the foliage once it has completely dried out and starts to come away naturally

  5. Store your bulbs in a mesh bag in a dry, cool place until the next planting season


A Passion for Daffodils

Seeing volunteers selling vibrant posies of daffodils for Daffodil Day can bring a smile to anyone’s face. However, if you find yourself passionate about this stunning flower for more than one day a year, then why not make it a real hobby?

In New Zealand, the New Zealand Daffodil Society provides a host of information for daffodil care, how to grow daffodils, and how to join a Daffodil Club.

If you become part of a club along with others passionate about the flower, you can attend daffodil shows, see various displays, learn where to buy the best bulbs, and even how to grow specialist daffodils from high-quality bulbs. You can also learn more about upcoming events.


What started out as an indicator that better weather was on the horizon has now turned into a symbol for hope and a chance to make money for cancer research and resources with The Cancer Society. If you want to grow daffodils for yourself and you’re not sure how, you will find this information above can go a long way toward helping you realise a new passion. You never know, it could be the very thing you need to uncover a hidden garden talent. 


Related Articles

ADMIN
Teach your children these enviro friendly garden hacks
Small child and parent growing sapling from ground

The world is becoming more and more like a concrete jungle by the minute. Luscious lawns are turned into residential high-rise buildings, while even forests are being cut down to provide the resources to make it happen. Therefore, it can be hard for your children to learn how to be environmentally friendly, especially in a world that hasn’t quite welcomed the concept with open arms yet.


If you want your children to appreciate nature and all its beauty, while encouraging them to do their part to hold onto it, then teach them these gardening hacks. You may find their interest in the environment blossoms before your very eyes.


Use Organic Products

If you want your children to be environmentally friendly, then you need to practice what you preach. Rather than douse your garden in the most toxic chemicals on the market to rid them of insects, always hunt for organic alternatives. You can buy pre-made natural products designed to stop bugs in their tracks, or you can sit down with your children and create your own bug deterrents.

Tip: Insects hate coffee grounds, so consider stocking up on these!


Wooden bird house against a tree

Build a Birdhouse

Teaching your children to be environmentally friendly doesn’t have to be a classroom lesson. They are sure to get plenty of these at school. Instead, you can make it a fun experience. Building a birdhouse is not only a way in which to spend time with your children outside, but it educates them on the importance of birds.


We need birds for controlling pests and pollinating flowers, but also for weed control and help with the gardening too. Birds love to eat the seeds of weeds on your lawn, so it’s a win-win for both bird and property owner. What’s more, if you build birdhouses for your property amongst your lawn and garden area, you benefit from conserving the bird population which can be rare in a residential area.


Build a Rainwater Collection System

Children love to build things. It’s an inquisitive part of their nature that sees them like to find out how something begins, works, and ends. Therefore, if you find yourself in need of a cost-effective water collection system for when you’re gardening, the kids can learn an awful lot by helping you build one.  Not only does having such a setup save you from having to use the town’s water supply for your garden, but it means you can use a sprinkler and hose to your heart’s content.

When the time comes to get the children together and learn how to be more environmentally friendly, you may find a few of these collection systems are within your skill set to produce.


Plant Flowers

Small girl taking photo of flowers in flower box

Whether you contact an expert to help with the process, or you and the kids want to give it a go on your own, you will find that planting flowers has many benefits. Of course, the main advantage is that you’re doing your part by being environmentally friendly. However, did you know there were so many other reasons why planting flowers is a good idea?  


When you get the gardening gloves and head out to your lawn, you will marvel at the beauty of the flowers. They’re bright, vivacious, and add so much colour and fun to your yard. What’s more, their environmental benefits are unparalleled.


Flowers help to remove pollutants from the air during photosynthesis. The leaves of the plant absorb carbon dioxide, releasing oxygen in return. And, if you and kids head outdoors and plant your favourite flowers, you also benefit from knowing they can help to reduce flooding and soil erosion as well. For the birds, the kids, the bees, and yourself, there are so many reasons to head to your local gardening store and get planting.


Start a Vegetable Garden

If you haven’t already got a vegetable garden, you may find starting one with your children is rewarding in so many ways. Firstly, it gets the kids off their mobile devices and out into the garden – something you may find difficult on a regular basis. However, showing your children how to start a vegetable garden can also set them up for life. When they grow up and move out of the family home, they will be able to provide fresh vegetables for their family in the way you did for them. What’s more, you’re doing your part for the environment by opting out of plastic-packaged vegetables from the supermarket.


Gardening can be a rewarding job, but it does take patience. Therefore, it’s a good idea to try and make the entire process as fun as possible. Let the kids choose what they want to grow and buy them children’s gardening equipment so they can feel and look the part.

After weeks or months of care – something you may need to actively encourage to stop them forgetting  - you can then let them enjoy the fruits of their labour. For mum and dad, it’s another win, as the kids may be more likely to eat their greens when they know they’ve grown them themselves.


Being environmentally friendly doesn’t have to be a hard task, but it does require you to think outside the square a little. If you’re ready to get outdoors and teach your children to be responsible for nature, consider trying out any of these tips and tricks above. You may find your children have hidden green thumbs that just need a little bit of nurturing.


Want a little bit more help in the garden?


Related Articles

ADMIN
Lawn & Garden tips for the inner city
 
Trees siting on apartment balconies

The lawn and garden connected to your home is an extension of your living space. You want to be able to go outside and relax, watch the clouds go by, and enjoy a cup of coffee as the sun comes up. Lack of space doesn’t mean your lawn and garden doesn’t need to reach its maximum possibility. A patio can turn into an outdoor pantry, complete with fresh herbs, vegetables, and fruit. Your lawn can be a relaxing place to read books and lay in the grass. Whether you're living in the inner city of Auckland, Wellington, or Christchurch, there's plenty you can do for an effortless lawn and garden. 


Don’t Overplant

In an average outside space, you want to fill a quarter with plants and leave the remaining three quarters to open space and seating. Those living in the inner city want to be cautious not to add too many plants. It is easy to make an inner city garden feel cramped and confined.


Layer Pots Together

An interesting focal point can be several pots stacked together with flowers. Place the largest terracotta pot at the bottom and fill with potting soil. Then, place a smaller pot inside. Fill the smaller pot with soil, and continue this process with however many pots you have. The pots progressively get smaller. Then, plant flowers in the soil not covered by pots! It creates a lovely visual. You can find DIY instructions from Den Garden.


Remember Vertical Space

Inner cities typically don’t offer massive lawns, but everyone can go vertical. A beautiful pergola allows you to grow strawberries on top. You can hang baskets on the sides with flowers, or grow tomatoes upside down! Use a trellis or two to grow pole green beans and cucumbers. A trellis takes up minimal space.

To add dimension and increase privacy, try tall pots filled with native grasses. Adding height also brings an interesting element to your garden.


Use Miniature Items

Since your outdoor space is miniature, size down on the items you use. Planting a full-size apple tree is not a wise idea, but a small backyard can handle a dwarf fruit tree that reaches heights of seven to nine feet.

Instead of using large paving stones for a walkway, use a larger amount of small tiles. It makes space feel larger rather than crammed. Be selective about the furniture. Bulky items aren’t your friend.


Side to Side

If you have a narrow garden, it might feel as if you are stuck in this little space. One great idea tricks the eye, and that is lining your deck or yard from side to side with plants. So, put multiple pots or plants along the border on each side of your property.

For those with wide but short garden, try adding items from top to bottom. Tricking the eye and making illusions is key to the perfect inner city garden.


Put plants sitting on windowsill 

Remember to Use Surfaces

As you plan how to decorate your inner city garden, don’t forget the surfaces. A fence, the sides of your house or a shed, or windows are perfect places to add décor.

Place window boxes or flower pouches under windows. Hang a pallet on a fence or the side of your house for the perfect urban herbal garden. Garden pouches are increasing in popularity and allow anyone with a fence to grow plants like lettuce and herbs.

Another surface could be a table placed outside. Put a shallow tray on the table and grow herbs on your table. That makes harvesting very easy!


Practice Proper Lawn Care

In a small space, guests will quickly notice when you aren’t taking care of your lawn properly. Mow your lawn when it reaches two to three inches high throughout warmer seasons. Try not to mow any shorter because the roots need to spread deeply to allow the grass to thrive even if rainfall amounts are low.

Treat weeds in the spring; they are noticeable in smaller spaces. In the fall, remember to fertilize your lawn to prepare it for any cold weather coming your way. A well-maintained lawn makes your garden space more appealing for guests and yourself.


Reseed Bare Lawn Spots

In the spring, make sure you lay grass seed over bare spots in your lawn. You want whatever lawn you have to look fantastic, along with all of those plants you have. Planting grass seed requires little effort on your part. Make sure you plant the correct type of grass, which depends on your location and amount of sun your lawn receives. Shady lawns require different grass that grows well without an abundance of sunlight.


Pot plants hanging on garden wall


Use Pallets

Pallets are popular right now. People use them to build fences, tables, compost bins and more. Pallets are perfect shelving for your inner-city garden. It doesn’t take much work to make them the perfect home for trailing flowers, herbs, and grasses. Succulent plants even enjoy life on a pallet shelf.


Make a Special Hideaway Area

Even in the smallest of gardens, there is a spot where you can add a hideaway. That might be a bench surrounded with tall, native grasses. It could be a hammock swing hung under a tree. An arbor covered in vines could hide a comfortable bench seat.

These secret areas are popular and allow you to enjoy your garden space. You can sneak away to these areas when you need a bit of silence. It also adds interest to your garden when guests find them!


Plant Perennials

The great thing about perennial plants is that you plant them once and they continue to grow back each year. That means you have to spend less time each year preparing your lawn and garden. There is an abundance of gorgeous perennials so that you will find something to suit your tastes.

Some popular perennials include:

  • Asters

  • Achilleas

  • Penstemons

  • Cannas

  • Dahlias

  • Sedums

  • Salvias


Designing Your Inner City Lawn and Garden

While those who live in an inner city tend to have small outdoor spaces, that doesn’t mean you can’t take full advantage of the space given. Use colours, wise placement, and utilise every spot you can. With the right design and vision, your outdoor garden will become your favourite place to go.


Related Articles

ADMIN
Fertilising the garden this winter


Gone are the glory days of summer to the now dreary days of winter. You don’t need to be on active garden duty, but there are some winter chores you need to do to prepare your garden for spring.


Kiwi lady with fertiliser in wheelbarrow

Fertilising the Garden

It’ll soon be time to plant fruit trees and roses. You can prepare holes and add manure, such as sheep pellets, cow or horse manure for these woody plants to develop a deep root system and plentiful fruit and blooms. Next, you want to remove an inch of mulch from your gardens to allow sunlight to penetrate through and warm up the soil for spring planting.


If you have poorly drained soils, you want to add gypsum to your garden. Gypsum binds up soil particles together allowing air to help evaporate excess water. Gypsum also helps open up the soil to drain away water.


The Magic of Potash Fertiliser

Potassium, also known as potash, is a macronutrient that every plant needs in winter to protect plants from fungal diseases and rot. Your lawn also needs potash in late winter for a quick green-up in spring. Potash enables fruit and vegetables to develop larger crops, it produces abundant flowers and increases plants’ overall health. Potash works in the lawn, too, helping yard grass develop resistance to diseases as well as it improves your lawn grass’s ability to survive drought and heat stress.


Before applying potash to your gardens, test your soil’s pH as well as the macronutrients’ levels. Your acid-loving plants, such as azalea, hydrangea, and rhododendrons don’t like alkaline soils. So, don’t add potash to beds with these shrubs because it’ll make the soil more alkaline.


Also, if you have sufficient amounts of potash in your lawn and gardens, you don’t need to add more. Potash turns to salt when it’s in abundance and will damage plants. Finally, if you have sandy soil, you can add potassium to it. However, you’ll also need to add leaf litter and other soil amendments to help with drainage and soil health.


You get potash from the following fertilisers:

  • Animal waste, such as cow and horse manure as well as sheep pellets

  • Kelp

  • Wood ash added to your compost also improves potash levels.


Man pours liquid fertiliser

Fertilising Your Lawn

You should fertilise your lawn in late fall to prepare it for winter or in late winter to get grass to green up quickly come spring. Liquid fertiliser brings the fastest results. Your fertiliser should be high in nitrogen and potassium to give your lawn grass a good start.

Add liquid fertiliser to your watering can and mix with water. Sprinkle it over your grass. You can also use granulated nutrients, but you’ll still need to water your lawn afterward to activate it. Since lawn grass grows best in sweet soil with low acidity, make sure you add lime a few weeks after you’re finished feeding your lawn with fertiliser.


In winter, you don’t have as many gardening and lawn chores to complete. However, there are still some necessary things to finish before spring’s arrival in September. If you need a bit of extra help with fertilising, the team at Crewcut will be happy to help this winter. 


Related Articles

ADMIN
The Guide to Tree & Shrub Pruning In Winter
 
Man trimming a dead tree brach in winter

As winter approaches, there are some shrub and tree pruning jobs that are best done during the coldest months of the year. Generally speaking, your deciduous (their leaves drop off in fall) bushes and trees need trimming in the winter. Since deciduous trees lose their leaves in winter, you can see clearly what branches need to go and which ones can stay.


However, not all trees and bushes need pruning. To successfully take care of your woody plants in winter requires that you know which ones to trim and which ones to leave alone.


Pruning Trees and Shrubs

Basically, you can prune trees and shrubs that are deciduous as well as some fruit trees. However, maples and magnolias don’t want to feel your secateurs on their limbs. The only tree pruning you need to do to maples and magnolias is to remove any dead, diseased or insect-infested limbs. If not, heavy winds will lob off those dead branches for you, endangering you and your family.


Also, you want to get rid of any diseased or insect-ridden branches on maples and magnolias, so the disease or infestation doesn’t go farther than the injured limb.


Further reading for winter garden care

5 landscape ideas to prevent flooding
Getting the garden ready for winter
Dead leaves smothering your lawn this autumn?


Selective Pruning

Selective pruning is a form of pruning trees and bushes that respects the tree’s natural shape, but it also allows for air to circulate and sunlight to penetrate these woody plants. However, some homeowners and tree care companies believe in topping trees. Tree topping leaves your trees unbalanced and ugly. Plus, you’ll notice spouts rather than branches growing on the top of the tree.These spouts are fragile limbs that could break off during a severe storm. So, tree topping not hurts the tree, but it also weakens it.


Trees: For early spring flowering trees, you want to trim them in late August. Below is a list of deciduous trees, including early bloomers that need winter pruning:

  • Ash

  • Beech

  • Dogwood

  • Eastern ninebark

  • Elm

  • Gingko

  • Locust

  • Smoke tree

  • Oak

  • Tulip

  • Walnut

  • Willow


Shrubs: Again, your shrubs benefit from selective pruning too. First you need to remove all dead and diseased limbs. Then you can trim the shrub back to its natural shape. Here are some common bushes to prune over the winter:

  • Abbotswood

  • Buddleia

  • Bush roses

  • Hops

  • Hydrangeas

  • Mock orange

  • Perennial sweet pea

  • Spiraea japonica

  • Summer clematis


Yellow roses on rose bush

Roses

The most popular shrub in Kiwi gardens is the rose. So, it’s only appropriate to talk about the rose’s winter pruning needs. It’s safe to prune most roses over the winter because New Zealand roses bud on new bark rather than old bark. You want to cut above the buds and trim off old, dead or diseased canes. It’s recommended that you prune roses from mid-June through August unless you live in an area that gets very cold. Then you should wait to trim them in August.


Pruning Fruit Trees

Most fruit trees need pruning in the early spring or fall. And yet, there are two fruit trees as well as two fruit-bearing, woody vines that need winter pruning:


1.    Apple and pear trees: These two fruit trees need pruning every winter to ensure a superb crop the following summer. Matter of fact, pears only provide a yield every other year. So, when you correctly prune this tree, you’ll find that it produces an abundant crop of pears in the second season.


2.    Grapes and kiwi fruit: Even though grapes and kiwis grow on vines, it’s important to mention them in a shrub and tree trimming article. These fruits need to be pruned back every winter, so they continue to produce plentiful crops. Your goal is to cut back these vines, leaving only three to five buds per plant.


Finally, it’s vital to remind you of which fruit trees and woody vines that don’t need winter pruning. If you would trim them this winter, you’d be opening up these plants to disease and freezing temperatures.

  • Almonds

  • Blueberries

  • Cherries

  • Chilean guavas

  • Citrus trees

  • Feijoas

  • Figs

  • Nectarines

  • Olives

  • Peaches


Your trees and shrubs deserve the best care, and that includes trimming jobs. If you want to avoid the hassle of tree pruning this winter, make sure you hire a professional operator from Crewcut.  Check with your local Crewcut operator to see if they are equipped are trained to properly prune trees and shrubs—preserving the woody plants’ natural shape and taking only off enough to keep them healthy.


ADMIN
Getting the Garden Ready for Winter


Fall is in the air. Moreover, that means it’s time to clean up your summer garden and prepare it for winter. While the days are getting shorter and the air is a bit crisper, you can still work the soil, creating beautiful landscapes as well as nurturing winter vegetables and herbs.


Winter gardening tools

Keeping Your Gardens Tidy over Winter

As the summer melts into winter, your flower and vegetable beds will start to look tired. Your gardens can get that tidy look back when you


Small tree sapling growing in bark mulch

When you’re done restoring your winter garden, you want to add a fresh application of mulch. Mulch has many benefits:

  • It keeps moisture in the soil

  • It protects plant roots from extreme cold and heat

  • It keeps weeds at bay

  • It moderates the soil temperature

  • It provides nutrients as it continues to decay

  • It gives your gardens a tidy appearance.


Are you planning on adding hedges to your property this winter? Check out this blog 'How to plant a hedge for privacy'.


Getting Ready for Winter Gardening With These Plants

This fall, the first place you want to be is your vegetable garden. It’s time to harvest the remaining summer bounty, cook or preserve it for eating over the wintertime. For example, if you’re having a plentiful tomato harvest, you can add breading and fry up green tomatoes.

You can also oven-roast tomatoes or make them into spaghetti sauce or stewed tomatoes. Your homemade spaghetti sauce and stewed tomatoes freeze well for you to use throughout the winter.


If you live in a temperate zone, the following vegetables will grow well in your garden:

  • Brussels sprouts

  • Kohlrabi

  • Radishes

  • Shallots

  • Spring onions

  • Strawberries.


For those of you who live in Northern New Zealand with its sub-tropical or tropical winters, you can plant the following vegetables:

  • Beans

  • Capsicums

  • Cucumbers

  • Eggplant

  • Parsnips

  • Tomatoes.


Of course, there are herbs to add to your garden to make your winter vegetables taste delicious. Here are 10 must-have herbs to add to your vegetable patch:

  1. Bay

  2. Chervil

  3. Coriander

  4. Mizuna

  5. Oregano

  6. Parsley

  7. Rocket

  8. Rosemary

  9. Sage

  10. Thyme


Beautiful Flowers to Grace Your Gardens

Flowers give pops of colour and create a palette that brightens your landscapes and lifts you out of the winter doldrums. When you plant flower seeds in the warm soil in early autumn, you’re encouraging those seedlings to develop deep roots. During dry spells, your garden plants’ deep roots help keep the plants alive by finding new moisture stores in the soil.

If you prefer not to deal with seeds, you can visit your local garden centre and buy established seedlings that you only need to transplant into containers or your flower beds.


The following flowers make lovely plants for your winter garden:

Brightly coloured pansies against brick wall
  1. Pansies: These flowering plants have beautiful blossoms that come in a wide variety of colours, such as whites, yellows, pinks, purples and black. Here’s an easy gardening trick: When your pansies start to look leggy, trim them back and give them some liquid fertiliser. Your pansies will bounce back in a few weeks with more blooms.

  2. Polyanthus: Bold, bright colours will cheer up any winter garden. Polyanthus belongs to the primrose family.

  3. Lobelia: These flowers have the corner market on the blues. Lobelia produces sprays of blues, whites, pinks and light purples. Great for garden borders and hanging baskets.

  4. Alyssum: This is a hardy flowering plant. Alyssum looks exceptional in between sidewalk cracks, nestled in with spring flowering bulbs and as a border plant. It keeps reseeding itself throughout the winter. Alyssum comes in white, pink, cream, purples, apricot and a whole host of other colours. They also perfume the air with their gentle, baby powder scent.

  5. Fairy primrose: Another primrose variety that does well during New Zealand winter months. The fairy primrose grows larger than polyanthus. These primroses look great in a flower bed and containers.

  6. Forget-me-nots: Lovely white, blue or pink blossoms cheer up your flowerbeds. These little flowers look great as a border plant. Forget-me-nots will reseed themselves. You’ll want to pull out spent plants from your gardens before they start looking tatty.

  7. Violas: These blossoms are cousins to pansies. They’re more like perennials since they keep popping up throughout the winter and early spring. Violas look excellent in borders or containers.


There’s something therapeutic about working in a winter garden—whether it’s vegetables or flowers. New Zealand’s climate makes gardening throughout the year enjoyable. Use these final fall months to get your vegetable and flower gardens in order. Then sit back to enjoy the blossoms and delicate scents that waft throughout your beds and borders.
 

If you do require any help in the garden before winter makes its full appearance, the Crewcut team would be more than happy to help! Just contact us on 0800 800 286 or leave us a message in our chat below. 


ADMIN
5 landscape ideas to prevent flooding
Happy dog sitting on a flooded lawn

The end of summer weather hasn’t been too kind to us in little old New Zealand. Experiencing two tropical cyclones in a short space of time, many parts of the country have suffered severe flooding. They say when it rains, it pours, and the past couple of weather patterns have done just that. If you’re fed up with your backyard filling up with water, and the lawn needing a lot more care, then we have a few creative landscape ideas to help you.


Identify the problem areas

You will need to observe how water enters your lawn, where the gravity pulls it, and where it ends up. Flooding only happens when the soil can’t absorb any more water, so it may take a few heavy rains for you to see. When the soil can’t drain away any more water it will run to the lowest point in the lawn which will be where the drainage needs to be. 
 

Other signs your backyard is prone to flooding:

  • Pooling of water on the driveway

  • Water stains in the bottom level of your home

  • No roof top gutter system

  • Lawn sloping towards the house

You may find that a bit of water actually trickles in from other parts of your property, like the driveway or downpipes. If this is the case you will need to find a way to divert this extra water. 


1. Diverting extra water

If you have no guttering or spouting systems, sure your lawn might be slanting the right way but it will be no match for the roof run off come a few days of rain! Consider installing a few gutters to collect the rain off the roof. 

Diverting downspouts away from your house and lawn in heavy rain will prevent water pooling near your house. The easiest way to do this is by using a downspout extender. These can be easily found at your local hardware store along with an elbow corner pipe. This can be easily attached at the base of the downspout and the water diverted away from the house into dry areas, or into any drains. 

Remember to check and clear blockages in your downspout extender prior to heavy rain to prevent overflowing. Just make sure you don’t divert your drain towards your neighbours or  somewhere else it will become a problem. 


French drainage system in New Zealand garden

2. French drain

A french drain is an ideal way to control excess water without be too much of an eyesore. It works like an underground creek, a drainpipe below the soil that diverts water to areas that are dry. French drains are ideal to be constructed where the water is pooling, around gutters, garden beds or uneven driveways. There are so many ways to create these french drains, so here is the basic guide so you know what labour is involved, and if it would be an option for you:
 

  • Get all the necessary materials (pipe/gravel/plastic) for the method you choose.

  • Dig the trench to fit the pipe leading towards the space you want to divert excess water.

  • Line the trench with plastic or gravel.

  • Fit the pipe to the trench.

  • Fit the entry point for water, whether it be stones or a drain like top.

  • Test it!

  • Cover the trench with stones/soil or grass.


There are professionals that are experienced in french drainage, so have a look into those options if you are not so keen to start hacking away at your lawn. A DIY french drain can be done easily enough, just make sure you check with your council as to whether you are allowed to dig or not. There are so many ways you could construct your drain all using different materials. 


3. Rain garden

If you have a spot in your lawn constantly taking on a bit of water - this could be the simple solution for you. 

  • Select a spot on your property where water will run into it and plan out an appropriate shape for your rain garden.

  • Plan out the shape of your rain garden and research some native plants, flowers and grasses that do well with large amounts of water. Plan to plant the ones needing a more drier climate on the outer edge.

  • Dig up the turf of your grass at least 20cm deep. Create a berm on the edge as a border and remember to add an overflow, a break in the berm where excess water can flow through.

  • Plant the grasses and natives and add a heavy mulch a few inches thick that won’t blow away. Feel free to add stones or other grasses on the outer edges.


4. Swales

If water is running down your driveway, or down any hills in your property - this may be the answer for you. The basic function of a swale is to redirect water to other places, and soak into the soil along the way. So it is perfect to incorporate where there will be lots of water hitting as it can delay and soak up the water running to the bottom of any gradients. You might have seen these on large hills, or farms looking like a staircase. It prevents the water from rushing to the bottom and creating gullies - and from taking all the nutritious top soil with it. 


All you need to do is dig a long shallow trench along the contour of the land, and the water will flow where directed, spreading out the impact of the water. Swales can definitely be incorporated into your residential home by yourself, or if the job might be a bit bigger, consulting a landscaping professional is a good idea.  


The process:

  • Locate the water run off areas, where it rushes to as that will be where you need to prevent it from going to as quickly.

  • Locate were you could dig the trench to direct the water, maybe a rain garden, drain or other part of lawn.

  • Dig a trench 25cm deep or more along the contour of land, and adjust the width to your preference.

  • Place the excess soil on the side of the berm, downward hill side.

  • If building multiple swales, have an overflow spout running between them. Lastly, plant grass or plants on the berm to hold in place.


5. Kit out your backyard

A key part of preventing flooding is preparing for bad weather to come. You can do this by:
 

  • Using heavier mulch on plants so that it that won’t float away come some rain.

  • Planting more water loving grasses and plants in areas that take on water.

  • Using rain barrels under spouting to collect water in heavy rain. These can then be used after wild weather.


So there we have five ways you can prevent your lawn and garden flooding. Get creative and give it a go! Many of these methods can be done yourself, and now is the perfect time before winter sets in. Remember to do a few more preparations for wet weather and keep up with your lawn mowing even in winter. You could even consider working together if a few neighbouring properties are in the same boat with flooding issues. 


Related Articles

ADMIN
How to Plant a Hedge for Privacy
Hedge with a multi-story house in the background

So, you decided that you want some privacy to drown out traffic noise, nosey neighbours or to create some green space.

You don’t want to build a wall or a fence that doesn’t give you the privacy you want. Additionally, you want to add greenery that will add depth and dimension to your garden.

So, what is the answer?

Hedging plants.

A hedge that grows densely will keep out noise and prying eyes. And yet, it’s something that adds texture, colour and a home to local birds and insects. Growing a hedge is a great alternative to building a fence.

Picking Out the Right Shrubs

Before you can plant, you need to purchase the right shrubs for the spot where you want to plant them. You also need to know how high your woody plant will be—and if it creates the privacy you desire.

For example, how high do you want your hedge to grow—2m or 4m? To envision how high a plant will be, have someone stand on a ladder to give you a visual of that height. Some hedging plants, like photinia, grow up to 2m while michelia figo can grow up to 4m.

Then, you need to decide if you want a hedging plant that flowers or one that is an evergreen. Fortunately, you have a lot of varieties and species to choose from to create the perfect privacy hedge.

5 Popular Hedging Plants

Here are our five favourite hedging plants that reduce noise, create privacy and add to your garden’s greenery:

 
Close-up of bamboo

1. Bamboo: Do you want to add a song to your garden? Then you need bamboo. It’s fast-growing and a popular privacy screen. When the trees sway in the wind, they sound like they’re singing.


Bush hedge of pink flowers

2. Camellia: Which variety gives you a living privacy screen—japonica and sasanqua? The sasanqua is the faster growing of the two types. The sasanqua has small leaves and a higher sun tolerance compared to its japonica cousin. Plus, it provides beautiful blossoms in autumn.


Green hedges

3. Griselinia: A New Zealand native, the kapuka (another name for griselinia) is an evergreen hedging plant that does well in drought and coastal conditions. It also attracts bird to its berries.


Magnolia Figo hedge

4. Michelia figo: The michelia figo is part of the magnolia family. It’s an evergreen that produces fragrant blossoms. It works well as a privacy screen due to its density.


Photinia red hedge leaves

5. Photinia: The vibrant red leaves look brilliant as a hedge in your garden. This hedging plant also produces blossoms.


How to Plant Your Natural Privacy Screen

Now that you know what kind of hedge you’re going to buy, it’s time to plant it. You can plant each hedge in individual holes or a trench. It’s better to plant them in a trench, but you’ll need to keep them well-irrigated and fertilised.


Here are five steps to planting your natural privacy screen:

1. Preparing soil
For your hedging plants to succeed, you need to first prepare your soil. For example, you want loose soil so roots can anchor and water can percolate deep in the ground. So, if you have heavy clay soils, you need to work it to make it loamier. Likewise, if you have sandy soil, you need to add compost or organic material to it for better water retention.
 

2. Spacing between plants
How much space do you need between plants? It depends on your hedge variety and how dense you want it. Generally speaking, if you’re planting a 2m plant, you want to space the plants 1m apart.
 

3. Don’t mess with the roots
It’s tempting to comb out the roots of your new plants, but don’t do it. You can kill your new hedges.
 

4. Don’t forget to fertilise
 When you’re finished installing your hedges, feed them fertiliser, so they get a good start growing a deep root system. Plus, cover them and then add mulch to protect the roots as well as to keep the soil temperature even.
 

5. Make sure you water your new plants 
After you finish planting your hedges, you must water them immediately. And they need a good soaking, up to 3-5 cm of water. You also need to continue watering your plants every day for the next two to three days, then cut back to two days a week, and finally to one day a week. Of course, this routine is based on your region, including the season, weather conditions and soil type. Your goal is to keep the soil moist.


Crewcut operator trimming hedge with long trimmer

Maintaining Your Hedges

After your hedges get established, their maintenance is pretty simple:

  1. Regularly fertilise them

  2. Get a hedge trim about twice a year.


Your local garden centre can help you pick the right fertiliser to use. Each hedging plant has different fertilising needs. So make sure you follow the package directions. For pruning, it’s essential that you properly trim your hedges to respect the plant’s natural shape. But there is also more to it than a hedge trim every now and then. You also need to make sure that light and oxygen can get into the centre of each plant.


To save you time and aggravation, you want to hire a professional hedge trimming company to keep your privacy screen growing densely and beautifully. At Crewcut, our hedge trimming crews will bring new life to your natural privacy screens to protect you from wind, nosey neighbours and noise pollution.


If your natural screens need pruning, you can contact us by clicking the buttons below


Related Articles

Hedge TipsADMIN
Dead leaves smothering your lawn this Autumn?
Raking leaves on green grass

If you’ve been to your local park lately, you may have noticed something different – and I’m not talking about rubbish bins full of empties left behind by cricket fans. It’s the influx of greenkeepers and lawn cutting service council staff trying to do something about the state of the grass after a crazy summer of droughts and cyclones.

Unfortunately, the bad news is that your lawn at home isn’t in much better shape. When out lawn mowing and gardening, Crewcut contractors up and down the country have encountered lawns that are madly overgrown in some areas and sun burned yellow in others.


So, what can you do to rectify the ravages of summer, protect your lawn from Autumn weather and get your lawn in tip top condition ahead of winter?


Crewcut’s operations manager Pauli Horgan says that as the days get shorter and wetter, it’s a good idea to keep grass long so that it can soak up some rays, and to do your lawn a favour by letting air in to dry it out. He says a trap for young players is to cut off long summer lawn in one fell swoop at the end of the season. 

“Cutting off the long blades will leave the earth exposed and open to root burn when the ground gets cold.”

This makes sense – imagine if you were enjoying a late summer nap outside when someone simultaneously turned off the sun and stole your clothes. It would be a horrible shock to the system.


Two hands holding a clump of freshly mown grass

Exfoliate

Get yourself a stiff rake and go over any dry patches, to weed out the dead grass. Grass needs mowing less over Autumn because of the weakening sun but it does need to convert all the energy it does get into growth – there’s none to spare for dead weight. Pauli advises grooming and caring for the lawn to ready it for winter hibernation. Depending on where in the country you live, you will have to watch out for sogginess, frost and suffocation. The last applies to lawns nationwide, so don’t put that rake away even if you’re not doing any lawn mowing.


He says that Autumn leaves aren’t just a pain and an eyesore, they can kill: 

“You need to keep all leaves removed or your lawn is being smothered, the fallen leaves are choking the grass growth.”

So even if your lawn mowing schedule drops back to two or three weekly, keeping on top of garden clearing is just as important to the health and appearance of your lawn. Blowing and raking leaves off the lawn also removes dead grass and gives your lawn maximum exposure to the sun. (And who doesn’t love having some fun with the leaf blower? Just make sure you herd the leaves into a green bag). 
 

Aerate

From Northland to Southland, no part of the country is now immune to extreme weather and its likely many of you will have a bog at your back door at some stage over the next few months. Aeration is the practice of jabbing short narrow holes into the soil that provide channels for the air, fertiliser, rain and water to get through. This applies to water that might otherwise run off and not be absorbed into the ground, particularly if you have clay soil, advises Pauli. Rather than have your daughter’s rugby team go hell for leather on your turf, call your local Crewcut team. They are less busy with lawn mowing over the cooler months and happy to help with any gardening advice.


Further reading for Autumn gardening:
- All about Autumn pruning
- Autumn gardening tips
- There's more to hedges than trimming


Nourish

The lawn is going to need feeding ahead of the barren winter months and Pauli is a big proponent of including fertilising in his Autumn lawn mowing regime. The solution he advocates is a simple yet sustainable one. 

“Mulching clippings into the soil is ideal at this time of year to enrich the earth. Make sure you use a mulching lawn mower, not just a catcher mower with the catcher removed – this will just leave clumps that will smother and kill the grass.”


Purify

A new unauthorised biography of Prince Charles claims he has four gardeners who “lie flat, face down, on a trailer pulled by a slow-moving Land Rover” to hand pluck weeds, because of our future king's hatred of pesticides. If you too dislike pesticides but are on a lower budget, your lawn will love to be rid of energy sapping, eyesore weeds that you could pull yourself or call in a Crewcut gardener. 

It’s quite likely that you’ll also need to do some patching. Ensure you get the correct seed by taking a photograph of your lawn to the garden shop and asking an expert. Do not plant just before heavy rain (wash away) and do sprinkle top soil over the top and water daily for the first two or three weeks.


So, while serious lawn mowing takes a back seat from now until Spring, lawn maintenance is more important now than ever. After all, it’s when one’s vulnerable that one needs TLC and your lawn will need to be in its best possible health to face a hostile Winter and emerge strong again in Spring. Try not to forget about your lawn during those cold dark weeks ahead when you see it less and less, because it is suffering out there! Ultimately, grass is a plant and like any other it needs love and attention.


Related Articles

Garden TipsADMIN
All about Autumn pruning
Brown dog lying on autumn leaves

Autumn in the garden can be a dismal time. The food supply is dwindling, the lawn is soggy and when you gaze upon your domestic forest you’re faced with the full trifecta. There's summer overgrowth, a shaggy orchard and the resident maple dropping its leaves in the guttering.

Tree pruning is necessary to keep nature in check and ensure the garden is a safe place. Untamed or diseased trees will not only fail to flourish or bear good fruit, they can be a real health hazard to humans. Branches that are overgrown or weakened by disease can take an eye out or crush a person. Remember to be sensible and call in the experts if a tree pruning job is too big.


Cut don’t kill!

It’s vital that no diseases develop as a result of your tree pruning efforts. If your tree develops a disease it could die, which is devastating if it’s a fruit tree that has only just started to bear after years of nurturing. To minimise the chance of spreading infection and to ensure you give your tree the best shot at post-surgical recovery:

  • Clean/sterilise equipment so you don’t transfer bacteria between plants

  • Prune on an angle so water doesn’t pool in the cuts (use pruning paste if you wish)

  • Prune on a dry day so cuts heal quickly

  • Cut away all dead, dying and diseased wood


Pink flower bush

Flowering trees

Don’t be shy about cutting back your dried out dead hydrangeas now: leaves, stalks and all. They will bounce back with new growth next spring. 

Trim into shape sun-loving shrubs that prefer to hibernate over winter and won’t fancy their snooze being disturbed by a nasty haircut. This includes lavender and rosemary. Deadhead your roses but wait until winter before you do any pruning – any new growth will suffer in the winter cold. (However, if you live in the north and your climbing rose has exhibited runaway growth due to the hot wet summer, wait for flowering to finish and then you go for it!).  

With all flowering trees and shrubs, remember to cut at least 2cm-3cm above new bud growth, in a downward direction away from the new bud.


Climber tree with red fruit

Climbers

The long, hot, wet summer means the Crewcut gardening team has been overwhelmed with demand for a garden tidy up service. Jasmine, wisteria and other climbers are running riot, canes sprawling over the deck, garden and into the vegetable patch. In a couple of months deciduous vine leaves will be falling too fast for you to sweep up, so now is a great time for pruning trees that should be thinned out.


Fruit trees

Berry bushes – once finished, thin out to ensure bumper crops next season. Use secateurs to maintain control when you prune back tendrils to encourage fresh growth in spring. Remove spent branches, dead wood and unproductive ‘traffic’ clogging the main highways. When your stonefruit have finished bearing, it’s safe to pick up your loppers and start tree pruning. There are several things to consider before you start. First, the age of the tree – just like people, it’s best to shape trees from infancy. So, if you want to block the view of an ugly telephone pole, leave the central leader (trunk) and prune the lower branches.

Prefer a low, spreading lemon tree that’s easy to harvest for cocktails? Remove the central leader to encourage sideways spread. This will form the tree’s future shape. Remember – you want the tree to put its energy into producing fruit, not sustaining extraneous growth, so don’t be shy about pruning away branches that are crowding the party. Tree pruning is trickier with saplings, but you must try to envision the future shape of the tree and imagine what it will look like with branches full grown. You don’t want to cut off a branch at the base if it will leave an ugly gaping hole in the eventual shape of the tree.


Hairy hedges

There are some extraordinary hedges about at present – solid dark green boxes with metre-long pea green shoots waving wildly from the top. Crewcut has dedicated and experienced hedge trimmers but if you’re going to tackle these yourself, remember to put safety first. A stable ladder and preferably a second pair of hands to pass you equipment and keep the ladder steady. Check the underside of your ladder’s feet for the state of the grip – it may need new rubber shoes. Don’t overstretch, get down regularly to move the ladder or set up a trestle. If you’ve a super thick yew, you might be tempted to walk and cut at the same time but this will likely result in a sprained ankle.


Dead trees are deadly

Every winter, the country is subjected to increasingly violent weather events, resulting in loss of property and occasionally life. In January, a Rotorua woman died when a tree fell on her car and earlier this month in the Northeastern United States five people, aged six to 77, were killed by falling branches and trees during a two-day storm. Five people in one storm killed by trees!  


We can’t stress enough the need to ensure the safety of your family, property and passing pedestrians and motorists. Make tree pruning a priority before winter. Take a good look at each tree and if in doubt, have an expert come and assess your property for anything that might pose a safety hazard should a big storm hit. It’s better to be safe than sorry so take it out or lop it off. Two children in the US were actually inside their homes when trees fell through the walls. Trees near the street and out on the berm should also be inspected for signs of rot and your local council notified if necessary. The hot, wet spells in summer that give us wonderful vegetable harvests have the flipside of fostering rot and disease. In the past, nature evolved together with the weather. Now, climate change has thrown it out of kilter and it’s struggling to establish its defences.

Finally, before you go outside, remember the first rule of tree pruning – safety first. Protect yourself against falls, cuts and eye injuries and call on your Crewcut team for advice or assistance any time. 


Related Articles

Hedge TipsADMIN
Autumn Gardening Tips

The onset of cooler temperatures is the opening of a starting gate for gardeners champing at the bit indoors, clutching their forks and trowels. Previously limited to moonlit watering, they let loose attacking the weeds and bugs and carry everywhere their lists of tasks and plans.

At this time of year there is plenty of vegetable gardening to do, but not much in the way of instant reward. Most Autumn gardening involves either cleaning up after the last harvest of summer or tending winter seedlings that won’t deliver for the table for weeks or months. In between is a great deal of weeding and lugging about of compost. You can get a lot of fun from planning your winter garden, sketching it out on paper, trying new varieties of vegetable and deciding which to sow in the greenhouse and which to plant straight from seedlings bought from the garden centre. 

A greenhouse can be just a two-shelf number with a plastic cover from the hardware shop. Growing your own seeds is very satisfying – just remember that one seed sometimes means one vegetable (broccoli) and sometimes one plant (beans) and sow accordingly! Seedlings also make great gifts.

Greenhouse with saplings growing inside
  • Remember to wear gloves and a mask when opening bags of bought potting mix, because of risk of legionnaire’s disease. Airborne bacteria from the soil can cause lung infection.

  • Stock up on neem oil, a natural solution to battling most bugs that love your vegetables.

  • Downy mildew is a fungus that develops on the underside of the large leaves of cauliflower, broccoli and many other vegetables. It loves humidity – and loves Auckland! Most gardening suppliers have a product to combat it, you might even be able to find gardeners in Auckland to help you out.

Prepare the soil

On a sunny day, go through your garden and pull out all dead vegetable plants and any that have gone to seed or bolted. Weed your beds and add compost. Practise green gardening by recycling - stakes and ties pass seasonally between tomatoes and beans, and 1.5l transparent plastic bottles (with labels and ends removed) encourage both celery and leeks to grow strong and tall. If you plan to give up vegetable gardening until salad days return (not unwise given how cheap winter vegetables are), then it’s tempting not to weed it at all. Cover the garden in newspaper (weigh it down) to choke weed growth and unveil at the end of winter.

Much of vegetable gardening success comes down to composting and Autumn is the best time to get a new system started so it has time to decompose before it’s needed in early Spring. Once your household gets into the groove, composting becomes a way of life, plus it saves on rubbish collection fees. The best bin is the type with drawers at the bottom for easy access to the good stuff while you keep loading the goodies in the top. Keep the mix wet with the odd feeding from the hose and of course, throw in those grass clippings. If your garden is low on soil, then an all-purpose garden mix (and compost if you’re short) will bring the garden back to life again.

Auckland Council is encouraging Aucklanders to reduce food waste and is offering free workshops, online tutorials and discounts on worm farms, compost bins and bokashi systems – find out more here. There’s even a food scraps/compost matching service, kind of Tinder for fertiliser?

While you’re in the vegetable garden, check on the health of your herbs. Basil won’t be happy about the cooler weather, so bring him inside. Likewise, any houseplants that have been holidaying in the sun – peace lilies should come back in now and any tropical pot plants.

Field of yellow and red tulips

Bulbalicious

Not all autumn gardening is dull! Here at Crewcut, we love bulbs because they’re hardy, self-sufficient and they set off a lawn to perfection. It’s wonderful after a grim winter to suddenly see the first merry daffodil faces, followed by beautiful tulips, elegant irises and cruisy colourful freesias. Planning this display is masses of fun and helps take the edge off the upcoming cold season. Some bulbs are high maintenance, so if time-consuming gardening maintenance isn’t your thing, best avoid hyacinths.

Try framing the sunny end of your lawn with masses of daffodils or clumps of tulips, set little crocuses in and around a rockery or along a path. Many freesias have a beautiful smell (check the pack) so plant near the house or in a patio pot. Garden centres are always well-stocked with bulbs, or order online from a nursery for more variety. New Zealand has several excellent, reliable bulb nurseries.

Remember – when the flowering is over, wait until the leaves have died before disturbing the plant. The leaves are still collecting energy from the sun and storing it in the bulb for next year’s growth. Depending on the type of bulb, you can dig it up for storing in a dry place, or in some cases (daffodils, crocuses, freesias) leave bulbs in the ground to naturalise (wait for the leaves to brown before snipping off).

  • Summer bulbs aren’t planted until spring – these include dahlias, begonias and gladioli.

  • The pointy end is the stem and the messy, rough side is the root system. Plant pointy side up.

Gardening Maintenance tips

  • Check fastenings on plants and trees such as beans and climbing roses. Make sure ties aren’t too tight or in a position that will hinder new lateral growth.

  • Newly planted saplings, including hedges, will need support against strong winter winds so choose a stake size accordingly.

  • If your deck or front steps are mossy, get them water blasted so they don’t become a slippery health hazard over winter. Do this now rather than waiting to do it in the cold and rain.

  • Clear your section of junk (broken kids’ Christmas presents) and take it to the local recycling centre (tip). Spending all winter watching it rust on the lawn is just depressing on several levels.

  • An exceptionally long, hot, wet summer has resulted in triffid-like tendrils all over the place and we’ve been inundated by SOS calls from hedge owners. There’s a lot of pruning that you can do with your secateurs to keep things tidy and in check. Look out for upcoming articles here for pruning advice.


Related Articles

There's More To Hedges Than Trimming

One of our valuable Crewcut customers wrote us this piece while looking for help with their hedges


The hedge is nature and human working together to create the ideal wall – easy, cheap and environmentally friendly. With ongoing care, it can also be beautiful. But what else can be done aside from hedge trimming to give you the best hedge on the street? North Shore Crewcut operator, Larry, says that when it comes to ongoing care, there is no ‘best’ tree species for a hedge.


“It really comes down to personal choice. If thought is put into the planting of the trees, then the hedge can be kept looking good through regular maintenance.”


If you want a low maintenance hedge, he suggests buxus as a good choice and says that, along with acmena and pittosporum, it’s very popular with Kiwis.


It’s all about the base

Garden shovel in the ground

Planting has a big effect on how easy the hedge is to control in the future. Larry says that foresight is crucial. “You have to plant for how things are going to look in the future.”
Consider your needs are before you choose the trees. I wanted a fast-growing hedge to screen out the neighbour’s wall and I wanted a tree with light foliage that would be easy to prune and would not block out the light. Attractiveness was important because the hedge is near our front door and finally, my partner had insisted on a native. After much enjoyable research I chose pittosporum tenuifolium Wrinkle Blue, with a height after 5 years of three metres, although I’ll be keeping it at about two.

 I dug a trench rather than individual holes so that I could play with the distance spacings marked on a piece of string (also, it was a lot easier on the back!). This method meant I could lay fertiliser along the trench to be reached by future root growth, rather than just under the root ball. Because of the proximity of the wall I tossed in some small bits of scoria for drainage and scattered sheep pellets and fresh compost on top. Early and continual pruning of the branches at the back ensures the hedge won’t become congested against the wall.


Lady trimming the hedges

Too close for comfort

Surprisingly, Larry says that many hedges aren’t the result of meticulous planning but of overeager gardeners. “The main thing people do wrong is they plant things for how they look now, so they plant trees too close together and end up with a hedge.”

This strategy will be difficult to keep looking tidy if the trees have different growth rates and characteristics, however it can make for an interesting effect. I am actively hoping to incorporate an existing camellia into my new hedge. It’s at the end of the hedge line – I doubt it would have survived in a more central position.


Flower bank

Pink flower bush

Camellia hedges are very popular, with sasanqua and hybrids the best for hedging (I have a japonica Roger Hall and it’s quite woody, with slow, straggly growth). “If It’s a flowering hedge then the best time to trim depends on when the hedge comes into flower,” says Larry. Sasanqua are winter bloomers, so early Spring is the time to get out the shears or call in a hedge trimming professional before the hedge launches into its annual growth spurt. Water well because they have shallow roots but since they are also prone to root rot from waterlogging, mulching is especially important. (If you’re a camellia fan, make a seasonal visit to the impressive forest at the Auckland Botanic Gardens).


Let the light in

Larry says that when you trim your hedge depends on its growth stage and the type of tree. “Some people like to trim it in spring because it will grow faster.”

If your hedge is difficult to control, trim the trees twice yearly, in early spring and late summer. I keep a garden diary and it’s invaluable. Over winter, make a note of whereabouts your house becomes dark and gloomy due to lost light and which parts of the garden are dampest and sunless. Are they shaded by a wall of greenery? If so, you may wish to significantly cut back hedging in spring.  Likewise, if you are planning to plant a hedge later this year, make a note of where your house gets its winter sun and don’t plant where it will be blocked. You’ll be glad you have the information.


Don’t leave it too late

Although common advice is to prune deciduous hedges in winter when the trees are dormant, I detest gathering fallen leaves, so I trim in early Autumn. This isn’t limited to hedges – we have a leaf blower just to cope with the wisteria. A single morning spent carrying branches and green clippings to the garden bag is preferable to the misery of raking up leaves all Autumn. You know it makes sense.


Taming the hedge hog

Have an enormous hedge, inherited from a previous owner? The kind that as a kid you had great fun making huts inside? Rampant real estate inflation has dramatically increased the cost per metre of property, but you can regain some of your precious section by cutting back heavily. We cut back our monster laurel hedge and salvaged enough space for a bike shed.

However, it’s not your own hedge that is giving you trouble but the behemoth encroaching from next door, don’t get out the chainsaw as a first response. Asked what should be done if the neighbours’ hedge is a problem, expert Larry says, “Personally, I’d go and talk to them about it.”


If you're looking for someone to deliver a top-notch hedge trimming service this coming autumn, be sure to leave it to the professionals. Contact Crewcut for your free, no obligation quote on 0800 800 286


Related Articles

Hedge TipsADMINTrimming, Hedges
How to stop your dog destroying the garden
Spaniel dog on the grass running towards owner

Nothing brings a tear to your eye quicker than seeing your freshly planted garden trampled, or your neatly mowed lawns sporting fresh new holes. While your garden and lawns may have been your pride and joy, your dog evidently wasn’t happy with them and felt they needed some minor alterations.


If you’re inclined to disagree, it’s time to take action. While a stern word and a sit-down chat aren’t going to stop that troublesome behaviour, some of these tips below might.


Supervise Their Yard Visits

Rather than leave your furry friend to their own devices in your backyard, why not take the time to go with them? The less time they spend on their own, the less likely they are to resort to destructive behaviour that requires a significant clean-up job. While dogs love being outside, they do have relatively short attention spans. Therefore, that fluffy tennis ball begins to look far less appealing than your gorgeous flower bed that’s lacking a bit of trampling courtesy of Rover.


Take the time to play tug of war, throw a frisbee, play a game of fetch, anything that both stimulates your dog and stops it from adding new and unappreciated focal points in your yard.


Utilise Fencing

To protect your prized peonies from your destructive dog, it might be worth investing in fencing that acts as a deterrent. While the fencing doesn’t have to be six feet high, serving as a barricade, it can be a way in which to show your dog their intrusion into this area is not appreciated. Whether you had a gardener complete the work or you did it yourself, any method of protection is going to save you both money and time in the long run.


Distract Them

Dog waiting for treat on its nose

Dogs require constant distraction, and you’ll soon learn what happens when you don’t. That’s when holes are dug in your freshly seeded lawns, and when garden beds become flattened. While you can hire experts to fix the problem, isn’t it best to avoid it in the first place?  To distract a dog from causing havoc in your yard, be sure to exercise them every day.


In most cases, a brisk stroll around the block won’t do. Trips to the dog park, ball games, and beach adventures are all valid ways in which to tucker out your pup and stop that destructive behaviour. After all, it’s not a naughty dog that sets out to trample the tulips; it’s a bored one.


Try Home Remedies

If emotions are running high because your previously immaculate lawn is looking like a battlefield, it’s time to try absolutely everything. If exercise, distraction, and fencing are not enough to stop your pup, then maybe home remedies are. Dogs are not fond of the smell of white vinegar. Therefore, you can use this dislike to your advantage. In your dog’s “hot zones” – the areas in which they tend to flex their destructive muscles, spray the area with vinegar.


Alternatively, cayenne pepper is equally as beneficial if your pup tends to dig in the same spots over and over again. A smattering of cayenne pepper from your spice rack can often be enough to have them opting for “tamer” hobbies such as chew toys.


Create Their Own Space

While there’s no denying that man’s best friend loves to roll around in the grass and enjoy the fresh air, they might not have enough stimulation in that space to keep them entertained for hours on end. So, instead, they make their own fun at the expensive of your beautiful gardens and lawns. 

If you find that stress, anxiety, or separation is not the cause of your dog’s destructive behaviour, but boredom is, then creating their own area in the backyard can help to at least partly solve the problem. Offer plenty of toys to play with and chew, or even tunnels to run through if they’re agile and active pups.

To create a space just for them, you may like to take it one step further and attach them to a proximity lead. This lead system is a stake installed in the ground with a wire that’s available in various lengths. While your dog can still run around and enjoy themselves, they may be just that little bit too restricted to gain access to your gardens. Just remember that dogs are social creatures and alone time should be kept to a minimum.


Your dog doesn’t set out to be naughty, even if it seems that way. However, even being compassionate to your dog’s anxiety, stress, or boredom doesn’t fix your now trampled lettuces. If you’re getting ready to contact the experts to recreate your garden or mow your lawns, then there’s no time like the present to begin altering that destructive behaviour.


Related Articles

Save mega bucks & grow your own avocados
Plate with avocado on toast with eggs, tomato an basil leaves.

Avocados are very “on-trend” at the moment. They go beautifully with eggs on toast, on a bagel with olive oil and feta, or even just cut in half and eaten with a spoon! In fact, thumbing through the pages of any current magazine will just about bring up a new recipe for how to enjoy them every which way. However, given the price of them – anywhere between $4-7 each, you may just be looking to mortgage your house to satisfy that avo craving. Therefore, what’s the harm in trying to grow a tree? It could save you a fortune while uncovering a hidden green thumb.


Many of our franchisees also enjoy running avocado orchards when they’re not gardening, tree trimming, or behind the mower. It can be a rewarding process, so why not read our how-to guide and grow a tree for yourself?


The backstory of the Avocado

The avocado has its roots back in south-central Mexico where it began life in 7,000 BC. However, in recent years, it was discovered that Incan mummies in Peru dating back to 750 BC were buried with what appeared to be avocado seeds.


As early as 500 BC, avocados were cultivated in Mexico, but they were known as Persea Americana. Eventually, they became known as aquacate which, in English, became avocado. Avocados are now a staple of many South American diets, but they also feature heavily in the west as well. People consume them for breakfast, in guacamole, and even in desserts such as cheesecake or mousse.


Here in New Zealand, not every part of the country is blessed with the ability to grow them. They grow beautifully in Northland, Auckland, Hawke’s Bay, Bay of Plenty and Gisborne, and some people have even had success gardening them in Golden Bay and Nelson as well. However, those in the deep south will have less luck due to the colder conditions.


A large avocado on an avocado tree

Can I grow them?

Even if you love gardening and are quite good at it, you may still struggle to grow an avocado tree – depending on your conditions and where you live. You need to have protection from the wind, as well as a warm and sunny spot in your yard. What’s more, you must have at least two metres of free-draining soil due to the sensitive roots.

You can grow avocado trees in coastal locations due to their salt tolerance, but even the slightest hint of frost will have them withering up and dying. A light frost will burn young growth, while temperatures as low as -3 degrees will kill young trees.

The slow way

Growing an avocado tree from seed can give you a sense of pride, even if you’re waiting 15 years to enjoy the fruits of your labour. The next time you get out a personal loan and buy an avocado, keep the seed. Here’s what to do with it.

  1. Wash it and pierce it with three evenly-placed toothpicks.

  2. Fill a glass with water and put the avocado on top with the bottom half in the water and the top half dry. The toothpicks will keep it in place.

  3. Place the glass in a warm area but not in direct sunlight.

  4. Wait. Roots and a stem will begin to grow and when they are 6-7 inches long, cut them back to three inches.

  5. When the stems have leaves again, and the roots are thick, plant them in fertile soil with half of the seed exposed.

  6. Water it but don’t drown it. Keep it in partial sunlight.

  7. When the stem grows to around 12 inches, cut it to half the height to encourage new shoots.

  8. Once the sapling has outgrown its pot, get your gardening gloves out and plant it outside in good sunlight. You don’t need to plant this shallow-rooted plant too deeply.

To literally enjoy the fruits of your labour, you are in for between five and 13 years of waiting. After maturing at around five years old, you may see as much as 200 to 300 avocados per year.

 
Avocado saplings 
 

The fast way

If you don’t want to wait over a decade to enjoy an avocado and salmon bagel, then you can opt for a faster method. Instead of growing the tree from seed, you can buy a pre-grown tree from a reputable garden product supplier. Then, instead of having to painstakingly fight to keep it alive, you merely have to carry out tree trimming to keep it in tip-top shape. It might take a few years for it to produce fruit, but it’s better than risking a 15-year wait.


How to carry out tree trimming of your Avocado tree

Not everyone is a gardening expert, and that’s okay. There are plenty around who can help you out when you require it. If you want your avocado tree to produce fruit and thrive for many years to come, then it’s crucial to stay on top of your tree trimming requirements – generally in Spring.


If you believe you can tackle the task on your own, here’s how to keep your avo tree in tip-top shape.

  1. Remove damaged, dead, or diseased parts.

  2. Remove crossing branches or any part of the tree that may cause it not to grow as it should.

  3. Shorten long branches.


Tip: Never remove more than 20 percent of the tree at any one time. If you haven’t carried out tree trimming on your avocado tree in some time, it may take several years for you to bring it back to its former self.


It’s clear to see that to get that coveted avocado, you need to be willing to put in the hard yards. Otherwise, you may end up like the several thousand New Zealanders who put on a brave face as they buy a $7 avocado from the supermarket.


Related Articles

Mulching Tips
Small garden plants sitting under bark mulch

Learning how to mulch can provide no end of benefit to the avid gardener. Not only does the mulching process help to stop frostbite and retain moisture, but it can be so beneficial for plant growth while preventing weed growth at the same time.


If you’re tired of spending all your precious free time on weekends on your knees pulling out weeds, then while not learn how to mulch? We’ve included various options as well as the benefits of mulching below. Once you try out these methods, you will be surprised at how well your garden thrives as a result.


Grass Clippings

If you are always out and about mowing your lawns, then you will no doubt have plenty of lawn clippings available. Rather than pay to take these to a waste disposal facility or pile them in the corner of the yard, why not use them to your advantage? Grass clippings, believe it or not, are perfect for mulching. Just spread them over your garden beds to help with suppressing the growth of weeds. The best part is, they’re free.


Given the water content, however, you will find they decompose reasonably quickly. If you have a considerable amount of lawn clippings, this may not be a problem for you.


Newspaper

When you have finished catching up on the daily news in your local newspaper, you will find there are many benefits of mulching with it as well. Rather than throw it in the bin, you can layer the sheets around your favourite plants and help to keep the weeds away and your plants moist. For best effect, layer between four and eight sheets around your plants then wet them. Keeping them moist can help to stop them blowing away in the wind as well.


Bark

When you’re learning how to mulch, or you’re getting gardening help from an expert; you will soon realise that bark is one of the most effective mulching products around. You can use it with your shrubs, encompassing garden beds, and even around trees. The reason why there are so many benefits of mulching with bark is that it’s long-lasting. Unlike lawn clippings and newspaper, it lasts a long time, meaning you can spend less time maintaining your garden and more time admiring it.


However, if you like to dabble in transplanting, moving plants, and creating space for new plants, bark may not be the best mulching product for you. It doesn’t play nice with soil, making it exceptionally difficult to remove without interrupting the dirt.


Shredded Leaves

Most yards will have one or two trees that drop leaves in autumn and winter. While they are perfect for blocking your gutters and messing your entrance ways, they actually have a positive purpose – mulching. By collecting these leaves, you solve two problems – your plants get crucial nutrients, and your yard benefits from a clean-up.


You can use shredded leaves anywhere for mulching, and they even encourage earthworms to work their magic as well. As a result, they help both your plants and your soil – while being free for the average homeowner.


Straw and Hay

Straw and hay, when you use it correctly and know how to mulch correctly, can be exceptionally beneficial for your garden. However, you do need to be careful and make sure you purchase weed-free hay. Otherwise, you’re creating more problems than you’re solving. Weed-free hay can keep your weeds at bay, retain that all-important moisture in your soil, and add organic matter as well.


When you add straw or hay for mulching, be sure not to pile it around roots, stems, or tree trunks. Piles of hay is an open invitation for slugs and rodents to come out and play.


Plastic

In a world that’s actively trying to promote less plastic use, it may seem odd that it can be beneficial for your garden – particularly as it doesn’t break down. However, if you have any old black plastic sheets lying in your back shed, you may as well re-use it rather than throw it into landfill.


When you spread black plastic sheets tightly over a flat soil area, the sun’s heat transmits with it and creates a hive of activity within your soil. The soil warms up and then prevents weeds from growing, retains much-needed moisture, and even helps vining crops from succumbing to rot and dirtiness.

If you have infrared plastic at home, then even better. This type of plastic can also help to produce better fruit crop yields.


However, there is a right and wrong way to plastic use. You need to spread it out tightly over the top of your flat soil base, poke holes in it, then plant seeds in those holes. It may be hard to water those plants – especially in their early days, so you may also like to install drip hoses to help keep it moist while they grow.


Plastic is beneficial for garden beds, but you shouldn’t use it for mulching under shrubs. It can, in a word, choke the plants as they begin to grow roots closer to the surface. In essence, there are no benefits of mulching with plastic for more mature plants.


Mulching in Winter

There is a common misconception that mulching during winter is not necessary because the sun isn’t out to heat up the soil for the best effect. However, mulching protects your plants from frostbite, so mulching in winter is a good idea. It stops the roots from freezing while preparing it for a hit of growth in the spring months.


If you know mulching is essential, but you’re not sure how to approach it, you will find there are plenty of garden and lawn experts you can contact in your local area who are only too willing to help. There are also many benefits of mulching, so there’s no time like the present to arm yourself with newspaper, bark, plastic, leaves, or straw and hay and start the process today.


Related Articles

Keeping Cats Out Of Your Garden
Small cat hiding in the garden bushes

There’s no denying that cats are some of our favourite pets to own. While they’re very independent animals, most New Zealanders seem to think they’re worth keeping around. After all, if they weren’t, 44 percent of New Zealand households wouldn’t have at least one.


However, for all their companionship benefits, there’s one bugbear many people have. Why must they use our gardens as their litter box?

The truth is, cats have to use the toilet somewhere. Unfortunately, that tends to be the nearest and most attractive looking garden – and it’s typically not the cat owner’s, either. Therefore, many homeowners tend to find that the entire neighbourhood’s cats consider their property as a public restroom.


For many, it’s a frustrating and endless experience. Imagine having your garden looking neat and tidy, only to pull up a cat poo along with your carrots? While it seems like you’re facing an uphill battle with troublesome Toms, it’s not a battle you can’t win. Here are a few of the many ways in which you can keep cats out of your garden.


Motion-Activated Sprinklers

It’s a well-known fact that most cats hate water. Therefore, choosing to install motion-activated sprinklers after just investing time and money in a garden clean-up is a good idea. Now that you’ve rid your property of all signs of cats, you’ll want to keep it that way.


As soon as a cat comes near your sprinklers, they will get the shock of their life when they’re sprayed with water. Most importantly, however, they’ll remember the experience and will be unlikely to return.


Chicken Wire

Whether you’ve contacted the experts to help with your new vegetable garden, or it was a labour of your own love, you’ll be wanting to keep it as the picture of perfection. However, between the birds and the cats, it can sometimes feel like an impossible task. It doesn’t have to be, not if you invest in chicken wire fencing.


Not only will installing chicken wire over your vegetable garden protect it from birds, but it will stop cats from using it as a restroom as well. They can’t dig in the dirt to cover their business, nor will they like the texture on their feet.


Pine Cones

One of the primary ways in which you can discourage cats from entering your garden is by ensuring the experience is not a pleasurable one. You can achieve this in many humane ways. Cats have sensitive feet, so if they stand on something that doesn’t feel pleasant, they won’t be in a hurry to relive that experience. Therefore, if you happen to have access to pine cones, take advantage of them. If you spread pinecones around the common toileting areas of visiting cats, they will be less likely to find your gardens that appealing.


Citrus and Coffee Grounds

Just as you don’t like the scent of cat urine and poo, cats don’t like the smell of your everyday citrus fruits and coffee grounds. Therefore, it’s in your best interests to take advantage of their hate for this odour.

Collect all your coffee grounds from your morning brew and purchase citrus fruit. As soon as cats smell these odours, they’ll take off in search of greener pastures – hopefully, their own backyard.

However, it’s crucial to know that you should not place citrus and coffee grounds on your plants, as these can have a detrimental effect. Instead, surround your garden beds with them.


Lavender

Lavender is a lovely plant that many people prefer not to own because it can grow like a weed. However, in the spirit of keeping cats out of your yard, lavender is going to be a welcome addition to your garden. Not only can you enjoy the scent as you traverse your garden paths, but cats will turn their nose up at it. Lavender, eucalyptus and similar strong-smelling herbs and flowers are something cats do not like at all.


Therefore, if you were to plant them in your garden – especially near toileting hot spots, there’s every reason to believe you can benefit from fewer feline friends making themselves at home.


Cayenne

If you’re at your wit's end and have tried almost everything, then it might be in your best interests to give cayenne a try. While it’s not an effective method that deters all cats, it has been known to work on the majority. And, if you can get rid of at least a few cats from your garden, then it’s going to be beneficial in the long run.


Cats don’t like cayenne pepper because it features capsaicin. Capsaicin is the component of pepper that makes it hot – not only to humans but cats as well. If cats were to step on something coated in cayenne or taste something featuring it, they would be less than impressed.


To use cayenne to keep cats out of your yard, buy flaked cayenne and sprinkle it around your garden. When it rains, you will need to repeat the process. Otherwise, you can combine dry mustard, cayenne pepper, and flour together as a reliable cat repellent for use around your home.


Many of us adore cats. However, generally speaking, they are less desirable when they’re defecating amongst your potatoes. Get in touch with the experts for garden clean-up help, then try any of these cat repelling methods to get rid of them for good.


Related Articles