Is Having a Lawn Really That Important?
Do we really need lawns?

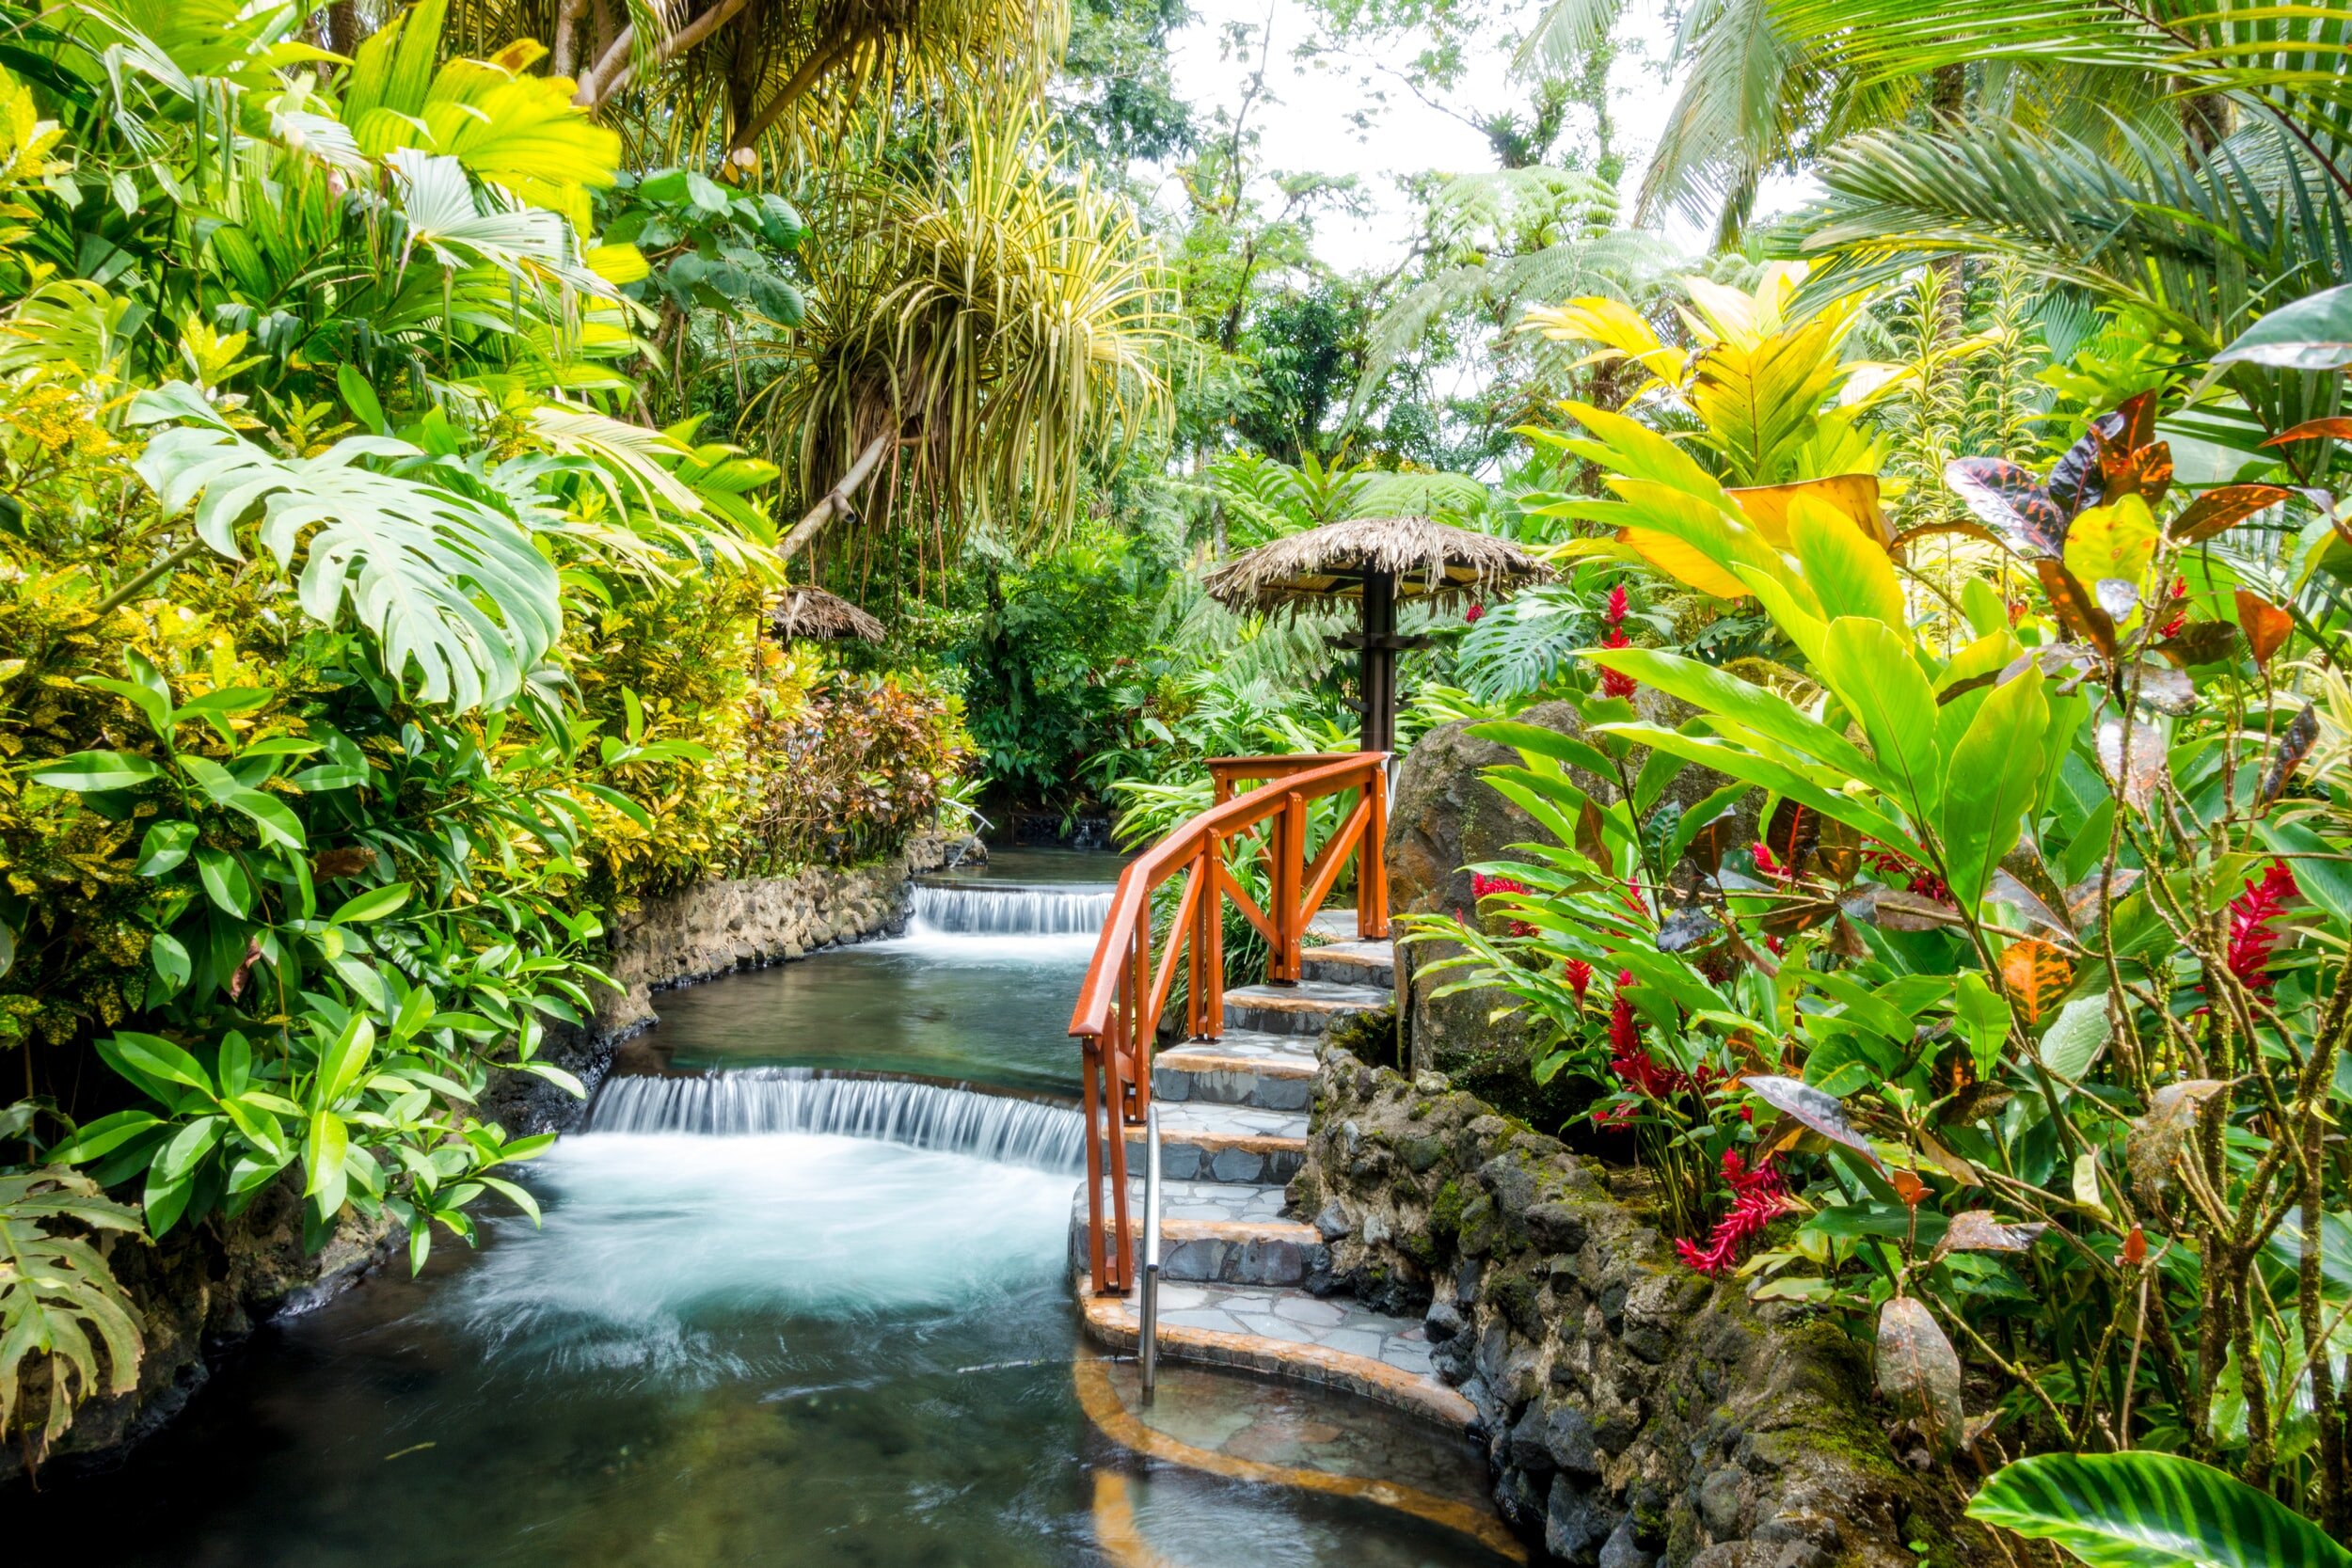
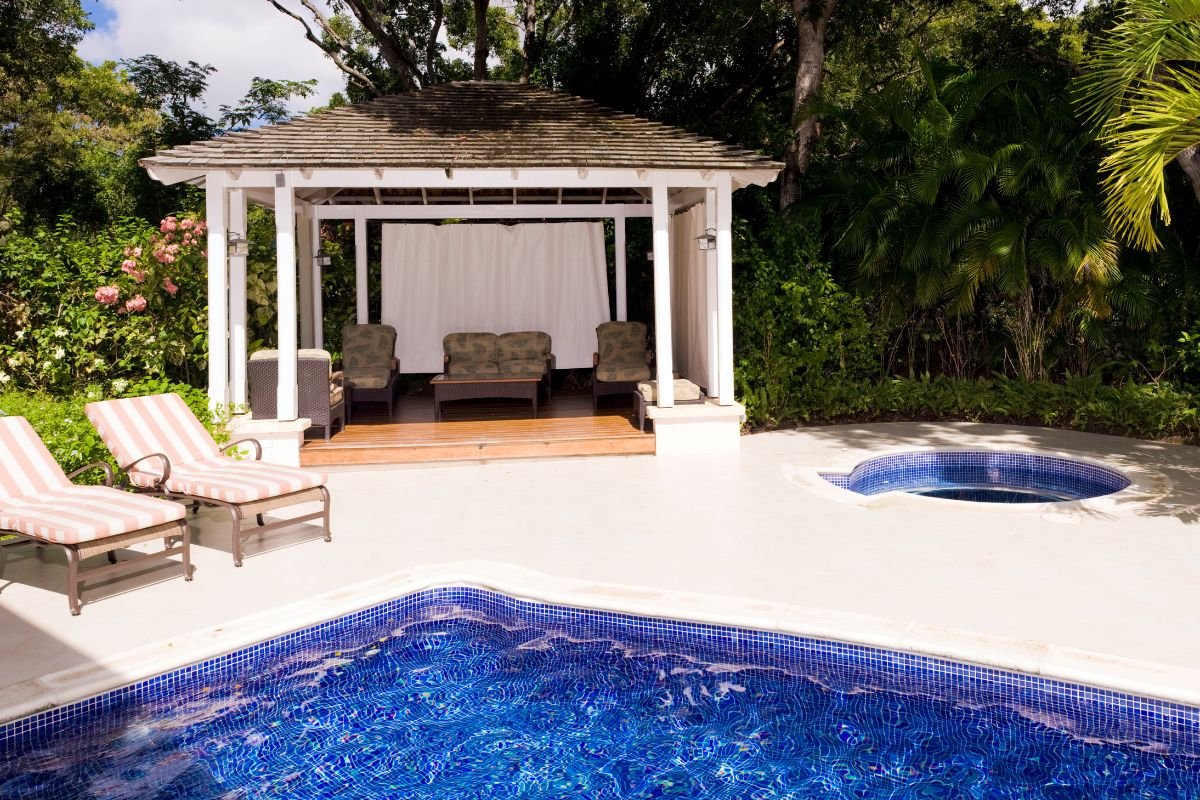
While apartments are popular in some of New Zealand’s largest cities, you still won’t find many Kiwis who would say no to having a yard to call their own.

However, with the sheer amount of maintenance they can often require, you might be tempted to rip up your lawn in favour of something more low maintenance, such as paving stones or concrete. Before you get stuck in, take a moment to consider whether having a lawn could be important – not only for you but the environment.


Rainwater Filtering

The next time your town or city experiences rainfall, and you shouldn’t have long to wait, take notice of what happens to rain on your lawn and paved areas. On a lush, well cared for lawn, water is absorbed into the soil and grass roots.

Unless the rainfall is particularly heavy, that’s where it generally remains. However, rain on pavement tends to react much differently. It pushes dirt, debris, stones, and other materials into your storm drain and beyond. With enough muck, storm drains can become blocked.

That’s not to say that having grass stops your storm drains from becoming blocked, but it gives the rainfall somewhere to go to be filtered of all those nasties, which is often its final destination.   


Air Filtering

If lawn wasn’t helpful enough in being able to filter your rainwater, it can also filter your air. Grass, like all plants, absorbs airborne pollutants like carbon dioxide and sulphur dioxide. It then replaces them with oxygen which, of course, we use to breathe.

Lawn also filters the air by trapping dust, dirt, and smoke particles. Without it, you may be seeing all that dust and dirt scattered over your concrete areas, your home, and even on your windows.


Cooling Properties

In the heat of the summer sun, there’s something quite satisfying about tip-toeing across your concrete pathway to the soothing coolness of the lawn. The temperature difference can be significant and is definitely noticeable when you compare rural areas to cities.

Grass, plants, and trees all have the ability to cool down an area, whereas hard surfaces like concrete retain heat. If you live in a particularly warm part of the country, it may not be in your best interests to replace grass with hardscapes.


Soil Structure Improvement

For many homeowners, dealing with soil compaction can be frustrating. When it rains, water can pool on the surface, and it can also look quite unsightly. Growing lawn may prevent this from becoming a problem.

As grass grows through pores in the soil, it’s helping it to remain loose and crumbly. This allows the soil to absorb more water while providing a healthier foundation for the grass to grow. It’s a mutually beneficial relationship with the earth helping the lawn and the lawn helping the earth.


Wildlife Benefits

While not everyone likes sharing their lawn with insects and birds, you can be doing your local wildlife a favour. The more lawn area you have, the wider the variety of delicious snacks for birds that can be present, like worms. You then get to enjoy knowing you’ve done your part for the wildlife in your area.


Noise Pollution Reduction

It’s not hard to see how grass could function as a form of noise insulation. Compare the sounds of children playing happily in a fully concrete schoolyard between buildings and a grass play area between buildings. Noises can bounce off all-concrete surfaces, whereas adding grass in the mix allows for some of that sound to be absorbed.


How Much Do Lawns Cost in NZ?

If your property doesn’t have a lawn, but you’d like one, you might be wondering how much they cost. That depends on how quickly you want to see results and whether you want to manage the entire growing process yourself.

A cost-effective option like hydroseeding works out at around $15+ a metre, with a small garden costing as much as $400. However, all the hard work is done for you, and grass growth can happen in as little as a week.

Otherwise, you might look at ready-lawn, which is around $30+ a metre and is pre-grown before it reaches your property.


Worried About Lawn Maintenance?

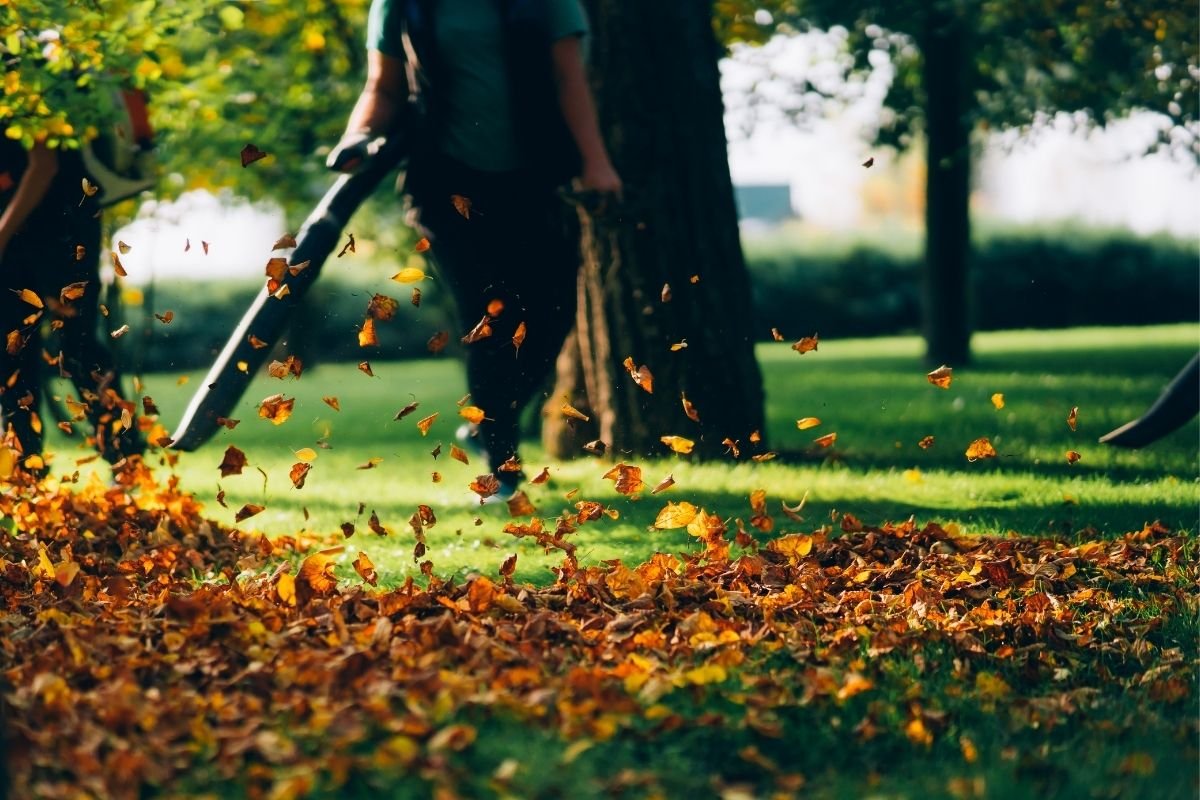
You might already understand just how many benefits are associated with having a lawn, but there might be one niggling thought at the back of your mind: the sheer amount of work that goes into maintaining it.

Grass is a lot easier to maintain than you might think, but it’s okay not to want to spend your free time mowing, de-thatching, and making sure it’s in optimum health. In that case, you can hire lawn care experts to take care of your lawn’s general care instead.

You get to enjoy all the benefits of having a lawn, like soil health, water and air filtering, and wildlife, but without worrying about cranking up the lawnmower on a Saturday morning. Why not check out lawn care experts near you?

Klaris Chua-Pineda
7 Ways to Build a Better Backyard
Relaxing in a beautiful backyard

Wouldn’t it be nice to come home to a beautiful backyard that offers somewhere for you and the family to relax? Sometimes, you have the space for such a backyard, but you lack the inspiration to create something magical that becomes the envy of all your neighbours. 

If you’re asking yourself: how can I make my backyard better? Then you’re in the right place. Keep reading to learn about some of the most effective ways to turn an ordinary yard into something extraordinary.

1. Plant a New Tree in Your Backyard

Unless you’ve purchased a well-established home with a backyard bursting with flora, you may not have a tree. But that doesn’t mean you can’t have one.

Trees bring so much value to any property while providing shelter, shade, privacy, and even oxygen. Did you know one tree can provide a full day of oxygen for a family of four?

While trees can take many years to grow from seedlings, you can also purchase reasonably well-established ones to speed up the process. You could have that dream tyre swing in no time.

2. Add Outdoor Furniture

When your backyard is a blank canvas, there are opportunities galore for improvement. Why not start with outdoor furniture, and maybe even a hammock or swing?

The best part is, when you ask: how can I make my backyard beautiful on a low budget? Outdoor furniture appears as a solution more often than not.

While purchasing a brand new outdoor furniture set is an option, you can also pick up many high-quality sets secondhand. Once you decide where to put it, an entire backyard theme can be realised, allowing for an easier landscaping journey.

3. Put Up a Fence

Without a fence, it’s not always easy to know where your property boundary ends, and your neighbour’s begins. However, this isn’t the only reason to consider putting up a fence.

Fences and hedges can help you build a better backyard or front yard by offering an incredible amount of security and privacy. You can entertain friends and family in the comfort of your property without having to worry about being your neighbours’ form of entertainment.

Best of all, there’s no shortage of options to suit the style of your home. There’s something for everyone, from white picket fences and corrugated iron, to wood panels, concrete block, and brick.

4. Create an Outdoor Living Space

There’s something quite refreshing about having bare grass from which to create your perfectly landscaped yard. However, it’s not always easy to come up with ideas and bring them to life.

Starting with your outdoor living space may be one of the best decisions you can make. When you purchase outdoor furniture, you can begin to form an area with outdoor lighting, art pieces, pavers, gravel, low-care plants, and even a cooking station like an outdoor kitchen or barbecue.

5. Install a Water Feature

One of the best things we can do for ourselves and our families is prioritising our mental health. That’s why many homeowners are starting to see the value in building a backyard that can become a retreat for rest and relaxation.

To assist with this process, consider installing a water feature in your backyard. Studies have already shown that nature, including the trickling of water, can impact stress regulation while slowing down our stress response and promoting feelings of calm.

You can also pair a water feature with ponds, water lilies, a seating area, and lighting. When you’re having a particularly stressful day, you’ve then got a nice spot to sit and destress.

Kids in the backyard

6. Put Thought into Plants

With plenty of options for outdoor living and entertainment, it’s now time to focus on the plants you’d like to use to tie the entire look together.

Many homeowners prefer easy-care and low-maintenance plants like grasses and tussocks. When paired with stones, they can be both contemporary and aesthetically pleasing. Before you venture into your local garden store, consider sketching out a plan.

Calculate how many plants you’ll need, the volume of landscaping materials like gravel and mulch, and whether you’ll use garden boxes, your ground, or pots. The more you plan, the easier it can be to know what you need to shop for and remain within your budget.


7. Ask for Help

As much as Aotearoa is a nation of DIYers, that doesn’t mean we all are. Sometimes, we’ve got great ideas but not the skills to bring them to life. Fortunately, no matter where you live in NZ, you’ll likely find someone to help.

Lawn care experts can help with hedge trimming, garden clean-ups, lawn mowing, and more, while builders will likely be more than happy to lend a helping hand with building a fence. As daunting as the prospect might be of creating your dream low-cost backyard, it can be entirely achievable with a few wise ideas and the right people for the job.

Klaris Chua-Pineda
On Mowing Lawns and Burning Calories
crewcut-blog-post-image (3).jpg

Not everyone has the time and, let’s face it, the desire to hit the gym. We all know that experts recommend two and a half hours of moderate exercise throughout the week, but the thought of working up a sweat on a treadmill in a crowded gym is many people’s idea of torture.

While exercise is necessary, there are plenty of ways to get it, and one such way is lawn mowing. Who knew that by doing something many of us have to do, we’re burning calories?


Burn Calories While Mowing the Lawns

The average person can burn between 350 and 450 calories pushing a mower for a single hour. Even using a ride-on mower can help you reach your goals, allowing you to burn between 175 and 225 calories an hour.

So, if you were to get into the lawn mowing business and mow for an hour each day, you would be able to burn up to 3,150 calories in a single week!

Summer is also one of the best times to mow the lawn, but it’s also when we like to be socialising, indulging in cheeseboards, and drinking our favourite summer beverages. Offset some of those caloric gains by setting time aside for lawn mowing and other garden tasks.  

You’re probably thinking that you can’t mow your lawns every day if you’re not a lawn mowing business owner, and you’d be right. However, there are other ways to burn calories by pottering around your garden.

You can burn 107 calories by simply watering your lawn or garden and up to 272 by raking your lawn or leaves, using a moderate amount of effort. Those who like to use a push applicator to apply fertilizer or lawn seed can also burn up to 179 calories.

Walking with a hand mower allows you to burn the most calories out of all garden tasks at 430, while general garden tasks come in second at up to 394. Sacking leaves and using a power mower might also allow you to work off the equivalent of an English muffin breakfast, which is up to about 400 calories.


And What About the Mental Benefits?

Gardening for mental health has appeared in countless studies, so you’re reaping more than just the physical rewards when you venture out into your yard and get stuck into some chores.

Hospital studies of 79 patients found that people felt more relaxed, calmer, stronger, and more refreshed when spending time with plants. Other studies showed that gardening is an ideal stress relief option while also potentially improving your attention span.


Take Care With Summer Mowing

Knowing that accelerated grass growth is expected during the warmer months of the year, you might find yourself behind the handle of a mower more often than not during summer. Even though enjoying a nice-looking lawn and burning calories can be your main priorities, it’s essential to focus on how the heat of the day might be affecting your physical health.

Take frequent breaks to avoid overheating, particularly if you have a large area to mow. Make sure you drink plenty of water and wear sunscreen to avoid getting sunburnt.

If you are using lawn mowing as a weight-loss tool, consult your doctor before beginning any exercise or diet programme. Mowing your own lawn once a week may not see the need for medical intervention, but mowing everyone else’s in a lawn care business role might require a doctor’s approval, depending on any health conditions you may have.


Be Comfortable While Burning Calories

Exercise isn’t always going to be comfortable, but using lawn mowing as a way to burn calories doesn’t have to be uncomfortable. Before you get started, make sure you and your mower are fit for the job.

Make sure you have proper posture and techniques while mowing to avoid injuries and make the task easier. When using any gardening tools, like mowers, weed eaters, line trimmers, and similar, choose ones to suit your height. The more suited they are to your body, the more comfortable you can be.

Finally, if you’re keen to burn calories but also get out of the summer sunshine as quickly as possible, pay attention to your mowing habits. Start on one side of your property and work your way to the other. The same goes for other gardening tasks like hedge trimming, weeding, and general garden tidy-ups.


Or, Burn Calories Doing Something Fun

Let’s face it; property maintenance is not everyone’s idea of fun. You can burn calories mowing lawns, but you can also burn them swimming at a pool or sauntering down your local beach. There is always the option to leave all yard maintenance tasks in the capable hands of lawn care experts. They not only love burning calories but seeing a job well done.

Klaris Chua-Pineda
Should Leaf Blowers Be Banned?
leaf-blower.jpg

One of the most infamous tools in the avid gardener’s toolkit is the leaf blower.

This mighty, noisy, and dirty piece of equipment was the genius solution to the labour-intensive rake and broom, but could we be due to make a move back to them?

Is the leaf blower really as bad as people make it out to be? Well, you’re about to find out.

What is a Leaf Blower?

A leaf blower is a gardening tool that uses an electric or gas motor to move debris, such as dust, dirt, grass cuttings, and leaves, away from where you don’t want it to be.

Rather than spending a long time spreading dust around your yard with a broom, you can move it with speed and accuracy with one blast of this handy tool. Within just a few years of its invention, hundreds of thousands of models were flying off hardware store shelves.


Why Do People Hate Leaf Blowers?

People hate leaf blowers for a number of reasons, which we’ll cover in a small amount of detail below. However, to put it into just one statement: because they’re considered noisy, dirty, and downright annoying.


The Noise

Some people are so fed up with the noise made by leaf blowers that they have even created petitions for them to be banned. In a Change.org petition destined for the Departments of Agriculture in Australia, 812 people signed in solidarity with someone who was tired of being exposed to noise (and air) pollution created by leaf blowers.

According to the petition starter, Karina Bright, residents in densely populated areas were frequently being woken up to the sound of leaf blowers and the smell of petrol exhausts to start their day. While the operators were using earmuffs and masks, everyone else around them was left to listen to their horrendous noise.

Leaf blowers are also banned in several towns and cities throughout the United States due to how much they disturb the peace.

However, where there’s a problem, there’s a solution. Any keen gardener with no time to rake up every individual leaf may feel better when they learn manufacturers have been working hard on the noise problem.

Both gas and electric leaf blowers are up to about 75% quieter than their older counterparts, with some producing as little as 65dBA. That’s about as loud as a normal conversation, a business office, or slightly louder than a household refrigerator.


The Air Pollution

It’s true that leaf blowers are not as clean as a broom or rake, but that doesn’t mean they are as dirty as they used to be when they first hit the market. Technology has come a long way. Modern leaf blowers have to meet exhaust emission requirements, so there’s simply no room for the ‘dirty’ garden implements of days gone by.

What’s more, many people are swapping heavy, maintenance-intensive gas leaf blowers for electric and battery-powered models. While not as powerful, they are cleaner, easier to maintain, and suitable for residential property owners and business owners who don’t want to spend hours on the end of a broom each day.


How to Buy the Best Leaf Blower

With your neighbours potentially getting ready to storm your yard with their pitchforks, it’s essential to do your research before purchasing a new leaf blower.  

Considering people are petitioning to have them banned, it’s worth making sure the model you buy mitigates some of the most common problems people have with them. Alternatively, you can always hire lawn care experts who can manage all your lawn care tasks for you.


Choose Battery or Electric

Even though petrol-powered leaf blowers can be far more powerful than many battery and electric models, there are plenty of reasons why battery and electric models may be a better choice. You can typically enjoy up to around half an hour of battery life with a battery-powered blower or endless electricity if you purchase an electric corded model.

Battery and electric blowers also tend to be cleaner, quieter, and easier to maintain, solving many problems typically associated with the gruntier gas models.


Consider Noise Levels

Modern-day blower manufacturers are going above and beyond to ensure their new leaf blowers are at an acceptable noise level. While you will never come across a quiet leaf blower, you will find models that are much quieter than others. Don’t forget to purchase ear and eye protection, especially ear protection for models over 85dBA.


Look At Accessories

Even though the leaf blower is the essential part of the package, there’s no harm in considering which accessories come with it. Typically, you can purchase leaf blowers with narrow nozzles that boost blowing power and hooked tubes that allow you to clean gutters. You might even be able to buy blowers with hoses that will enable you to blow your debris directly into a bin.


Leave Lawn Care to the Experts

Whether you want to avoid a battle with your neighbours, or you’d rather not worry about lawn care at all, hire lawn mowing companies to help. They can take care of annoying autumn leaves, lawn mowing, gardening, tree trimming, and more. All you need to focus on is enjoying the fruits of their labour.

Klaris Chua-Pineda
Shedding Some Light on Garden Sheds
Backyard garden shed

Few yard additions are as convenient and versatile as garden sheds. They are useful for homeowners without garaging, provide protection for outdoor equipment, and don’t cost the earth.

But even if you know you could benefit from a garden shed, you might still have a few questions. We’ll attempt to answer some of the most common ones below so that you can be ready to make a garden shed purchase with complete confidence.


Why Do You Need a Garden Shed?

A common misconception is that you would only need a garden shed if you’re an avid gardener. After all, you need somewhere to store your hedge trimming equipment and potting supplies.

The truth is, due to the sheer number of options on the market, you can buy a garden shed for almost everything. Clear clutter out of the yard by buying one for the kids’ outdoor toys and bikes. You might even purchase a purpose-built motorbike shed if you want to keep your dirt bikes out of the elements.

Some homeowners like storing their lawn mowers in garden sheds, or even buying them to keep firewood dry, to protect swimming pool pumps, and to cook food on a grill without stinking the house out. You might even want one just because everyone has one, and that’s okay too.


Do Garden Sheds Need a Base?

As most garden sheds for sale don’t come with bases, you may be wondering if you need one. It’s easy to assume that you don’t since they aren’t included in the purchase price.

However, a base is necessary for a number of reasons. Your grass or soil may not be level, which means your shed may not sit straight or even stable on the ground. Without a base, you may also find that water seeps underneath, potentially damaging whatever you’re trying to protect inside.

Most kitset garden sheds in NZ won’t come with bases because all homeowners have different preferences. Some people would prefer something more permanent to sit their shed on, such as concrete, while others might be satisfied with cobblestones or pavers.  

You can also purchase timber flooring, which can be suitable for storing ride-on mowers, landscaping equipment, gardening tools, and more. If you want something easy to keep clean in case of fuel or oil leakage, you may opt for a smooth concrete pad that you can water blast.


What’s the Cheapest Type of Shed?

When you’re on a budget, being able to buy a cheap shed is a priority. If you’re only going to be housing a few bits and pieces in it, you may not see the need to purchase anything too fancy. 

You can generally find the most cost-effective options tend at hardware stores and large retailers. They keep costs low by buying in bulk quantities, then pass their savings onto customers. You may also find some incredible deals through small local businesses. 

It’s worth keeping in mind that some of the most affordable sheds may not be suitable for your area or needs. For example, a steel garden shed with no steel protection may succumb to the elements in a coastal area, while a thin steel shed may not withstand adverse weather conditions in high-wind regions

The cost of a garden shed can also depend on its size and locking mechanisms. The larger and more robust it is, the more you can expect to pay. Keep this in mind when you start shopping because, ultimately, you get what you pay for.


What Size Shed Am I Allowed?

Council rules and regulations have changed in recent years, which means you may not be sure how big your garden shed can be before you start to break the rules. Most councils in New Zealand will allow you to build basic structures like sheds and sleepouts of up to 30m2 without the need for a permit.

However, your garden shed or structure must still be compliant with New Zealand rules, such as having electricians and plumbers for specialist work. You must also make sure your structure complies with the NZ Building Code.

Fortunately, when you’re buying a kitset garden shed, you don’t often need to pore through pages and pages of building code rules. You simply need to follow the provided instructions and ensure where you’re placing the shed is in an appropriate place.  

Any shed, garage, or sleepout, must be its own height away from neighbouring properties. For example, if your shed is two metres tall, it must be two metres from your boundary.


Time to Go Shopping

Lawnmowers, garden tools, and even the kids’ toys all need a place to live once you’re finished using them outside. If you don’t have a garage or lack storage space, now might be the right time to measure out a place in your yard for a new garage shed and go shopping.

Klaris Chua-Pineda
How to Reduce Outdoor Waste and Make Your Yard Waste Greener

Most of us are beginning to understand the importance of reducing our carbon footprint. Alongside using battery-powered power tools and lawn mowers and driving electric cars, there’s more we can be doing in our own backyard.

Did you know you can make smart choices with your outdoor waste to benefit nature and your property? Make your yard waste greener with some of these techniques below.

reduce outdoor waste.jpg

Start Composting

Nutrient-rich soil is something we can purchase from our local garden stores with ease. Although, it’s also something we can be making at home, purely with what nature has already given us. Dedicate a section of your yard to composting or purchase composting containers that can assist with the process.

Once you have an area to create your nutrient-rich soil, you can get to work. Fill it with grass clippings, leaves, food scraps, and other compostable materials that can break down over time. Even a worm farm can be a worthwhile addition as you start your new composting journey.

Alongside providing you with healthy soil for your plants, composting also provides a myriad of other benefits, such as lower methane emissions from landfills, suppressed plant diseases, less rubbish going to landfill, a reduced need for chemical fertiliser, and more.

Use Water With Care

Access to clean water is a necessity, yet many people go without. Here in Aotearoa, we’re fortunate to have access to an abundance of fresh, clean drinking water. However, that doesn’t mean we don’t face shortages from time to time.

Use water with care by watering your plants with rainwater rather than water from the tap. You can even create a rain garden to filter stormwater runoff and stop it from entering lakes, streams, and rivers.

Fortunately, it’s easy to create a barrel water collection system, with many tank kits available from places like The Warehouse and Mitre 10. You can then position this in the most convenient part of your yard for easy plant watering.

Plant Drought-Resistant Plants

It’s only natural to want a beautiful garden filled with vibrant flowers that put a smile on your face. However, some varieties are only suitable for some climates. Rather than watering your plants year-round with precious drinking water, consider planting drought-resistant plants that require less care.

Several varieties can liven up your landscape, which means you don’t have to resort to other less hardy varieties. Succulents, agapanthus, flaxes, grasses, and even libertia may all be plant options you consider.

Cut Down on Chemicals

You might think that the only way to achieve a healthy, thriving lawn and garden is by investing in chemicals. While these might help, they are not always the best choice for the environment. Fortunately, you can enjoy green lawns with green lawn care techniques.

Natural is the way to go

Natural is the way to go

Switch to organic fertilisers that only need annual or semi-annual application. Improving your soil can also lay an excellent foundation for plant growth, potentially doing away with the need for chemical additions to improve its health.

There are plenty of small things you can do to promote soil health, such as:

  • Using organic mulch

  • Encouraging earthworms

  • Making your own compost

Use Mulch

Mulch can be a magical material when it comes to your property’s overall health. It can improve soil fertility, health, and even the aesthetic appeal of your garden. However, it can also assist with moisture retention in your soil. This benefit alone can save a significant amount of water. Given its ability to suppress weed growth, you may also be able to save yourself hours of weeding in the garden.

Attract Wildlife

With deforestation and a loss of flora, our wildlife is running out of places to call home. If you’re able to do so, consider replacing turf grass with native plants. These plants not only look beautiful but give creatures a much-needed place to call theirs.

Plant Trees

Trees have many benefits, such as producing oxygen, reducing stormwater runoff, and reducing erosion. They also give wildlife the food, protection, and shelter they need to survive and thrive. Even you can benefit when you plant trees at home.

They can be a source of privacy while also providing much-needed shelter on those hot summer days. If you’re unsure about upkeep, you can hire professionals to assist with their health and trimming needs.


Hire Crewcut for Green Waste Removal

If you don’t have somewhere satisfactory to store your green waste, and you’re already doing all you can to make your yard waste greener, there’s no harm in calling in the experts.  

Crewcut provides a garden bag and green waste service in many regions across the country to make your life just that little bit easier. Crewcut is committed to environmental sustainability, which means they are able to turn your green waste into compost on your behalf. Why not find out more about their green waste service today?

Klaris Chua-Pineda
The Best Water Features For Your Property
 
garden-water-feature-nz.jpg

It’s not hard to see why water features NZ-wide are becoming a more common sight. They enhance your local ecosystem, attract wildlife, require minimal maintenance, and bring the sound of nature directly to your doorstep.

Although, as desirable as water features can be in the average Kiwi backyard, not everyone knows how to go from simply admiring them in public places to having one themselves. Sometimes, it can be as simple as doing your homework and considering some of this information below.


What Are Water Features?

Water features are essentially a customisable landscaping feature that can become a focal point in the average backyard. They can be either a pond or fountain, or even a waterfall or stream, with a range of materials like rocks, stones, and plants, to tie the entire look together.

You can also purchase fountain kits with submersible water feature pumps to ensure the water circulates and remains fresh and clean. It’s not necessarily challenging to make your own water feature, but it can require a significant amount of research to determine the style, type, and size of the water feature you prefer.


Best Water Features

You can’t walk into your local garden centre and ask to purchase the best water feature they have available. The ‘best’ is a subjective term. Some people utilise what they have in their natural environment, while others purchase ready-made water features and incorporate them into their backyard.


Tanks and Troughs

If you have old tanks or troughs lying around your property, you may like to put them to good use by making a vibrant water feature. You can fill them with pebbles and plant beautiful flowers around the outside for a touch of softness.

Garden Ponds

Garden ponds are also a popular option. You can make them yourself or call in your local landscaping experts. Making a garden pond can be as simple as cutting out a shape in the earth, lining it with plastic, adding a pump, and beautifying it with plants and rocks. You may even like to incorporate a fountain or rill for both visual and audio benefits. 

Water Fountains

If you’re not one to carve up your backyard or install complicated technology, you can still have a beautiful water fountain. You can purchase ready-made ones, and these often have a variety of attractive materials incorporated into their design, like stone monoliths and metal spheres.

Pebble Piles

In recent years, homeowners looking for simple water features in NZ have been building simple pebble piles. Purchase or acquire stones and pebbles and conceal a pump underneath them. Water shoots up through the rocks, then artfully makes its way down to the bottom of the pebble pile again.


unsplash-image-GPAXT5ZiPfw.jpg

Plants For Water Features

No water feature is complete without gorgeous plants in or around it. Fortunately, there are so many beautiful options at your disposal. You can opt for a more traditional water feature plant, like lotuses, or go for that more contemporary vibe with Acorus Gramineus or water lilies.

Some garden centres specialise in water feature plants, so you’ll likely always have expert help available when you need it.


Best Rocks For Water Features

Just like plants and the water feature style itself, the best rocks for your water feature is a personal choice. What suits your preferences and property may not suit someone else’s. Fortunately, your water feature can be unique.

You can purchase ready-made water features with rocks incorporated into the design or purchase the rocks separately to form yourself. From alpine schist and quarry rock to grit and chip, decorative glass, and walking stones like Paradise and Waitaha, you’re spoilt for choice.


How to Choose the Best Water Feature For You

Given the sheer volume of options on the market, not to mention your customisation options, you may not know how to choose the best water feature for you. In most situations, you just have to factor a few different things into the equation, such as these below.


Available Space

You may have dreams of a water feature just like the iconic Friends fountain, but does your space allow? Self-contained fountains are ideal for courtyards and patio areas, while large ponds and pools could work in wide, open spaces.

Style Preferences

Some people prefer the elegance of traditional and classic water features, while others prefer the crisp, cleanness of modern ones. You can significantly narrow down your options by thinking about which you prefer.

Budget

If you’re undertaking a complete landscaping renovation, you may not want to spend huge amounts on a water feature. Your budget can determine the size, scale, and even whether you buy a ready-made one or build one yourself.


Garden water feature goals

Garden water feature goals

Where to Put a Water Feature

Where you put your water feature can depend on your property type, why you want one in the first place, and whether it requires electricity. If you’re running an electric pump, you will need to have it close to an electricity point and consider how much excavation you will need to do.

If your whole reason for having a water feature is to have it be a focal point, then position it somewhere it can be viewed and enjoyed. A front or back garden, encircling entertainment areas or plants may be a suitable choice. Landscaping experts can also advise on the best locations if you are unsure.


Time for a Water Feature?

Water features like ponds and fountains can elevate any small or large yard. If you’re looking for creative landscaping ideas, now might be an excellent time to consider this information above and start looking for a beautiful water feature that stands out from the crowd.  

Klaris Chua-Pineda
How to Deal With Spiders in Your Garden
 
crewcut-blog-post-image.jpg

Every time you step foot in your garden, you’ll see different insects wiggling, crawling, and scrambling across the soil. Although, one little critter you will probably see every time you start pulling out weeds is spiders.

We’re fortunate here in New Zealand to avoid some of the more deadly creatures like snakes, but spiders are still something many of us would rather not see. However, if we knew a bit more about them, we may be more inclined to leave them to their own devices. Read on for some interesting spider facts you may not have known.


What spiders are in New Zealand gardens?

Off the top of your head, how many spiders can you name? Probably not as many are actually present in New Zealand and our average gardens. According to HealthEd, there are approximately 2,500 known spider species in New Zealand. Fortunately, most of them are harmless.

Out of all 2,500, there are perhaps three that are cause for concern: the Redback, White-tailed Spider, and Katipo. 

Both the Redback and Katipo come from the same genus as the American black widow spider. They are both venomous, with the female of each type being capable of biting humans. Bites are rare, but there is an antivenom available for Redback and Katipo bites if they occur. 

White-tailed spiders are identifiable by the white tips at the ends of their abdomens. When they bite, they can cause itchiness, swelling, and pain. In some rare situations, they have also caused nausea, vomiting, and headaches.

White-tailed spider bites tend to resolve on their own over time. Although, if you are concerned, speak to your GP for advice.

Outside of those top three feared spiders, our gardens are home to various harmless species like slater spiders, jumping spiders, and vagrant spiders.


Why do we have spiders in our gardens?

While many spiders prefer to take up residence in our homes and local forests, some choose our gardens as their whares. You may have realised this accidentally when disturbing mulch in the garden or taking care of weeding.

Spiders, like many animals in the ecosystem, are essential. They become more active from around springtime onward and arrive just in time to take care of pests that attempt to wreak havoc on your plants.

They’re not fussy about what they eat, which is good news when you’re trying to find vegetables that critters haven’t ravaged. If you want to put as much distance between you and the spiders as possible, here are some of their most popular hangouts:

  • Underneath pavers, pots, rocks, and garden ornaments like birdbaths

  • Underneath dense scrub and garden logs

  • In trees

  • Near drain pipes

  • Inside fencing


Should I worry about spiders in my backyard?

Unless you have an infestation of venomous spiders in your backyard, they don’t tend to be creatures to fear. In saying that, a tiny spider here and there is very different from large infestations that are beginning to take over your home. 

If your local spider population is no longer content hanging out in your backyard and, instead, are making themselves comfortable in your home, then it could be in your best interests to look for a solution. We’ll cover what that solution might be below.


Should I get rid of spiders in my garden?

If you want to strike a balance between pest insects and spiders, it may not be wise to get rid of all the spiders in your garden. Although, if you’ve noticed dozens of them while performing garden tidy-ups, there are things you can do to give as many of them their marching orders as possible.

Outside your home, you can apply a bug or spider spray that you purchased from your local garden store. You can use it around exterior walls, window frames, pergolas, vents, door frames, and essentially anywhere that spiders and other pest insects may be outside.

You can then wait around two days before removing all of their webs and enjoying a surprise-free gardening experience. You may also like to make some changes to your home environment to ensure your property is not as desirable as it was before.

Remove spider webs regularly, and refrain from leaving items outside for spiders to make webs in, such as helmets, shoes, and sports gear. When the colder weather hits, move outdoor furniture inside.


Signs that you might have a spider infestation

It’s not always easy to know whether you’ve just been unlucky in seeing spiders or if you’ve genuinely got an infestation. Although, these signs below can point to the latter:  

  • Lots of spider webs

  • Living or dead adult and spiderlings (babies)

  • Egg sacs

  • Grey or brown faeces that stain surfaces

  • Cast skins of adults and spiderlings


spiders-children.jpg

Tips on keeping your children safe around spiders

Even though we have very few dangerous spiders in Aotearoa, that doesn’t mean it’s not worth having a few safety measures in place to keep your whanau safe. Always:

  • Check indoor, outdoor, and lawn areas before using (especially with children)

  • Wear closed-toe shoes and gloves when gardening

  • Check underneath furniture before moving it with your hands

  • Move pavers, pots, and other garden ornaments with care

  • Avoid going into the garden at night when spiders are most active


Live happily with spiders

As long as they aren’t infesting your home, taking over your garden, or are venomous, there’s every reason to believe you can live happily with spiders.

As terrifying as they can be, most spider varieties can take good care of your plants by eating all your pest insects. You don’t have to welcome them into your home, but accepting they’re always going to be there is how you can warm up to the idea of sharing your property with these eight-legged critters.

Klaris Chua-Pineda
Most Common Plant Types to Use as Hedges in New Zealand
Hedges in your property

Privacy is one of the earliest considerations many of us make when purchasing or building a new home. After all, we want to enjoy our backyards without the whole neighbourhood watching.   

With that in mind, you may start to wonder whether a hedge for privacy is a worthwhile consideration. While there is nothing wrong with a fence, those who are not in a hurry for property privacy may ponder a more natural solution.

Read on to learn about the most common plant types to use as hedges in NZ. You can then be on your way to a more private and peaceful backyard paradise.


Eugenia Ventenati – Lilly Pilly Variety

One of the most popular hedge types in NZ is the eugenia ventenati, also known as a form of Lilly Pilly. This hedge type is not only vibrant in its colouring but grows tall to provide an immense amount of privacy.

It’s fast-growing so that you can benefit from privacy sooner rather than later, and it thrives in full sun with free-draining soil. When your Lilly Pilly hedge is young, and even as it grows, it will require some care.

Don’t forget to keep it well-watered in the summer while it’s young and prune it regularly. If you’re not sure how to undertake hedge trimming to help your hedge form a dense screen, consult a lawn care company for assistance.


Mountain Green Pittosporum Tenuifolum

If you’re on the fence, pardon the pun, about choosing a fence or hedge, the Mountain Green Pittosporum Tenuifolum may help you decide. This beautiful New Zealand native hybrid is all about natural beauty and privacy.

In the right conditions, meaning full sun and well-drained soil, it can grow up to around two metres, if not higher. You also only need to carry out hedge trimming in spring to keep it looking at its best.


Griselinia Littoralis Broadway Mint

Suppose you live somewhere coastal or with minimal annual rainfall. In that case, set your sights on the Griselinia Littoralis. This beautiful New Zealand native oozes appeal while also offering the added advantage of growing fast for privacy. 

It can grow up to around 4 x 2 metres and thrives in full sun. While it can be a little fussy about soil types, you can’t go wrong with free-draining soil packed full of organic matter.

There can be quite a lot involved in planting and maintaining hedges, so don’t be afraid to contact hedge trimming experts to lend a hand if you need help with your Broadway Mint.  


Pittosporum Tenuifolium Wrinkle Blue

Anyone looking for the best plant type in NZ to use as a hedge will likely see Wrinkle Blue at the top of their wish list. This Pittosporum Tenuifolium is an ideal option for hedging and shrub borders.

It grows beautifully in full sun with a striking blue-green glossy foliage, and it requires minimal care to thrive. Simply plant it in well-drained soil, water it until it’s well-established, and ask your local gardening expert about nutrients it may need.

Once it’s fully established, Blue Wrinkle can grow up to around 2.5 x 1.5 metres – the perfect height and width for backyard privacy.


Chilean Guava

Not everyone needs a hedge for privacy in NZ. Sometimes, they want something that functions as a property border while adding to their yard’s aesthetic appeal. In that case, turn your attention to the Chilean Guava.

This stunning plant used to be popular in England in the 1800s and has started taking off here in Aotearoa. You can grow it as a shrub but turn it into a formal hedge akin to box hedging with care and training. 

Unlike many of the most popular hedge types in New Zealand, Chilean Guava is a giver. Not only does it spruce up your property, but it produces tangy and tasty fruit the kids are bound to love.

The best time to prune your Chilean Guava is after it has fruited. You can then work towards a more formal shape as it thrives. Once it’s mature, it can reach a height of around 0.6 metres.


Corokia Geentys Ghost  

A hard frost, high winds, and arid summers can bring the hardiest hedge to its knees. But not the Corokia Geentys Ghost. This sturdy all-around hedge thrives in the most challenging climates, making it suitable for growth in many parts of New Zealand.

While it does love full sun, it’s more than satisfied with your average, everyday garden soil in whatever weather conditions. You can also use it as a shrub or grow it into a full hedge that reaches heights of around two metres.


Get Stuck In

It’s not always easy to decide whether you prefer a fence or hedge for your new home. However, what might make it easier is knowing that there are plenty of suitable options out there.

Even the care of your hedge can be managed with the help of experts. What’s holding you back? Start shopping for the perfect hedge plants today and get that new property border underway.

Klaris Chua-Pineda
Mulch: Bark, Wood Chips, or Rock? The Best Landscaping Materials for Your Property
 
Bark mulch
 

If you’ve started ticking off renovation projects around your yard, you may find yourself eventually hitting your gardens. If they aren’t in the best shape, it’s only natural to begin looking at different landscaping materials to establish which one is going to offer the most attractive finish. 

Although, aside from the aesthetics, there can be much more to consider. If you’re tossing up between bark, stones, wood chips, or something else, here is what you need to know.


Bark Mulch

There’s something quite charming about bark mulch in a garden, with beautiful plants gently nestled in between. Although, before you decide that this is the right landscaping product for you, it’s worth being aware of bark mulch pros and cons.

Many people love bark because it aids in moisture retention. If you’re trying to make sure your plants can thrive, bark can undoubtedly help. It’s also available in various types to suit the look of your property while also helping with drainage and weed reduction.

In saying that, there are a few disadvantages of bark mulch. Birds love it. They will happily carry away small pieces of bark until you have to top up your garden beds. Light bark can also blow away in the wind, and it can eventually break down.

In saying that, if you went for a combination of stone and mulch landscaping materials, you might be able to cut down how many of the disadvantages you experience for yourself.


Wood chips as mulch in a garden

Wood chips as mulch in a garden

Wood Chips

Many people ask the question, “are pine wood chips good for mulch?” and the answer is yes, they are. Pine mulch chips, and even pine needles and shredded pine can benefit your plants’ health and performance. They help with erosion, weed control, soil moisture, and the general aesthetics of your garden.

Although, if you’re wondering is it OK to put mulch next to your house, then we recommend that you don’t. In normal landscape conditions and especially during hot, dry summers, pinewood chips can be combustible. 

If your heart is set on using wood chips, you can set it up within five to 30 feet of structures or in small areas separated by non-combustible materials. Look up rock and mulch landscape pictures, and you may find something that will suit the look of your property.  


Rock as mulch for your garden

Rock as mulch for your garden

Stones and Rocks

If you have a drip irrigation system installed in your garden, or your plants don’t require a lot of water, you may consider stone mulch for your property. Stones are attractive and, with the help of a weed mat, can assist in keeping those pesky weeds at bay.  

Even if you’re not used to seeing stones in your garden, flower beds with rocks instead of mulch can look quite attractive. You can also get creative with your plants, opting for succulents rather than common annuals and perennials

If you are still on the fence about whether you’ll opt for bark or stones for your garden, know that they both have pros and cons. Stones may not help with moisture retention as much, but they don’t blow away in the wind or pose a fire hazard.


What Are My Other Options?

After reading through landscaping pros and cons of rocks vs. mulch, you may decide that neither option appeals. Fortunately, you can also make your own mulch. Not only is it more affordable than rocks and bark, but it can offer much-needed nutrients that your soil may be lacking.

Can you identify these mulch options?

Can you identify these mulch options?

Some of the best ingredients for mulch, many of which you’ll have around the home, include:

  • Compost

  • Sawdust

  • Newspaper

  • Lawn clippings

  • Pea straw

Note: Organic materials break down. You may need to create new mulch for each growing season.


How to Calculate How Much Landscaping Materials You Need

Working out how much bark or stones you require for your gardens can be hard work. You could hazard a guess, but there’s always a risk that you’ll purchase too much or not enough.

Fortunately, there are plenty of online calculators that can help. All you need to do is type “how do you calculate landscaping material?” into Google or another search engine. 

With most online calculation tools, you simply need to find out the length of the area you require bark or stones for, its width, and the depth. These figures will help you establish the area, perimeter, and volume.


It’s Time to Start Landscaping

There is no single winner when it comes to the best landscaping materials in NZ. Bark is, of course, an aesthetically pleasing option, but so are rocks. Even pine wood chips have their place, as long as homeowners take care to use them wisely.

Remember, you can also ask a landscaping and lawn care expert for their opinion. They will be only too happy to share their advice. Happy landscaping, everyone!

Klaris Chua-Pineda
How Smart Homes are Saving Water
 
saving-water-backyard.jpg
 

People are all looking to save a little extra money on bills and expenses. At the same time, many are also looking to reduce our environmental footprint. One of the easiest yet most impactful ways to make this happen is by reducing water consumption. With drought issues cropping up in New Zealand and beyond, homeowners are continuously looking for ways to save water in their homes.

Thankfully, technology comes to the rescue, and there are plenty of feature-packed devices and tools you can get for the home that will allow you to conserve water in a breeze. 

Low-Flow Plumbing Hardware

When it comes to your faucets and showerheads, you tend to waste a lot of water without even realising it. Opting for low-flow options helps you instantly reduce the amount of water flowing through your home. Typically, you can expect to save a few bucks on your water bill as most models reduce usage up to 40% without impacting the way you would usually shower or wash your hands. Many low-flow models have the capabilities to be paired with sensors and in-home technology that reduces even more usage or touch-sensitive controls to regulate water usage. 

Detecting Leaks Before They Happen

Not only is a leak detector an excellent idea for any home to prevent significant and costly damage, but it helps prevent a lot of unnecessarily wasted water. Since most homeowners are not plumbers, some devices help immediately identify leaks before they become major concerns. Smart tech leak detectors can alert homeowners at the first signs of extra condensation, small leaks, drips, or flooding. They are handy if you don’t spend a lot of time in your basement or attic, which are locations where it’s likely to occur. 

water-rating.gif

Energy-Efficient Appliances

If you are the proud owner of older appliances, washers, and dishwashers, you may be wasting a lot of water without realising it. Replacing your old ones with new appliances with a high Water Rating (the more stars the more water efficient) can save you a significant amount of money. These impressive machines can almost 4,000 gallons of water during their lifespan. You can expect to see some savings on your water bill from this one upgrade. 

So when acquiring new appliances that use water, just follow the stars!

Shower Timers

Daily showering is a part of life, and if you have a large family, they’re likely a constant occurrence in your home. Especially if you’re prone to taking longer showers, you could be wasting a significant amount of water. There are plenty of smart shower timers on the market that help reduce the amount of time you’re spending every morning. It may take some getting used to, as you’ll have to be mindful of how fast you’re going, but installing this will save you time and money. 

Irrigation Systems

As a homeowner, taking care of lawns may be a chore you love to do or something you automatically turn over to your lawn and garden expert (hint: it’s called Crewcut). Either way, investing in an irrigation system is commonly suggested in lawn care guides and is an excellent option for those who don’t have the energy and time to do it on their own. The common problem, however, is that some people would turn on their sprinklers and completely forget about them, which leads to wastage of plenty of water.

Smart irrigation controls allow for in-ground sprinklers to turn on at a designated time, respond to the water concentration in the soil, and turn off when it’s done. You’ll never forget to water the lawn or accidentally leave your sprinkler running for an hour again.

Surely, your home’s external appeal can depend on your grass looking its best, and it can cost a fortune to restore an improperly maintained one. It’s just as important not to overwater or waste a lot of water, and it’s hard to judge just by looking at your grass if it’s been appropriately watered. 

In conclusion, there are plenty of easy and affordable smart home tools and practices you can choose to implement that will save you money in the long run while reducing your water usage and impact on the environment. 

Sources:

https://www.homeselfe.com/save-water-using-smart-home-technology/
https://www.maketecheasier.com/smart-home/best-smart-water-saving-devices/

This article was contributed by Richard Frankel, a real estate agent from Ontario, Canada.

Klaris Chua-Pineda
When to Prune Box Hedge or Buxus Hedge?
Beautifully trimmed boxwood hedge, box hedge, or buxus hedge

Buxus or box hedges are slow-growing, evergreen shrubs that look beautiful as low hedging and topiary. Kiwis who either plant this hedge variety or inherit it with a property purchase may find themselves with one burning question: when should you prune a Buxus hedge?  

We could give you a single answer, but if you’re trying to find out when is the best time to prune your box hedging, you may also be wondering how to care for them in general. We’ve got all the answers below.

When to Prune Box/Buxus Hedges

Ask any hedge trimming expert, and they’ll ponder the many variables before giving you the answer to how often you need to prune your box hedges – or any hedges. At a minimum, aim for twice a year. With twice-yearly pruning, you should be able to benefit from a tidy, beautifully-manicured hedge.

In saying that, proud hedge owners don’t always stick with that golden rule. They trim them up to four times per year because there’s a general understanding that the more regularly you trim your Buxus, the lusher it can become.

When you undertake your pruning can depend on the weather you experience at different parts of the year. Some people carry out their primary pruning task in August before spring growth starts to take off. They may then carry out their second necessary hedge haircut after Christmas once the new growth has had a chance to harden.

In between these times, you may decide to take care of your hedge’s shape and trim to allow airflow for pest and disease reduction.

How to Care for Buxus Hedges

Even though you may only have been wondering when you should prune your box hedging, it doesn’t hurt to learn a bit about their general care, as well. Even though they are typically low maintenance, they do require a bit of attention to keep them in tip-top shape.

Make a point of clearing away leaf litter that tends to sit just below your Buxus. Some leaf litter may harbour disease, and it’s not a risk you’ll want to take if you can avoid it.  

During the hedge’s growing seasons of spring and autumn, consider a specialised Buxus food product, and only water the hedge’s roots, rather than the foliage.  

Even your tools of the trade require some care. Wash any cutting equipment, then sterilise them with diluted bleach or methylated spirits before allowing them to dry.


Trimming Tips for Box Hedging

Whether you’re new to Buxus hedge care or simply want to learn some best practices, we’ve got a few additional tips that may assist in the process.

Refrain from trimming in the hot sun, which may negatively impact the foliage. Once you have finished cutting, run a leaf rake lightly over the hedge to dislodge any clippings that haven’t fallen out. Remove as much of the clippings from in and around the hedge as possible.

If you’re new to the world of hedge pruning, start small. Begin with a dwarf hedge, then consider adding more width and height as the hedge becomes denser. Slow and steady wins the race.  

Buxus Hedge Pests and Diseases to Watch Out For

Even if you’ve been incredibly meticulous with washing your cutting equipment, removing leaf litter, and watering the roots, you may still find your Buxus succumbs to pests and disease.  

One of the most prominent diseases is called Buxus blight, which causes considerable dieback. It tends to be more prevalent in warm, damp environments.

Fortunately, there are products on the market that can assist with both prevention and cure. However, it’s essential to follow up any treatments with pruning dead areas, removing excess leaf litter, and trimming to promote airflow.

You may also notice what looks like a fungal disease on the Buxus hedge stems. This may instead be scale insects. Visit your local garden store for oil products designed to suffocate the insects and give them their marching orders. While some insects are beneficial to have in your garden, these aren’t some of them.


Fun Facts About Boxwood Hedging

Many people plant Buxus because it’s a beautiful, tidy, low hedge that looks stunning on any property. However, there are many other reasons why it’s a firm favourite around the world.

  • Parts of this shrub have been used for a variety of medical reasons. It has been used for rheumatism, and, in some parts of history, a tincture would be made from the wood for use as a bitter tonic.

  • Hippocrates, Pliny, and Dioscorides all once recommended boxwood for diarrhoea.

  • In France, it was once used as a hops substitute in beer.

  • It’s one of the oldest ornamental plants.

  • People used to boil the leaves and sawdust in lye for auburn-coloured hair dye.

  • Perfumes have been made with their leaves and bark.


Is It Time to Prune Your Hedges?

It can seem like there is a lot involved in Buxus hedge trimming. While it’s true that they require a meticulous level of care, they are not overwhelmingly high-maintenance. Though, whether you lack the time, patience, or green fingers, there’s always the option to outsource this task to a team of experts. You can then sit back, relax, and enjoy a picture-perfect box hedge.  

Klaris Chua-Pineda
8 Exciting Autumn Activities Your Kids Should Try This Season
Autumn activities for your kids

Waving goodbye to summer fun is never easy. No more trips to the beach. No more outdoor swimming pool relaxing. And no more walks in the sunshine to the dairy for ice cream. Fortunately, there are plenty of fun things to do in autumn that can entertain young ones and teens alike.

So, while you may have waved goodbye to summer, you haven’t seen the last of family entertainment. Here are eight outdoor activities for your kids this autumn.

1. Nature Art

During autumn, trees are dropping all kinds of leaves, berries, twigs, bark, and pine cones. While to us adults, they are just yet another thing to clean up, they are exciting artwork additions to children.

Get the kids to gather up anything they want to use in their artwork, including any of these things mentioned above. Add some glue and paint in the mix, and you’ve got an activity that can keep them entertained for hours. Fortunately for mum and dad, these Picasso lookalikes will be too heavy to display on the fridge.

2. Autumn Scavenger Hunt

With a bit of planning, your backyard can become an exciting treasure trove for the kids. Create a bingo board of things the kids have to find in the backyard, then get them to stick those items to the squares that align with the name.


Some typical autumn finds could be:

  • Leaves

  • Twigs

  • Berries

  • Pinecones

  • Feathers

3. Leaf Mazes

As much as we wish that tree trimming would stop leaves falling in autumn, that’s not the case. Though, these mountains of leaves could end up being a source of fun for the kids when they don’t want to be stuck inside.

Arm them with leaf rakes and have them create a fun maze for them to walk through. Not only do they have something fun to do, but they’re also raking your leaves into easy-to-manage piles that you can clean up far easier later on. It’s a win-win for everyone!

4. Autumn Walks

Even though autumn in New Zealand can be cold and damp, it can also be strikingly beautiful. If you live somewhere with nature walks, why not take the kids out for an adventure? They can jump in piles of crunchy leaves while you breathe in the sweet autumn air and take in the kaleidoscope of autumnal colours.

5. Leaf Art

unsplash-image-DzgLAZXNFRo.jpg

If leaves have taken over your yard, it would be easy enough to head outside with a rake and get to work. But if you’re busy listening to your kids talking about how bored they are, you can kill two birds with one stone.

Get them involved in a leaf art project. This can include getting them to collect the biggest, strongest, and most colourful leaves so they can turn them into art. They can create shapes, a leaf collage, or simply glue them all onto paper to show off their beautiful colours.

6. Leaf Wreath

Here in New Zealand, we don’t celebrate autumn as much as in other countries. Though, that doesn’t mean you can’t decorate your door with an autumn-themed wreath.

Purchase a wreath base, or make one using a piece of vine. The kids can then add twigs, berries, leaves, and flowers and design them into something pretty you can hang on your front door. The best part is, you only have to use what nature has given you, and this arts and crafts project costs very little.

7. Gardening

There’s no rest for the wicked. After spending a summer relaxing, getting stuck into DIY, or working, it’s now time to prepare the garden for autumn. This is something you can do on your own, but also something the kids can get involved in. You never know; you may just discover that the children have green thumbs.

Now’s the perfect time to lift your main crop, potatoes, and sow seeds for your winter crops. It’s also a good time to plan vegetables like cabbage, cauliflower, broccoli, beetroot, and spinach. If you plant lettuce now, you can also get a reasonably good harvest before very long.

Your local garden store is bound to have a variety of child-friendly gardening equipment and gloves. You can even allocate a section of your garden for them to grow and tend to their own vegetables.

8. Attend an Autumn Event

Not everyone has the Kiwi dream backyard – a quarter-acre section. However, that doesn’t mean your kids aren’t stuck with nothing to do. There are plenty of autumn-themed events happening up and down the country.

The Arrowtown Autumn Festival in Arrowtown runs for 4-5 days over autumn in April. The Festival of Colour in Wanaka is also a huge hit during April, as is Bluff Oyster & Foods Festival in Bluff during May. It can be worth checking out local events at the changing of the seasons to find out what fun outdoor activities your family can enjoy.

While You’re Having Fun, What About Your Yard?

Leave your weekends free for fun autumn activities with the kids. Why not bring in the experts to take care of lawn mowing, leaf raking, tree trimming, and garden tidy ups? You can then enjoy as much free time as possible to spend with your loved ones.

Klaris Chua-Pineda
Hedge Trimming Tools and Tips for the Best Results
Hedge trimming tools

Hedges. We love them when they’re perfectly trimmed, but they become the bane of our existence when they start growing out of control. Whether you’ve just purchased a property with hedges, or you’re getting ready to give your hedge its first haircut, there’s a lot you have to learn. Read on to find out everything you need to know about hedge trimming tools and their use.  

What Is the Difference Between a Hedge Trimmer and a Hedge Cutter?

When you start browsing the various landscaping outlets for hedge trimming equipment, you may quickly become overwhelmed. Who knew there were so many options out there for hedge care? You may even see two different products, a hedge trimmer and a hedge cutter, and wonder if they achieve the same result.

Surprisingly, there are differences between a hedge trimmer and a hedge cutter. You might need one or the other, or even both, depending on your hedges.

Hedge Trimmers

Hedge trimmers are the perfect tool for light, delicate hedge work, such as finishing touches. You may rely on your hedge trimmers for shaping your hedges to perfection once you’ve given them a healthy haircut.

Hedge Cutters

In contrast, hedge cutters are designed to handle large hedge cutting tasks. You might use these when you’ve let your hedge grow wild or if it’s particularly woody or unkempt. These tools tend to have larger blades, which means they are suitable for cutting larger branches.

There’s a lot involved in hedge care, but having the right tools for the job can make a significant difference to the final result. If you’re not sure what you need, why not contact a gardening and lawn care expert for advice?

How to Trim Hedges by Hand

You might think you can attack your hedges in the same way you prune your shrubs or trim your trees, but hedge trimming is an art form. It requires you to understand the growth patterns so that you can shape and prune for your hedge’s health and your privacy.

Hedges should be full from top to bottom. This means you have to trim the sides with an outward flare angle to ensure the hedge top is narrower than its base. This unique shape can ensure that your hedge’s lower branches get enough sunlight to grow and add body to your hedge.

But that’s not all. Learning how to trim hedges by hand can also require you to understand the importance of string guide lines. Without them, you may find yourself with a less-than-perfect hedge you’d prefer to remove altogether.

Attach strings to wooden stakes and insert them in the ground at both ends of your hedgerow. You can then follow these boundaries as you cut, without cutting off too much or too little.

Start from the Top

Trim from the top to create a plane that is as flush with the top guide strings as possible. We’ll get more into the safety aspects of hedge pruning at height below. You can then trim the sides to create even planes along your guide strings.  If you notice thin spots, the haircut will likely spur new growth to fill them.

Lastly, you can trim the hedge ends. Square these up for aesthetic purposes, but you can also get creative by angling them inwards, as you did with the hedge sides.

What is Needed to Trim Hedges?

You’ll learn very quickly that you need more to trim your hedges than a pair of scissors. In fact, it’s worth having quite a few tools in your arsenal so that you can achieve both health and aesthetics in every cut.  

As previously mentioned, hedge trimmers can be ideal for light trimming. You can also arm yourself with hedge cutters to handle those larger branches and more detailed cuts. Don’t forget to have a stepladder handy for those tall hedges, along with string, a tape measure, stakes, and a hammer for making sure your hedge is uniform.  

How to Level My Hedges

You might have an eye for detail, but hedges are a fickle beast. While you’re working on them, you might think you’ve cut them perfectly. It’s not until you step away that you realise that wasn’t the case at all. 

As mentioned above, using string as a guide can offer no end of benefit. Box the hedge with your string at the top and bottom so you can cut within its parameters. You may not get your hedge inch-perfect, but it can look far more level and uniform than if you decided to wing it and hope for the best.  

What Do I Use to Trim Tall Hedges?

Most people grow hedges for privacy, which is why they let them grow so tall. Some species, like the pittosporum hedge, for example, can even grow up to three metres tall. This can make hedge cutting quite a complex undertaking.

One of the most important things to know is that you should never operate a hedge trimmer above your head. It’s all too easy to lose your balance and fall, resulting in severe injuries and a potential ACC claim.

Instead, use a long-reach hedge trimmer or a platform system ladder. Both can allow easy access to the tops of your hedges without having to put yourself in a dangerous position. Alternatively, contact the experts who can carry out tall hedge trimming for you.  

Are You Ready to Start?

Armed with helpful tips and tricks on the best hedge trimming equipment and techniques, are you ready to start? Knowledge is power, so you may realise you’re more prepared than you thought or require the helping hand of a hedge trimming professional.

Klaris Chua-Pineda
When to Prune Your Apple Trees in NZ
Apple picking in NZ

There’s nothing quite like waking up in the morning and picking apples from your own apple tree for breakfast. However, it’s essential not to take it for granted that your apple tree will always give, give, and give some more. Sometimes, it needs you to offer something in return: pruning.  

Not everyone knows when to prune apple trees in NZ or even what the process involves. Never fear! You’re in the right place to learn some valuable information.

When Should You Prune Your Apple Trees?

It’s a commonly asked question for a good reason. There is a right time to start the apple tree pruning process. Miss that window, and you may just affect your next season’s growth. Most experts say that you can prune in summer and winter, but it takes a particular set of circumstances to pull this off.

If you are going to prune in winter, then aim for July through August, or before the buds begin to swell. Alternatively, consider summer pruning once the tree has finished fruiting.

By pruning your apple trees in summer, you may be able to reduce the chance of infection or disease. The wetter the environment, the higher the chance of disease that can spread across your apple tree.

Although, whether you plan on undertaking any apple tree pruning in summer or winter, there are a few things to consider as best care practices.

  • Avoid pruning back by more than a third

  • Prune your apple tree into a central leader

  • Prune on a dry day

  • Establish your shape early on in the tree’s life

Once you’ve hit the ideal time of year to start pruning your apple tree, you can move on to learning how to do it.

Step 1: Remove What You Don’t Want

Take a critical look at your apple tree to see all its imperfections. You might notice branches that seem like they’re in the way or too large. You may even notice branches that cross over each other or are rotting. Take care of these branches for safety reasons and your apple tree’s overall good health.

Step 2: Prune for Aesthetics

Once you’ve removed dead, diseased, rotting, or imperfect branches, you can now focus on pruning for your apple tree’s beauty. Trim the limbs down to the fruit blossom spurs that look the best. Prune the smaller branches where the young wood meets the old wood.

While it’s always a good idea to leave some new growth to grow into new branches, it’s also in your fruit bounty’s best interests to focus on fruit bud growth.

Step 3: Survival of the Fittest

The whole reason for having an apple tree is that it produces fruit. Although, not every branch on your apple tree is going to bear fruit. These branches end up stealing the energy from the branches that are doing their best to provide you with plenty of delicious apples.

Prune any non-fruit branches. These are easily identifiable by their smooth bark and fine leaf buds, rather than the rounder buds that produce fruit. Consider trimming twiggy inner branches that don’t have fruit spurs.

Step 4: Admire Your Handiwork

After giving your apple tree a long-overdue haircut or hiring a tree trimming expert to do it for you, you may notice that it’s far smaller than it used to be. While that might alarm you, it’s not a cause for concern.

Consider what you’ve learned about pruning roses. Sometimes, they flower better when you get a little bit ruthless with your pruning. The same rules apply to apple trees, which makes sense, given that they are from the same family as roses.

When you remove poor-producing or non-producing branches from apple trees, they can focus all their energy on the limbs that do you proud.  

What You Need for Apple Tree Pruning

If you’ve just purchased a property with an apple tree, or your new tree has just matured enough for pruning, then you may not know what you need to get the job done. Some people prefer to hire a lawn care company to take care of everything garden-related. However, others like to get stuck in themselves.

If you’re more of a DIYer, there are a few things you’re going to need:

  • Loppers

  • Pruning saw

  • Secateurs

  • Pole tree pruner (for tall trees)

  • A-frame ladder

  • Stanley knife or sharp knife

  • Methylated spirits

  • Pruning paste

Loppers, a pruning saw, and secateurs can all help achieve a clean cut of branches and limbs. The Stanley knife comes in handy for slicing off branches that may have torn.

While methylated spirits is not compulsory, it does prove useful for sterilising blades to prevent diseases from spreading. However, you can prevent fungal diseases by using pruning paste on any branches you cut.

Or Just Skip the Hard Work, Call in the Experts

Not everyone wants to enjoy the literal fruits of their labour. Instead, they want someone to take care of their trees for them. If that’s the case, there’s no harm in finding a tree trimming company near you that can provide the TLC your apple trees need.

Klaris Chua-Pineda
Front Yard Ideas for a Great Street Appeal
 
New Zealand suburbs with front yards
 

Whether you’re hoping to fetch the best price for your property or you want a home you can be proud of, learning front yard ideas for a great street appeal can serve you well.

Street appeal is something that can often be overlooked as you go about making sure your interior is up to scratch. Still, as it’s the first thing visitors see, it’s a lot more critical than you might think. Read on to learn some handy tips and tricks for making sure your front yard is as pretty as a picture.

Don’t Underestimate Proportions

If you have a large home with a flat, square front yard, the options are endless for how you make it stand out from the crowd. In saying that, this yard shape doesn’t tend to benefit from an eclectic mix of your favourite flowers like less-uniform yards tend to.

Instead, work with your yard’s perfect proportions by adding plants that enhance this look. Repetitive, uniform shrubs lining a path, box hedging, and symmetry all come into play. Essentially, you’re pairing a uniform home with a uniform front yard for perfect harmony.

Make Property Access Obvious

Have you ever visited a home that didn’t provide the clearest access? You weren’t sure whether to go up the driveway to the back door or cut across the lawn to the front door. If you want to benefit from a great street appeal, let your home’s front entrance make a statement.

Consider paving a pathway if you haven’t already. If you have lawn access to your front door, make sure you keep on top of lawn mowing, so it’s a pleasant walk from the street to the home.

You may even like to invest in lighting when visitors turn up at night. There are plenty of options, such as fairy lights, solar path lighting, and even in-stair lighting.

Focus on Low Maintenance

Many people hire gardeners and lawn mowing companies as they don’t have much time or passion for property maintenance. You can do yourself and future owners a favour by creating a front yard that requires little to no care. Otherwise, make sure you hire a gardening team who can take care of it for you.

Low maintenance plants like grasses handle most weather conditions and can be paired with bark or small stones. Even succulents can be a focal point in your front garden, particularly in the driest parts of New Zealand.

Don’t Forget Seasonal Changes

If you are adding new plants to boost your street appeal, it’s a good idea to consider seasonal changes. What may look beautiful in spring and summer may look absolutely dreadful during the colder months of winter and autumn.

That’s why many homeowners opt for shrubs and trees that look stunning at any time of the year. Sure, annuals offer a beautiful burst of colour for a few months, but perennials are hardier and more likely to survive as temperatures plummet.

Attention to Detail

Sometimes, it’s the small things that end up making the most difference. That can be a good or a bad thing. For example, you might have the most beautiful home and a neatly manicured garden. Then you’ve got a beaten up, tatty-looking mailbox that spiders are now calling home.

Your fence may even be the picture of perfection, but you’ve paired it with a rusty, broken gate that doesn’t open. It’s these small things that can detract from the beauty of your yard. If you’re not quite sure where to begin, ask a friend or an outsider. They can point out the flaws that are preventing you from having an otherwise perfect street appeal.

Healthy Lawns

Diseased, dying, and patchy lawns can stick out like a sore thumb. Your gardens might be neat and tidy, but your grass can be letting the team down. A simple soil test can determine if your lawn is lacking something. Otherwise, there are other things you can do like mow it properly, add fertiliser, overseed it, or start from scratch.

If you’re not quite sure how to achieve that lush, green patch of grass you’ve always dreamed of, there are always lawn mowing contractors around who can lend a helping hand.

Brighten Your Door

If you’re trying to achieve vibrancy to enhance your street appeal, your door can be an excellent place to start. In recent years, homeowners have been steering away from neutral tones in favour of red, yellow, and even pink doors. They look fresh and fun while also leaving no doubt in a visitor’s mind about where they should gain access to your home.

Great Street Appeal Starts Here

Armed with helpful tips and tricks, now is an excellent time to start working on your street appeal. You can then enjoy the fruits of your labour or put your house on the market with a lot more confidence.

If you lack time to carry out property maintenance, don’t be afraid to contact a lawn mowing company in New Zealand who can take care of it for you.

Klaris Chua-Pineda
Treating Yellow Leaves on a Lemon Tree
 
Yellow leaves on lemon trees
 

When you see yellow on a lemon tree, it’s typically a good sign. Yellow equals lemons, right? Seeing yellow lemons is one thing, but what about yellow leaves? Lemon tree leaves turning yellow is far from a good sign. Read on to learn why it happens and what you can do about it.

What Does it Mean When Your Lemon Tree Leaves Are Yellow?

If you’ve noticed that your lemon tree has yellow leaves, you need to jump into diagnostics mode. There are many possible causes, including citric diseases in NZ, a lack of nutrients, or something else. The first step to diagnosing the problem is identifying the symptoms.

All-over Yellow Leaves on a Lemon Tree

All-over yellow leaves on citrus trees is a common problem, but it’s not one that’s without a cause. Typically, this problem is connected to a magnesium deficiency. Even though there may be plenty of magnesium in your soil, the soil might be too alkaline, which means it’s not in the correct form for your citrus trees’ roots to absorb it.

You can correct this problem by purchasing a yellow leaf remedy from your local garden centre. Alternatively, Epsom salts mixed with water to form a foliar spray may be able to assist. However, it’s crucial not to overdo it, as the cure can be as harmful as the disease if magnesium builds up.

If you are looking for a longer-term solution for yellow leaves on your lemon tree, consider applying a citrus-specific fertiliser during spring and through to autumn. Your local gardening expert may also be able to provide some tips and advice.

Yellow Leaves in Winter

Have you noticed that your leaves take on a yellowy tone in winter but are okay at other times of the year? Mottled yellow leaves can signal a nutrient deficiency. Once spring arrives, feed your citrus trees a citrus fertiliser.

It’s best not to act in winter. Adding fertiliser could promote new growth that then dies due to frost, snow, and generally cold conditions. However, if you want to give your trees the best chance of survival during winter, provide them with lime and gypsum to increase their nutrition and improve the leaves’ appearance.

Dehydrated Leaves

A lack of nutrients is one of the most common reasons for yellow leaves on citrus trees, but it isn’t the only cause. Sometimes, pesky mites are to blame – particularly in hot and dry weather. If you suspect a mite infestation due to the presence of dry leaves, check the underside of the leaves. You may notice a few mites hanging around, pretending to mind their own business.

Rather than leave them to cause more chaos, prepare a soap-based spray. Spray it on both sides of the leaves in the morning and evening when temperatures are cooler. Monitor the tree and respray it every fortnight if the mites reappear.

There are plenty of insects out there that will try and harm your trees. The more proactive you are, the more damage you might be able to avoid.

Veiny, Pale Leaves

Are your citrus tree leaves a pale green, white, or yellow colour with strange-looking green veins? Sometimes, this means your soil is too alkaline, so your tree roots can’t absorb iron. Visit your local garden centre and pick up iron chelates. These work as a liquid feed for the foliage.

However, a lack of iron is not the only reason why your citrus tree leaves may look a little peculiar. Sometimes, a zinc deficiency can be to blame. However, you may notice that leaves also appear narrow alongside being pale and veiny. In the case of zinc deficiency, you can apply a citrus fertiliser.

How to Treat Yellow Leaves on a Lemon Tree

As you now probably realise, there is no single method for treating a lemon tree’s yellow leaves. As there is no single cause, there is no single remedy. However, citrus fertiliser is one of the most popular options for improving your citrus trees’ overall health.

You may also like to talk to your local gardening expert or garden centre worker, who can shed some light on treatment options for varying issues.

General Citrus Tree Care

Whether you planted your own citrus trees or you inherited them in a property purchase, they are wonderful trees to have. They improve the aesthetics of your yard, offer shelter, and bear delicious, refreshing fruit.

However, to ensure they continue providing these useful services, you need to keep them in tip-top shape. Prune them at the right time of the year, provide them with the nutrients they need, and make sure they get enough sunshine and quality soil.

If you’re not confident in making sure your lemon trees can stay as healthy as possible, contact landscaping, gardening, and lawn care teams nationwide to lend a helping hand.

Klaris Chua-Pineda
Safe Hedge Trimming Tips and How-To
Safe hedge trimming

With all the safety features our modern-day lawn care equipment comes with, you may not spare a thought for your protection. Believe it or not, though, safe hedge trimming is not a task that your top-quality hedge trimmer can manage independently. It needs your help.

Before you haul out the ladder and all the tools of the trade, take a moment to consider what you need to do to keep yourself safe. After all, ACC doesn’t want to see you on their books.

Wear Protective Equipment

Sure, it might be shorts and t-shirt weather in your neck of the woods, but that doesn’t mean it’s the most appropriate choice of clothing for safe hedge trimming. In fact, a good rule to live by is that you should dress like you’re getting ready for a blizzard.

Wear anti-cut long-legged trousers, non-slip boots or shoes that won’t fight with the ladder, and heavy-duty gloves. These gloves can stop you from being cut or scratched by falling branches, thorns, and twigs, as you cut.

One of the most important things to wear, too, are UV-protected eyewear. Your standard pair of spectacles won’t be enough to stop sharp branches and twigs from embedding themselves in your eye sockets. So, consider buying purpose-made protective glasses from your local garden store or hardware store.

With the new rules surrounding mask use in Auckland when COVID-19 made a reappearance, most of us now keep single-use and reusable masks in our homes. Pop one of these on when you start hedge trimming because they can stop spores and insects from making their way into your nose and mouth.

Follow the Instructions

If you’re one of those people who throw the instructions away when you buy anything new, then it’s time to change your ways. When you purchase a hedge trimmer, you’re going to need them – especially if you want to practice safe hedge trimming.

The instructions can be manufacturer-specific, as well, which means past habits you’ve formed may no longer apply to your current hedge trimmer. Take note of the recommended method of use, maintenance tips, and general ‘do’ and ‘do not’ tips included.

You may be surprised at how much you learn – just like when you finally read the instructions of a board game you’ve been playing wrong for years.

Check for Obstacles

Before you start trimming your hedges willy-nilly, it’s a good idea to give them a thorough visual inspection. By doing so, you can save yourself from being called the worst parent in the world when you carve up your child’s favourite rugby ball.

Checking for obstacles can also keep you safe because there’s nothing more shock-inducing then having a hedgehog racing across your lawn after you woke it from its slumber. Once you’ve cleared the hedge of any obstacles, you can be one step closer to giving them a haircut.

Don’t Trim Your Hedges in Wet Weather

When you look outside and see that it’s raining, you’ve probably decided then and there that you’ll just hire someone to handle hedge trimming. And, of course, we recommend that. But if you do want to tackle them yourself, have patience and wait until it’s dry or has at least stopped raining.

You may notice that the job you do in wet weather is not as great as the one you did in the dry weather. What’s more, electric hedge trimmers are not safe to operate around moisture. Because, as you probably know, electricity and water are not a match made in heaven.

Another problem with wet weather is the concern around heights. If you are working on a ladder, you may find the moisture impacts your footwear’s ability to grip the rungs.

Don’t Operate Your Hedge Trimmer Above Your Head

Hedges can reach some astounding heights. For example, the pittosporum hedge can grow to around three metres and is among the hardier varieties in New Zealand. But because of its height, you may find yourself unable to reach the very top of it without the use of a ladder to bring you to its level.

And if you can’t reach the top even with a ladder, then never attempt to raise the trimmer over your head. You may lose your balance, fall, and severely injure yourself. Instead, leave the job to the experts or invest in a long-reach hedge trimmer or platform system ladder – or both.

Never Walk Backwards

When hedge trimming is at the top of your to-do list for the day, then make sure it’s safe hedge trimming you’re going to be doing. One way to keep safe is by making sure you always walk forward while cutting a hedge.

If you walk backwards, you may trip over something you don’t see and seriously injure yourself. It may not be something you’ve ever thought about, but it’s worth noting.

Or, Hire Someone Who Provides a Hedge Trimming Service

There can be a lot involved in safe hedge trimming. You have to buy a high-quality hedge trimmer, maintain it, then sacrifice watching the rugby game on TV so you can keep your yard in tip-top shape. When that’s the case, it’s often a good idea to hire someone to take care of it for you.

Someone who does hedge trimming for a living already has all the equipment. They can then turn up at regular intervals and make sure you never have to lift a finger.

Klaris Chua-Pineda
Taking Care of Old Trees on Your Property
Take care of old trees in your backyard

We are blessed here in Aotearoa to have beautiful native trees, such as Rimu, Tōtara, Kauri, Kōwhai, and Pūriri, gracing our backyards. They form the backdrop of our family photos, shelter for our picnics, and homes for our insects and birdlife.

Our trees, native or not, can also prove beneficial for absorbing traffic noise, capturing air pollution, and protecting our homes from the elements. So, it goes without saying that when they serve all of these purposes, they are something we should take care of.

Trees have the potential to live for several generations with the right care and attention. Learn how to take care of old trees on your property below. Your family can then enjoy them for years to come, but so too can the families after you.

Spread Mulch Around the Base

Mulch is beneficial for your gardens, is easy to make, and affordable to buy. But did you know the old trees on your property can also benefit from it? An even layer of mulch covering the trees’ roots and soil surrounding them can be more helpful than you might think.

It insulates your trees’ roots, offers the soil much-needed nutrients, and discourages people from walking on them. Wood chips or shredded wood can make an excellent mulch for your trees. However, it’s essential to keep it away from the bark of your tree, for it can promote rot and disease.

Look After the Bark

Just above, we mentioned how important it is to keep mulch away from your tree bark to avoid rot and disease. But creating a ring of mulch around your tree, distanced from your bark, can also aid in protecting that bark, as well.

That mulch can reduce the risk of power tools damaging the bark, which has growing tissue and water vessels beneath it. Healthy bark promotes a healthy tree, so it’s well worth putting in the effort.

Take Care of the Roots

Your tree’s roots are its lifeline, which means they require plenty of care and attention to ensure they can give your tree the health and vitality it requires. Taking care of your tree’s roots doesn’t require a lot of effort, but it’s not something we think about as often as we should.

Take note of the soil quality around your tree’s roots. If it’s packed down, it may not be letting in as much water and air as it needs. You can avoid your soil being flattened by avoiding placing furniture, cars, or play equipment near the tree’s base. Using mulch can also stop it from being used as a shortcut to footpaths and driveways.

Bring in the Experts

If you’re worried about your tree’s health, or you want an expert’s opinion, then contact a certified arborist. They can help identify tree diseases, damage, and advise on the best course of action regarding tree trimming and pruning.

Trees can develop rot, dead branches, cracks, and disease over time. Requesting the assistance of an arborist can prevent this from becoming a problem in the future.

Don’t Use it as a Toy

It can be tempting to hang a tire swing from a large tree, but it’s not always going to be in your tree’s best interests. Over time, the rope from which you’ve hung your swing can wear away the bark and damage its tissue. You also run the risk of having the branch break from wear and tear.

Reading a book in a hammock suspended from a tree is a fun way to pass the time. Still, it’s essential to approach the installation of a hammock in a particular way. Rather than use a rope, a drilled hole and eyebolt will be a far less damaging option.

Water It

Most of the time, you won’t need to worry about watering your trees. New Zealand tends to get plenty of rainfall in most parts of the country. However, during times of drought, your old tree may require a helping hand.

When you go about your daily task of watering your shrubs and other plants, give your mature trees some attention, as well. Turn the hose on so that it produces a small trickle. Place it under the tree in a root zone and move it every 15 to 20 minutes until you’ve watered the entire root area.

If you can’t reach your tree with a hose, distribute buckets of water slowly over the root zone until you’ve applied it evenly.

Plant More Trees

It’s always a good idea to look after the trees you already have, but what else can you be doing? For the sake of climate change and your environment, planting more trees is always a good idea. You can gift native trees to friends and family members for special events like birthdays, and even become involved in tree planting initiatives.

You never know, taking care of old trees on your property may evoke a new passion for caring for your natural environment.

Klaris Chua-Pineda
10 Great Gardening Resources for New Zealanders

We aren’t all born wearing gardening gloves and knowing how to trim our trees. Gardening is something that involves constant learning and experimenting. It’s also something that can even require the helping hand of an expert from time to time. 

Because everyone’s gardens are also so different, it can be challenging to know how to manage every plant, every tree, and every shrub. Fortunately, though, we’ve got one exceptional tool at our disposal: the internet.

In no particular order, we’ve compiled a list of some of the great gardening resources for New Zealanders. A whole new wealth of knowledge awaits!

1. Tui Garden

Tui Garden website

Tui Garden is one of the best gardening resources in New Zealand, primarily due to its variety of content. From learning about how to grow the best potatoes to figuring out when to plant different plants in various regions, it has it all!

This gardening resource even features a growing calendar so that you stand a better chance of planting a season’s worth of fresh fruit and vegetables at the right time.

2. Pod Gardening

Pod Gardening website

If you struggle to remember what to plant at which times of the year, then Pod Gardening is an ideal resource for you. This site is dedicated to growing guides, a growing calendar, practical gardening tips, and even recipes.

You can learn about common pest problems and how to solve them, beneficial insects and birds, and how to turn your yard into an oasis. There is even a store to purchase seeds once you finish learning about which ones to plant right now.

3. Palmers

Palmers website

Palmers has been a one-stop-shop for gardening supplies and advice for eons. Seasoned and beginner gardeners often find all the information they need with one quick visit to this online gardening resource.

You can get inspiration, find ideas for getting the kids involved in gardening, and even learn about growing citrus and attracting birds to your garden.

4. Kings

Kings Plant Barn website

Whether you need gardening advice or gardening supplies, keen gardeners across the country make use of Kings as their preferred resource. You can pick up planters, containers, and gardening supplies, not to mention information on the best house plants, shrubs, fruit trees, and grasses.

Kings also release monthly checklists, news stories, and articles that are sure to come in handy for people who want up-to-date information on what to plant next.

5. Yates

Yates community blog

Whether you need products, plants, or solutions to problems, Yates is one of the best gardening resources for you. There is almost nothing this site doesn’t cover, which is bound to benefit beginner and expert gardeners alike.

You can join a community of gardeners, share tips, ask questions, and even join the Yates Garden Club. What’s more, new information and articles are added all the time, so you can always receive an answer to that burning question.

6. Sarah the Gardener

Sarah the Gardener

If you are more interested in the faces behind the gardens and their journeys, then Sarah the Gardener is an ideal gardening resource for you. This site follows Sarah’s gardening journey, which offers you the opportunity to learn new things and become inspired.

Sarah the Gardener also offers books, cooking ideas, and the opportunity to ask questions. It’s a far more personal gardening resource than several others in NZ.

7. Homegrown Happiness

Homegrown Happiness

Gardening can be about more than mowing the lawns, pulling the weeds, and trimming the hedges. It can also be about producing ingredients for homemade goods and getting creative in your own slice of paradise.

So, that’s where Homegrown Happiness comes in. This NZ gardening resource offers helpful gardening tips. It can also be your go-to when you want to learn how to bake bread, preserve goods, or even whip up a delicious salad with a difference.

8. Kath Irvine’s Edible Backyard

Kath Irvine’s Edible Backyard

Grocery shopping is getting more expensive by the year, which is why many people are now turning to their backyards to make up the bulk of their weekly food supply. Kath Irvine’s Edible Backyard is an excellent resource for those who are not sure where to start.

You can learn about what to plant at various times of the year, how to prevent fungal diseases, and what it really takes to feed a family from what you produce yourself. Take your time to explore this site and gain a whole new appreciation for homegrown produce.

9. Kitchen Gardeners International

Kitchen Gardeners International

While not strictly a New Zealand gardening resource, the Kitchen Gardeners International site is worthy of mention. The non-profit organisation is based in the United States but offers opportunities and garden project ideas for people worldwide.

This particular resource also focuses heavily on public garden food projects instead of private ones for your family’s consumption.

10. There’s Also Our Crewcut Blog

 
Screen Shot 2020-10-15 at 2.34.05 PM.png
 

Crewcut is a lawn care company with franchises across the country. While we’re quite proud of our team who take care of our lawn care needs, we also make sure our site can be more than a point of contact. We also offer an articles section with lawn tips, garden tips, backyard banter, and information from our franchisees.

 Whether you need lawn care services or advice on how to tame your backyard jungle, Crewcut can definitely be of assistance.

Klaris Chua-Pineda