Creating the Right Balance of Colours in Your Plants and Flowers

Creating the right balance of colours in your plants and flowers can sometimes be one of the last things you think about as you browse the offerings at your local garden centre. Instead, you might be looking for plants that suit your environment, are pet and bee-friendly, and, of course, are within your budget.  

However, thinking about colours might be the difference between an aesthetically pleasing garden and one that is overwhelming and hard to look at. If you’re in the research phase of creating a new garden and want to get it right the first time, take note of the following information.  

Understand Basic Colour Principles 

The first step to nailing your new garden design is understanding colour theory and the basic colour principles. The more you know about colour, the easier it can often be to make the right flower and plant purchasing decisions. 

As most of us already know, we have primary, secondary, and tertiary colours. The primary colours, red, blue, and yellow, can’t be created using any other colours. However, secondary colours, such as green, orange, and purple, can be created by mixing primary colours. Blue and yellow make green; red and yellow make orange, and blue and red make purple. 

You then get into tertiary colour territory, which is when you mix a secondary colour and a primary colour to get combinations like red-orange, blue-green, and yellow-orange.  

Why Bother With Colour Harmony and Balance?  

There are no rules or laws against choosing plants and flowers of any colour and planting them willy-nilly. However, there’s a risk of missing out on colour harmony and balance, which can be crucial. 

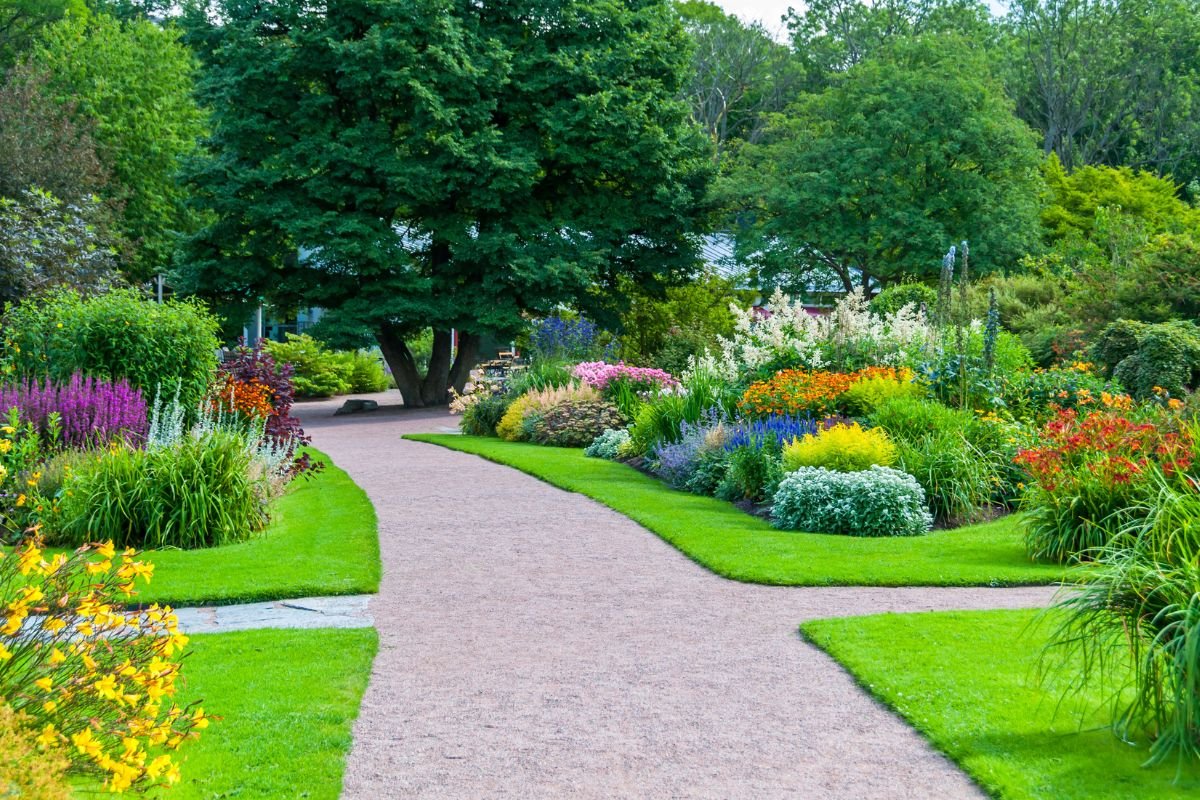
Colour harmony creates a sense of order, balance, and even excitement, without having to worry about overstimulating your sight and seeing nothing more than chaos in your garden.  

Colour harmony and balance are also closely linked to colour relationships: complementary and analogous. Complementary colours are those that sit opposite to each other on a colour wheel and bring out each other’s intensity, such as purple and yellow and red and green. In contrast, analogous colours sit next to each other on the colour wheel and are essentially a gradient of each other.  

What Do Colours Achieve?  

As you load up your shopping trolley with new plant and flower varieties to add to your new garden, take a moment to consider what their colours will achieve in your space. Typically, warm colours like red, yellow, and orange are about excitement and energy, whereas cool colours like pink, blue, and purple are calming and peaceful while also making small yards look much larger. 

If you purchase monochromatic plants, which are plants with one main colour, you can add visual interest with contrasting leaf and flower textures.

You Don’t Always Need Colourful Plants 

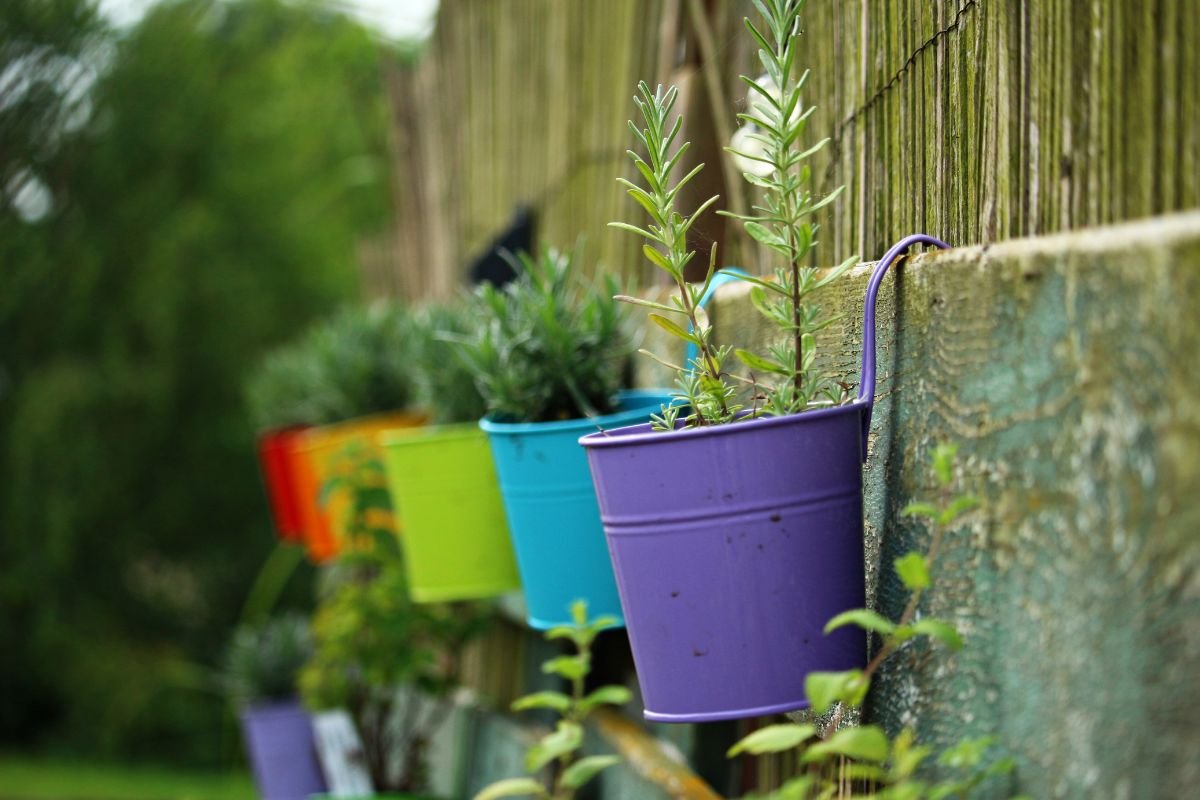
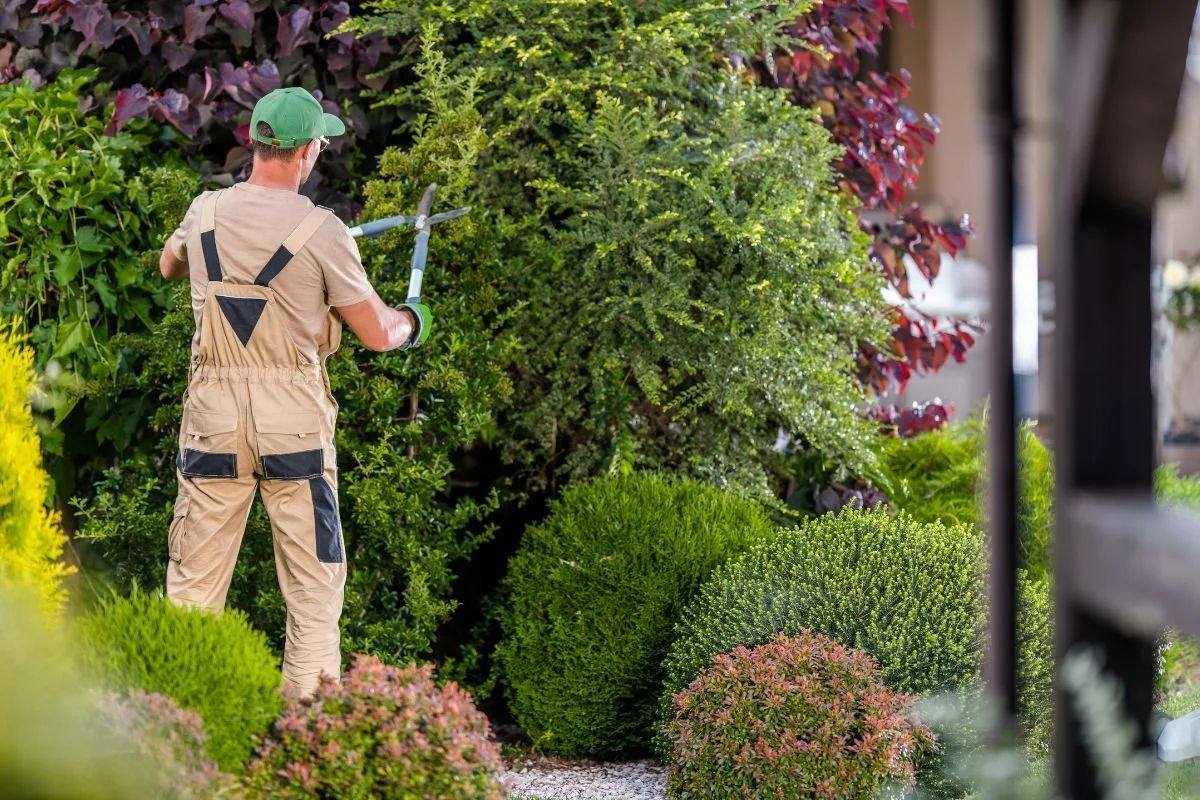
Not everyone has the time or patience to tend to a large, colourful flower garden. While you could always hire a gardener, there are other ways to achieve colour in your yard. Plant monochromatic plants or easy-care varieties like tussocks and flax and achieve that burst of colour you desire through hardscapes. 

For example, you might plant shrubs in brightly-coloured garden pots or purchase cushions and rugs in various beautiful colours for your outdoor furniture. 

Balance Colours with Plain 

As tempting as it can be to plant out your entire garden bed with beautiful flowers like begonia, petunias, and dahlia, the vibrant colours might not help you achieve the balance you desire. Instead, plant those flowers alongside plainer plant varieties like acacia limelight for beautiful green freshness or even Corokia for its silvery-grey foliage.  

The combination of calming colours with vibrant ones might ensure a sense of balance, order, and harmony you didn’t think was possible. 

Grow Pleached Trees 

Some gardeners struggle to create structure in their gardens while ensuring balance between soft-scaped and hard-scaped parts of their property. And that’s where pleached trees come in. They don’t take up much space in a small yard, yet they can add much-needed greenery, contemporary elegance, and definition where you need it the most. 

Pleached trees are framework-trained trees that you can attach to a fence or grow free-standing. As the branches grow, they weave and twist on their framework to create a tall and flat screen. They look like trees and are trees but grow as if they’re a fence.  

Achieve Colour Balance In Your Garden 

If you’re gearing up to plant a new garden, don’t be afraid to plan it first. Sketch your available space, set a budget, and think about the best plants for balance, colour, and your environment. Once you have a firm understanding of how colours interact with each other, you might end up with a beautiful, harmonious, and well-proportioned garden that has all the neighbours peering over your fence for all the right reasons.  

Karan Kikani
Shape Your Shrubs: Decorative Trees in Time for Summer

Most people leave their shrubs, hedges, and trees to take on any form and shape they want. You might trim branches that have gone astray or become a hazard, but you might not think about playing with shapes like rectangles, circles, and spirals to improve their aesthetic appeal.

There’s nothing wrong with using a hedge for privacy and not much else, but have you ever thought about making them more of a decoration on your property? Below, you can learn more about the best shrubs to shape and how to get started.

Best Hedge Plants for Shaping in NZ

Hedge plants consist of shrubs and trees planted together and trained to form a barrier. Most people who grow hedge plants do so for a bit of greenery on their property, sound protection, and privacy.

However, that’s not everyone’s story. If you want to plant hedge plants so they can become decorative trees on your property, you might like to grow some of the following varieties.

Buxus

Buxus hedge plants are compact and evergreen with small leaves. They are most commonly used to edge gardens and line paths, but people also use them to create beautiful topiaries or ‘box balls’. Box balls are essentially round-shaped hedge plants in a pot and can be a striking addition to any home’s entrance.

Lilly Pilly

There is certainly no shortage of lilly pilly hedges in New Zealand. It can seem like there’s a lilly pilly hedge providing a property with shelter and privacy everywhere you look. Lilly pilly is a popular hedge plant for its vibrancy and fast growth. It also thrives in free-draining soil and is reasonably easy-care compared to many other hedge species.

Like Buxus, you can shape lilly pilly into a topiary and balls, so there’s no reason you can’t have a show-stopping decorative tree on your property just in time for summer.

Wrinkle Blue

If a simple green hedge is not enough to add excitement and vibrancy to your property, consider the Wrinkle Blue hedge plant. This hedge plant is ideal for both hedges and shrub borders and produces gorgeous blue-green glossy foliage that stands out from the crowd in full sun.

When Blue Wrinkle is fully established, it can grow to about 1.5m tall. However, you can also trim it into a range of shapes.

What You Need to Shape Your Shrubs

After seeing the beautiful hedge shapes that people produce on their properties, you might assume you need a range of expensive tools and some kind of educational degree. However, that’s not the case. As far as tools go, you only need a handful of products.

Depending on the shape you’d like to achieve, most gardeners already have what they need tucked away in their garden shed: a hedge trimmer, wooden stakes, and string. However, if you hope to achieve spiral shapes, circles, and any other irregular shapes, you might also need wire meshing, a saw, and hand shears.

How to Create a Formal Hedge

Sometimes, the easiest way to make your hedge stand out for all the right reasons is by turning it into a formal hedge. This requires you to ensure it has straight edges to create defined property boundaries.

Creating a formal hedge with a straight top, back, and sides can be as easy as dusting off the hedge trimmer. However, if your hedge is large, it’s not always easy to ensure it’s straight on all sides. Before you get to work, hammer two stakes into the ground at each end of the hedge and tie a string at your desired height. When you pull it tight, it can function as a cutting guide to ensure a straight trim on all sides.

How to Cut a Round Hedge

Everyone has square and rectangular hedges. Don’t you want to stand out? You might be able to do that by cutting a round hedge. On a small hedge plant that you grow from a cutting, such as a Buxus, you’ll only need a few tools before achieving a perfectly round hedge.

Start with an ornamental pot, your box cuttings of choice, a loam-based compost, and hand shears. Put your cuttings into the pots and trim them with scissors to ensure they start growing bushy from the base. Place the pots outside and keep them fed and watered to ensure healthy growth.

Within two months, your plants will have rooted, and you can move them to a larger pot with your loam-based compost. Space the plants close together so that they knit together as they grow. Promote dense growth by pinching out the shoot tips.

It’s essentially a waiting game at this point. Water and feed your plants regularly and trim them with scissors or shears as they grow. Get into the habit of removing the tips once 2-3cm of growth has occurred. You should have a well-established, circle-shaped hedge plant in a container within three years. At this point, twice-yearly trims should be all they need to stay in shape.

How to Cut a Spiral Hedge

Cutting a spiral hedge can take time and patience, but it can be all worth it when you see the final result. Trim your hedge into a cone shape, ensuring its base is the widest point. If you notice thin areas, give them time to grow before continuing with your spiral shape.

Use a piece of string to map out where the spiral will go, and use it as a guide as you work around the plant with your shears. Always work from the plant’s base and cut at an angle below the string.

Shape Your Shrubs for Summer

Don’t put up with a boring hedge. Turn it into something spectacular. With a pair of garden shears, a piece of string, and some imagination, you can achieve some beautiful things.

Karan Kikani
Top Tips for Growing Your Own Fruits and Veggies In Your Garden

When open signs are put out on weekends at gardening stores across the country, Kiwis flock through the doors in their droves. They then leave laden with bags of potting soil, seedlings, and other goodies needed to create top-producing gardens.

If you’ve never planted anything before, you might be jealous of their know-how to grow their own carrots, peas, potatoes, and other delicious produce. The truth is that anyone can grow fruits and vegetables themselves with a small amount of research. Here are some top tips for starting your own gardening journey.

Know When to Plant

You might assume you can plant any fruit or vegetable at any time of the year, but that’s not the case. Some plants grow better in some seasons than others, and some might immediately fail if they’re not suited to the elements.

Before you purchase seeds, gardening gloves, soil, and other gardening equipment, take the time to know what to plant at which time of the year. Many websites offer helpful planting calendars so you can get to grips with your climate and the fruits and vegetables to thrive within it.

For example, if you live in Auckland, springtime is the best time of year to plant cabbage, carrots, beans, spinach, tomatoes, potatoes, and lettuce. You might also choose spring as the best time to harvest some of these vegetables from previous growing cycles as well.

Your climate and whether or not you have a greenhouse can often determine what you plant and when. If you’re not sure, consult your local gardening expert.

Prepare Your Soil

It’s easy to believe that you can grow anything you like as long as you have soil. However, plants typically thrive in nutrient-rich soil. Take the time to purchase or create the soil you need, and you might be surprised by how many healthy vegetables and fruits you can grow.

Add compost, specially formulated garden mixes, and even sheep pellets to give your plants the best start to life. Adding a layer of mulch can also be helpful for ensuring your vegetables get as much moisture as they need.

Plant Seedlings

If you’re a novice gardener who wants to experience success with minimal effort, consider planting seedlings. Seedlings have already been given an excellent start to life at a garden centre, whereas seeds in packets rely on you to provide that healthy foundation from day one.

While seeds are undoubtedly the more economical option, you can learn how to be the best plant parent when you’re continuing someone else’s efforts with seedlings. Once you have some experience, you can try planting seeds the following year.

Planting seedlings is also straightforward. You can start by soaking your seedlings in plant tonic to prevent transplant shock and add a vegetable mix to your soil to ensure it has all the most appropriate nutrients. Dig a hole down to twice the depth and width of your plant’s root ball and gently loosen the roots before placing the plant in the pre-dug hole. Fill the hole with vegetable mix and press the soil gently around the plant’s base. Water your newly planted seedlings and water them regularly as they grow.

Start With Easy Plants

Not all fruit and vegetables are easy to grow. Fruit trees, for example, are much harder to grow than potatoes. If you’re new to the gardening scene, start with plants that thrive with minimal effort.

Potatoes, cabbage, spinach, lettuce, cabbage, and spring onion, are all excellent beginner crops that tend to grow well even if you don’t have much gardening experience. You might try those before moving to more complex crops like aubergine, sweet potato, onions, and artichoke.

Know When to Harvest

You might assume that you can harvest your vegetables as soon as they appear large enough. While you can get away with harvesting some varieties when they look like those you’d see at the supermarket, others require more knowledge. Sometimes, your harvesting timeline can be the difference between a sweet vegetable and a bitter one.

You can typically harvest your potatoes when the foliage starts to die back between 120 to 150 days after planting them. Carrots are often best to harvest around 8-19 weeks after sowing, but you can leave them in the ground and harvest as you need them.

Beans typically need between 50 to 70 days to grow. Keep an eye on the calendar, as they can go from tender to tough in the blink of an eye. Harvest them while they’re still tender to avoid stringiness.

Grow Your Own Vegetables With Confidence

Anyone can become an experienced gardener. You just have to start. Talk to your local gardening experts about the best fruit and vegetables to plant, and you can be well on your way to a successful planting exercise in no time.

Karan Kikani
What Plants Make for Exotic Gardens?

If you live in a part of Aotearoa New Zealand, with a subtropical climate, such as Auckland, you’re spoilt for choice regarding plant growing opportunities. With warmer conditions than other parts of the country, such as Southland, you can grow a broader range of plants with much more success.

Therefore, if you’ve been considering growing an exotic garden to create your own little slice of paradise, you’re in luck. A number of beautiful, showy, and exotic plants can provide that authentic oasis feel. If you’re currently in the planning phase of your exotic garden, here are a few of the many options you might like to consider.

Banana Misi Luki

If you’re looking for plants that are both exotic and productive, banana Misi Luki, a banana-producing palm, will tick all those boxes. This subtropical banana plant has large, glossy green leaves and produces deliciously fruity and creamy bananas for you to enjoy in spring. Not only is this plant disease-resistant for peace of mind, but it also grows in poor soils and is tolerant to drought conditions, as well.

When fully grown, they’re about four metres tall and can provide both shelter and privacy. However, they are not suitable for forming hedges.

Nikau Palms

While exotic gardens typically feature an abundance of plants from other countries, you can still achieve a tropical garden with New Zealand plants, such as the Nikau palm. This palm tree is endemic to Aotearoa and is the only palm tree native to mainland New Zealand.

They can grow up to 15 metres tall and have circular trunks, three-metre-long fronds, and rings around the trunks with scars from fallen leaves. Nikau palms are typically found in lowland forests and coastal areas within warmer regions.

Alongside the beauty and uniqueness of Nikau palms, there are other reasons why you might decide to plant them. They can be an important source of food for native birds like the kererū and kākā and hold importance in Māori cultures and traditions.

Clumping Bamboo

Nothing says tropical slice of paradise quite like clumping bamboo. And the good news is that this fast-growing plant can serve many purposes. It’s an excellent plant to use as screening for privacy and can even be the backdrop for other plant varieties.

Clumping bamboo thrives in tropical and sub-tropical environments. It grows well in most non-clay soil types and enjoys full sun and shade. If you want your bamboo to grow quickly and healthily, turn your soil over down to around 20cm, mix it with compost or manure, add a slow-release or controlled-release fertiliser, and mulch well after planting.

Bird of Paradise

Every garden needs a show-stopper plant, and Bird of Paradise would have to be at the top of the list. Also known as a crane flower and bird’s tongue flower, this clumping perennial truly looks like a bird of paradise.

It boasts a vibrant array of colors from orange to blue and violet, and it has unique shaping similar to a bird’s head. Bird of Paradise grows up to around 1.2 metres tall and up to three metres wide and has foliage akin to that of a banana leaf.

It thrives in free-draining and light soil and will stand the best chance of success in warm, temperate environments. Whether you’re trying to achieve an exotic-looking garden or need a hardy plant for your gardens, Bird of Paradise can’t help but impress.

Frangipani

With its quaint white flowers, large green foliage, and tropical appearance, frangipani well and truly stands out from the crowd. This deciduous plant grows well in the tropics and sub-tropics within free-draining and sandy soil and enjoys protection from the wind in full sun.

They can grow up to around 30 centimetres long and 10cm wide and tend to flower from December to April. It’s worth noting that frangipani can be quite time-intensive plants for new gardeners. They typically require organic matter like manure or compost to thrive and can be easily damaged at the roots. Large frangipani plants also often require staking as they can be rather top-heavy.

Bougainvillea

Add some vibrancy and happiness to your slice of paradise with Bougainvillea, a thorny ornamental vine that tends to be evergreen in warm climates but deciduous in the cold. Bougainvillea can grow upwards of 12 metres, but you have the freedom to trim them to a desirable size or even buy dwarf varieties.

They prefer deep, well-drained soil in full sun and require regular watering. These beautiful plants will then treat you for your efforts with gorgeous and vibrant flowers in the summer months.

And while you can purchase full bougainvillea plants from your local nursery, you can also grow them yourself from cuttings. You simply need to take 15-centimetre-long cuttings from new shoots with some old growth, remove leaves from the bottom portion, place them into a pot of propagating sand, and keep the cuttings damp until they establish.

Create the Exotic Garden of Your Dreams

Everyone deserves to have a garden they can be proud of, and you might love the idea of unique and exotic plants. Some of the plants listed above are excellent options to get started, but you might also like to consult your local expert gardener for advice.

Karan Kikani
Choosing the Best Seeds for a Full Bloom Spring

Spring has sprung, and nothing beats looking out your window at a garden full of freshly bloomed flowers after a long and bleak winter. But if you’re still looking at bare soil even with the onset of the warmer weather, you might have forgotten to plant those all-important spring bulbs.

If you’re just getting to grips with the gardening scene and want to be fully prepared for the seasons ahead, here are some of the best spring flowers to plant for your enjoyment once winter is given its marching orders.

Daffodils

Spring and daffodils go hand in hand. When you see daffodils popping up in the unlikeliest of places, you know winter has finally ended.

You can plant daffodils any time from March until the end of May. However, when you plant them can often dictate when they start to flower. You also need to plant daffodils in well-drained soil in an area that experiences full sun.

Tulips

Out of all spring bulbs, tulips would have to be one of the most beautiful. They stand out from the crowd, and many gardeners describe them as show stoppers, no matter which variety you choose.

Surprisingly, tulips are reasonably easy to grow, as long as you plant them in a sunny spot within well-draining soil. Tulip bulbs also benefit from being placed in a paper bag in the fridge for 1.5-2 months before planting in May. Always plant at 8-10cm deep and 10-15cm apart. Keep the soil cool by applying a layer of mulch once planted.

Poppies

When you want to ensure your gardens look vibrant through winter and spring, consider planting poppies. Poppies are straightforward to grow from seed, and you stand the best chance of success if you plant them from late August to early September.

Poppies require rich soil and full sun to thrive. You might also see the value in providing them with a nutrient-rich flower mix. Whether you plant them in pots, containers, or in a traditional garden, you’ll be pleased you took the time to add poppies to your landscape.

Hyacinths

Add hyacinths to your shopping cart when nothing short of full vibrancy in your garden will do. Hyacinths are fragrant spring flowering bulbs that you can grow in your garden, containers, or pots.

Dig the soil over, add compost, and plant your bulbs 10cm below the soil level with the tips facing upwards. Space the bulbs about 10cm apart, but reduce that spacing by half if you’re planting in mass. While there can be a bit of work involved in growing them, you’ll know it was all worth it when they start to flower in spring.

Ranunculus

Are you trying to achieve a sophisticated spring garden look? Don’t look past ranunculus. These popular bulb flowers are available in a wide range of colours, like white, purple, orange, and yellow, and can be planted on their own or in borders.

They grow up to 60cm in cold to temperate areas and prefer well-drained loam soil with organic matter added. Ranunculus also flower better in full sun.

Choose an open area in your garden that receives plenty of direct sunlight daily, and plant your bulbs between mid-January to mid-May. Before introducing them to the soil, keep your bulbs in the fridge and soak them in water for at least two hours before planting. Place them up to 5cm deep in soil with the claw facing down, and place one bulb every 15-20cm.

Hebes

Gardening can sometimes be an overwhelming activity, especially when you have to keep track of the best times of the year to plant your favourite flowers. That’s less of a problem with hebe, which can be planted at any time of the year.

This beautiful flowering plant thrives in compost-enriched soil and full sun. It should also be planted at the same depth as when positioned in the pot you purchased it in.

Snapdragons

Snapdragons are unique and beautiful flowers that can’t help but put a smile on your face when you see them bloom for the first time. And fortunately for new gardeners, they are easier than you think to grow.

You can plant snapdragons in free-draining fertile soil positioned in full sun. Sprinkle your snapdragon seeds on the soil’s surface, then gently press them in. Snapdragon seeds need light to germinate, so don’t cover them up once you’ve planted them. Make sure you keep the soil evenly moist but refrain from overwatering them.

Spring Has Sprung, Get Planting!

If you want next spring to arrive with a hiss and a roar, it’s time to get planting! The more spring bulbs you plant, the more vibrant and beautiful your garden can look when spring rolls around once more.

If you need a helping hand, there are bound to be plenty of gardening experts in your area to assist in creating a garden you can be proud of.

Karan Kikani
Different Types of Gardens for Different Personalities

Very few people ever start with their ideal garden. You might move into a home with a well-established yard, or you’ve built your dream home on bare land and have to create something from scratch.

In both of these situations, you don’t quite yet have what you prefer, but that’s not to say you never will. If you need a helping hand designing a garden to suit your unique personality, some of the ideas below might be helpful.

The Busy Professional

Many busy professionals spend more time at the office than they do in their own homes, which can take its toll on their backyards. With very little time left in the day for maintenance, gardens can soon look unkempt and unloved.

While you can hire a gardener or lawn mowing expert to take care of everything, you might also decide to design a garden that reflects your busy lifestyle. Minimal lawn and garden, raised garden beds, and easy-care plants might all feature at the top of your must-have list.

Fortunately, it is possible to have an aesthetically pleasing and low-maintenance property simultaneously.

The Entertainer

After a busy week at work, you might love nothing more than returning to your slice of paradise and inviting friends and family over to enjoy your free time with you. In that case, an entertainer’s garden design might suit your needs perfectly.

There are many different ways you can create a garden for entertaining, regardless of your property size and budget. If you have a small patio area, you can add outdoor furniture, lighting, and even a few potted plants for a touch of nature.

However, if you have a more spacious yard to enjoy, you might decide to go ‘all out’ with a barbecue, spa pool, fire pit, or even an outdoor kitchen. The sky’s the limit when you decide to create an outdoor entertainment area for you and your loved ones to enjoy.

The Provider

When you see the price of fruit and vegetables in supermarkets throughout Aotearoa, it’s only natural to be curious about growing the staples yourself. The green-thumbed members of your family might prefer a garden that prioritises functionality over aesthetics so that you can literally enjoy the fruits of your labour.

Such a garden might include tunnel houses and greenhouses, raised vegetable garden beds, and even fruit trees if you live in a warmer part of the country. Generally, such gardens feature a range of helpful features like pathways to access fruit and vegetables, watering systems for the drier months of the year, and potting areas for when new growing seasons begin.

The Potterer

When you have plenty of time to stop and smell the roses – literally – it makes sense to build a garden you can turn into your hobby. Such a garden might include a vibrant array of perennials and annuals, trees, shrubs, and pathways winding through them all for easy access.

Your beautiful, well-established yard might also have lighting, seating areas for people to sit and enjoy their surroundings, and a dedicated potting space.

The Modern Homeowner

Clean lines and simplicity is a preference for many homeowners, especially those who prefer easy-clean outdoor spaces that look sharp, modern, and welcoming. The simpler the design, the easier it is to maintain and the more attractive it might be to prospective purchasers should you decide to sell your home in the future.

A modern homeowner’s yard typically has an abundance of hardscapes, such as decking materials, retaining walls, concrete patios, stone walkways, fountains, and more. It usually has a larger ratio of hard materials to softer ones, allowing for easier maintenance and a more contemporary look.

The Space Saver

Not everyone has the quarter-acre section that used to be the Kiwi dream. Now, New Zealanders are making do with smaller, easier-to-maintain sections that require less of their free time.

However, the downside of such a section is that homeowners have limited space to work with, which means they have to get creative with any element they introduce. Fortunately, there are many different ways you can still have the backyard features you want, regardless of your section size.

For example, rather than having vegetable gardens taking up a lot of your space, you can build vertical gardens that allow you to grow the same amount of vegetables in a much smaller area. You might also opt for hanging planters rather than potted plants that take up valuable entertainment space.

Create Your Personal Paradise

No matter your personality, you’re bound to find a garden style to suit. The hardest part is bringing your vision to life. If you need a helping hand turning your garden dreams into reality, contact the friendly team at Crewcut to assist. We can help with all manner of outdoor-related tasks, such as gardening, garden tidy-ups, lawn mowing, water blasting, tree trimming, and more.

Karan Kikani
A ‘How To’ Guide for Building a Beautiful Garden Path

A sprawling lawn can be an ideal way to navigate your yard at most times of the year. Although, once winter hits, it can quickly turn into a soggy, soppy mess. With that in mind, you might be toying with the idea of creating a garden path to protect your grass and still access the most-used areas of your property.

Garden paths can be both aesthetically-pleasing and practical, which is why you’re probably eager to jump straight into this project. However, before you do, you might see the value in finding out how to build a beautiful garden path you can be proud of. Follow these steps below, and it might be easier than you think.

Step 1: Plot Your Path

Plotting a garden path is not a five-minute process. Sometimes, it can take days of traipsing the same patch of grass to learn your regular walking patterns and know the best area to build a path.

Many people start by plotting out the primary path that connects to the street, house, or garage. You might follow this path to get from your home to the garage, or from the garage, to the house, and to the street.

From the development of this path, you might then look at less formal options that take you to a vegetable garden, the washing line, and other popular parts of your property. Be mindful of how you currently navigate your property so that you can confidently plot out where you’ll install your new path.

Step 2: Consider the Width

You might not think that the width of your path matters, but failure to consider dimensions might mean your newly created path stands out for all the right reasons. A primary path should be at least 1.2 metres to allow for two people to walk on it side by side. 

However, secondary paths, such as those that take you from your house to the washing line, might only need to accommodate one person at a time. Such a path could be much narrower at around 76-90 centimetres.

To help you make your decision, measure the exterior architectural elements of your home, such as your home’s entrance with its trim. Aligning with these elements can allow for a much more cohesive property design.

Step 3: Choose Materials

No two paths are the same. Some people prefer the contemporary elegance and cleanness of pure, square-edged concrete, while others like brick and stone pavers cleverly set into softer surfaces like turf.

You might even consider the style of your home so that you can choose materials that work in harmony with it. There can be a lot to think about before making your choice, including a few logistics-based decisions. For example, you wouldn’t place loose materials like bark near entrances, with a high risk of it being traipsed inside your home. 

Among the most common are concrete, gravel, bricks, and stones. Consider more robust materials for primary paths and softer, more aesthetically pleasing materials for those secondary paths that will be used less often.

Step 4: Prioritise the Base

A pathway can look like a picture of perfection when you first lay it down, but it won’t necessarily stay that way forever if you haven’t spent time laying the perfect foundation. Rather than simply scattering bark or gravel on a grassy surface, you might need to think about levelling, drainage, water run-off, and much more.

If you want your path to last for many years to come, you might need to lay a coarse crushed stone base down to around 10 centimetres into the ground. This can help your pathway stay level over the years of use.

If you have clay soil, drainage might be an issue, so installing drain pipes down the middle, surrounded by gravel, with drain holes facing down, might be crucial to prevent water-related problems.

You might also need to apply a levelling product, like sand, if you’re installing pavers to ensure all stones are neatly nestled in place. Some homeowners may even see the value in purchasing masonry edging to hold stones, pavers, and bricks in place.

Step 5: Future-proof It

You might not have any plans to illuminate your paths now, but that doesn’t mean you won’t in the future. Consider installing an electrical conduit above the base so you can effortlessly retrofit wires for a practical and eye-catching low-voltage lighting system to guide the way.

Step 6: Consult the Experts

We can’t all be experts in everything we try, and that’s okay. Building a beautiful garden path can be hard work, and there’s no reason why even the savviest DIYer can’t call professional path builders for advice and expertise. With their assistance, you can enjoy a well-made, long-lasting path that perfectly borders your lawn and enhances your landscape.

Karan Kikani
Flowers That Bloom - Even In Winter

Winter can be a dismal time of year. You might not have to mow the lawn or weed the garden as often, but you have to stare at a bare, dull-looking yard with no growth and not a flower in sight.

However, it might surprise you to learn that you can have a vibrant-looking garden in winter. All it takes is the right selection of plants, such as these options below.

Hellebores – The Roses of Winter

It won’t take you long to work out why hellebores are often called the roses of winter or winter roses. These fast-establishing perennial plants produce elegant flowers and thrive in shady areas during late winter and early spring.

Hellebores love well-drained, rich soil and will thrive in full or part shade. They don’t tend to enjoy the sunshine as much as many other plant varieties, which makes them ideal for wintry conditions.

Once you plant them in rich organic matter, it doesn’t take them long to make your garden their permanent home. They grow quickly and, as an added bonus, are easy to take care of. You’re also bound to enjoy planting the many different varieties that produce a range of flowers in shades of pink, white, and reddish-purple.

Camellias

Every homeowner deserves to have a showy flower that can be the envy of neighbours, and camellias definitely tick that box. Camellias are evergreen shrubs that bloom throughout winter and spring, providing a much-needed boost of colour in an otherwise grey and dreary winter landscape.

Camellia flowers are stunning and contrast beautifully against the green, glossy foliage of the shrub. They are also quite versatile in that you can turn them into hedges or shape them into beautiful shrubs you’re proud of.

Among the best camellias to purchase and plant are Sasanqua varieties, which flower from autumn to late winter, and Japonica, which flower from winter to late spring.

Pansies

If you’re not much of a gardener and often receive gardening help rather than tackling the task yourself, pansies are undoubtedly an ideal plant option for you. Not only are they easy to care for, but they can liven up the most depressing-looking winter garden with ease.

You simply need to purchase and plant them before the cold weather sets in, and they’ll have no problems thriving in all sorts of weather conditions like rain, hail, and even frost.

Alongside being a vibrant addition to any garden, pansies are also incredibly versatile. They are the ideal addition to any sprawling cottage garden but are also right at home in hanging baskets, garden beds, and borders.

Cornflowers

One of the hardest things to come to terms with when you plant new flowers is the fact that not all will grow in your garden year after year. Some will thrive for a short time before disappearing forever. That’s not the case with cornflowers.

These winter beauties are a common sight in the average cottage garden in New Zealand and tend to thrive in a wide variety of conditions. Once they’re there, they continue to grow each year.

While it can take some time for them to establish themselves, they tend to thrive once they settle into the soil. You can then enjoy beautiful double flowers in a vibrant shade of blue once the temperatures plummet.

Calendula

Frost can be a significant problem for the average gardener. It can easily wipe out a vegetable crop if you haven’t prepared for it, and many perennials succumb to particularly hard frosts. But out of all flowers that bloom in winter, Calendula would have to be one of the most robust varieties.

These vibrant orange flowers are frost-hardy, which means they aren’t normally phased when the mercury drops. You can also plant them in your vegetable garden to keep aphids away without needing to resort to pesticides.

Violas

Violas, or baby pansies, are a delight in any garden. Even when everything is dying in your garden around them, they stand out with their vibrant purple-blue petals and healthy green foliage.

Violas can be planted in March or April in spring or during autumn in September and October. However, winter varieties are hardy enough to be planted out in the winter months. Once you’ve planted them, you can enjoy their presence yearly.

Time to Get Planting

There’s no denying that winter is many gardeners’ least favourite time of the year, but that doesn’t mean your garden has to look as sad as you feel. By planting flowers that bloom in winter, you have something to look forward to once we welcome the colder temperatures.

Talk to your local lawn care and gardening experts about the best winter plants to include in your garden and how to create a peaceful flowery paradise of which you can be proud.

Karan Kikani
Tips to Care for Your Climbing, Creeping, Crawling Plants

Explore the average proud gardener’s property, and you’ll likely discover at least one variety of climbing, creeping, and crawling plants. You might wonder how they managed to achieve such incredible growth or even how they managed to train their plants to grow a certain way.

It’s easy to assume that caring for your climbing, creeping, and crawling plants is labour-intensive and complicated, but it doesn’t have to be. If you’re considering purchasing such plants in NZ, you might find the following tips helpful.

Choose the Right Plant

First and foremost, it’s essential to know that climbing plants, creeping plants, and crawling plants are three different plant types that grow in different ways.

Crawling plants creep along the ground. They are also known as clambering or scrambling plants and potentially could climb but generally don’t. Then there are creeping plants or creepers, which grow close to the ground with small vines. They function as a form of ground cover for your garden beds, which can be convenient for homeowners who don’t like weeding.

Climbing plants ‘climb’ up fences, walls, and other tall objects, and most varieties have vines. However, climbing plants can scale horizontal surfaces in many different ways. For example, plants known as ‘twiners’ will coil themselves around anything in their path, including neighbouring plant stalks, wire, and even nails.

Winders can grow similarly and will form stems around trees, stakes, and other support structures you’ve put in place. Clingers might be a climbing plant worth your inspection if you don’t consider yourself a very competent gardener. These plants, such as ivy, require no support and will easily grow on rough walls without much guidance.

You might have also heard of ramblers and suckers. Suckers have sticky-padded stem tendrils that readily attach to whatever obstacle is in their path, while ramblers, such as roses, navigate support structures using their thorns.

Understand the Best Growing Conditions

Now that you’re aware that climbing, creeping, and crawling plants are all different, you’re probably not shocked to learn that they all have different ‘best’ growing conditions. It’s important not to assume that the way you grew one plant successfully is how you can successfully grow another.

Before purchasing any new plant that requires your care to climb, creep, and crawl, make sure you research the type of soil and conditions that it needs to thrive. Otherwise, you might be fighting a losing battle.

For example, the ever-popular clematis loves warm temperate and cold temperate climates. They prefer full sun, but some varieties love the shade. Regardless of where you plant them, they also require cool roots and protection from strong winds.

Plant Them in Healthy Soil

Crawling, creeping, and climbing plants have their work cut out for them when you bring them home as new plants. They have to establish themselves essentially from scratch, which requires a lot of growing. 

Give them the best start to life by planting them in healthy soil. Alongside making sure you’re providing them with soil they prefer, consider adding compost, a slow-release fertiliser, or even blood and bone to kickstart their growth period.

You might also like to add a fine bark or mulch to keep weeds away and retain much-needed moisture.

Water Often

New Zealand experiences scorching-hot temperatures in summer, and this can spell failure for many new plants yet to establish themselves properly. However, a hot summer doesn’t have to spell the end of your new climbing plants.

If you’re just getting ready to plant your new climbing plants, you might be able to give them the best start to life by regularly watering them.

Prioritize Support

While you might not need to worry about support for creeping or crawling plants, the climbing variety tends to require a significant amount of support. Fortunately, you’re not short of options.

Trellis is popular among many avid gardeners as it allows for easy training. The thicker the trellis, the more weight it can support. You can also install trellis on walls, fences, or the ground.

Alternatively, stakes might be a support option you consider. You can place wood or metal stakes in the ground when you plant climbing plant seeds or cuttings. As your plants grow, you can tie pieces of fabric or twine around the plant and attach them to the stakes to ensure they grow in the direction you want.

If you’re purchasing a climbing plant to form a specific shape, you might decide to install an arch in your garden. Arches are beautiful additions to any space and can become a picture of perfection when climbing plants hide the original structure.

Plant Your Creepers, Climbers, and Crawlers

Climbing, creeping, and crawling plants can be delightful additions to any garden. Now that you know the best practices for caring for them, you might feel confident enough to make your purchasing decision. If you need any help, advice, or general garden care, there are always gardening and landscaping experts like Crewcut to assist.

Karan Kikani
Plants in Harmony: How to Maintain Plants in Symbiosis

Hiring a gardener is one of the best ways to benefit from a beautiful garden without putting in all the hard work yourself. However, believe it or not, symbiosis is also another option for time-poor garden lovers who want their gardens to look after themselves.

Symbiosis, also known as mutualism, refers to anything that can live together and affect each other. An example of symbiosis would be planting a tomato plant and basil plant together. The tomato releases nutrients into the soil that the basil can use to grow, while the basil attracts pollinators to help the tomato plant grow.

However, if you’re new to symbiosis in the plant world, you may not know how to maintain this mutually beneficial relationship. We’ve included some top tips below.

Grow Mycorrhizal Fungi

If you’ve always struggled to provide your plants with the nutrients they need, such as phosphorus and nitrogen, consider growing mycorrhizal fungi. This fungi wraps itself around the roots of your plants and enhances nutrient uptake.

The plants release carbohydrates as sugar in return for the fungi’s help, which the fungi then consumes. Many different vegetable plants can benefit from this relationship, such as lettuces, carrots, cucumbers, and corn.

If you’re unsure where to get mycorrhizal fungi from, you’ll be pleased to know you can grow it yourself. Collect grassy species like oats, wheat, and maize and mix them with legumes like alfalfa, peas, beans, and lentils. If you don’t have grass species, you can use an allium like a leek or onion.

The combination will become a healthy foundation for mycorrhizal fungus, which can then multiply in your garden. Alternatively, many New Zealand plant nutrient businesses sell this fungus ready to use. 

Attract Wildlife

Many homeowners love attracting wildlife to their properties just so they can admire them. After all, who doesn’t love waking up to birdsong? However, attracting wildlife can be essential for maintaining plants in symbiosis.

Birds, bees, and even butterflies might allow your garden to thrive far more than you anticipated. Birds help eliminate grasshoppers, slugs, caterpillars, aphids, and much more. They are essentially a natural form of pesticide that save you from having to use toxic products that have the potential to harm wildlife and even your pets.

They are also reasonably easy to attract with birdbaths, feeders, and birdhouses in your trees. While you’re luring the birds in, you can also be welcoming bees and butterflies to assist your plants. Plants that require pollination make up 35% of the crop production volume worldwide, and bees and butterflies are excellent pollinators. Without them, we’d likely be headed for a global food shortage.

Ask the Experts

The more your plants can help themselves, the less you have to do, which can certainly be a motivating factor to make sure your garden promotes symbiosis. However, if you’re unsure how to begin, asking gardening experts for help could be in your best interests.

They can assist with helping you know which plants to buy and which ones work together to help each other. The sooner you get the process underway, the sooner you might experience the benefits.

Best Plants for Symbiosis

We detail some of the best plants for symbiosis here, but there’s no harm in running through a few of the most popular options, especially if you need help getting started.

Lavender

Not only is lavender a beautifully aromatic plant that can’t help but put a smile on your face, but it’s also a powerful symbiotic plant. If you have particularly vulnerable plants, consider planting them near lavender to keep the insects at bay. Essentially, lavender works as an insect barrier.

Rosemary

A sprig of rosemary on your roast dinner is the perfect garnish, but there’s more to rosemary than meets the eye. Anyone battling with flies, beetles, and cabbage moths might see its value for keeping them away from your carrots, cabbage, and sage.

You might also notice that it enhances the flavours of your other vegetables while giving your broccoli the best chance of growth. However, it’s important to note that rosemary and potatoes don’t grow well together.

Tomatoes

Tomatoes are a versatile fruit/vegetable that can be the star of the show in many dishes, which is perhaps why so many people plant them each year. However, they also have profound symbiosis benefits.

Carrots, celery, parsley, asparagus, basil, and onion all love being neighbours with these red delights. You may notice a difference in how healthy these vegetables grow when you choose to plant tomatoes next to them.

As challenging as it can be to find the time to tend to your plants and enjoy a well-maintained and healthy garden, you don’t have to do all the hard work yourself. Alongside hiring gardening experts to assist, you can also create a symbiotic garden that can work hard to take care of itself.

Karan Kikani
The Importance of Pruning

When you already have so much on your plate, those less important tasks like yard maintenance can fall by the wayside. You may know you want to keep a neat and tidy property, but you may not realise that there’s more to tasks like hedge and tree trimming than aesthetics alone.

While dropping pruning to the bottom of your to-do list may seem like an easy decision, there can be value in taking action sooner rather than later. Prioritising pruning allows you to take care of the following things. 

Removing Dead, Broken, or Damaged Branches

As much as we like to think that our greenery will thrive on its own, that’s not always the case. Wildlife and the elements can cause a great deal of damage, as can pests and even children as they explore their natural surroundings.

When you decide to take care of pruning, either by doing it yourself or hiring the experts, you can take care of those dead, broken, or damaged branches and create an overall safer and healthier tree or hedge.

Making Your Property Safer

Most people consider their homes as places of safety and comfort, but they may not always be as safe as you think. If you haven’t given your trees the care they need, any damaged, diseased, or broken branches can pose a safety risk to your loved ones.

Regular pruning helps you to identify any signs of disease or damage so that you can remove affected branches. If left alone, those branches might fall without warning and damage your property or, worse, harm your family.

Encouraging Healthy New Growth

If your tree or hedge is covered in dead, dying, damaged, or diseased branches and foliage, the environment is not all that attractive for new growth. Those branches and greenery that will no longer thrive are sucking up all the sunshine and nutrients, leaving nothing for any new growth waiting for its chance to shine.

By pruning back any undesirable or unhealthy growth, you’re giving the healthy hedge or tree growth underneath a chance to form and bring your tree back to life.

Welcoming Controlled Growth

Whenever you plant new trees, shrubs, or hedge plants, you generally think long and hard about their placement to limit their impact on surrounding structures in the years to come. Otherwise, they might cause chaos as they grow by blocking drains, damaging property in storms, impacting plumbing, and more.

However, even when you do plant new shrubs in an area you believe won’t impact other parts of your property, pruning gives you complete control in ensuring that’s the case. Essentially, regular pruning allows you to ‘train’ trees and hedges to grow in a particular way for their health and the safety of your property.

Enhancing the Aesthetics

While aesthetics might not be the primary reason pruning is so important, it certainly plays a part in why you’d consider it. A beautifully trimmed tree or hedge is far more pleasing to the eye than one that’s gnarled, unkempt, and growing out of control.

Just as you would spend time and effort pruning a small Buxus hedge to keep it looking tidy, do the same for your trees, shrubs, and larger hedges. You might be surprised at how the occasional haircut can enhance the overall appeal of your property.

Laying a Sound Foundation for Healthy Flora

It goes without saying that a tree or hedge that has been cared for since it was planted will be much healthier and stronger than one left to its own devices. If you want your plant life to grow up big, strong, and healthy so that you can avoid future problems, prioritise pruning from the very beginning.

Fortunately, it’s easy to do when hiring lawn and garden experts to help. They can provide trimming services on a schedule so that you can reap the rewards without putting in the effort yourself.

What Does Pruning Involve?

The pruning services you require can depend on the type of plant life you have and your goals for their care. You might hire someone to reduce their density, which involves removing limbs to allow more sunshine to reach the canopy.

Some homeowners focus on maintaining the health of their plant life, which can involve simple cuts to clear any unhealthy limbs and greenery. Size management is also a crucial consideration, and this service typically incorporates the reduction of a tree’s height or width to keep a clear distance around obstacles.

Prioritise Pruning Today

Pruning might not seem important, but you may now realise that it is. If you haven’t yet considered this service alongside gardening, lawn mowing, and general backyard care, now might be the right time to add it to your to-do list. You can then enjoy peace of mind knowing that your trees, shrubs, and hedges are beautifully trimmed, healthy, and in the best possible position to thrive.

Karan Kikani
Planting a New Tree In Your Backyard

Many of us have dreamed about buying a new property with a well-established tree in the yard one day. It’s where the kids can hang their tyre swing, the birds can chirp, and the family can get some much-needed shelter and shade from the sweltering sun during a break from backyard cricket. 

But, sometimes, you end up purchasing a property without a tree. So, what do you do? You plant your own – and here’s how to do it.


Step 1: Choose a Tree

Whether you’re looking for evergreen trees, native trees, or ones that grow quickly and provide ample protection, you’re probably going to start researching different varieties to see which ones will suit your property’s layout the best.

We recommend contacting tree care or lawn care expert or talking to a local nursery team to determine the best tree types based on your yard size and climate. There are plenty of beautiful varieties from which to choose, such as maple, crab apple, Pohutukawa, and Puriri.

Some trees are better suited to larger sections than others, with the likes of the Puriri in the North Island being capable of growing up to 20 metres tall.

Step 2: Get Ready to Plant

When you’re planting a large tree to be a feature in your backyard (or front yard!), it’s essential to take your time to plan. Think about possible obstructions and obstacles and the distance from your home to where the tree is.

Some trees have complicated root structures that can impact pipes, drains, and even concrete. If you’re unsure about where the best place to plant a tree is, consult tree care experts near you. They can help you choose the right spot to ensure that even when mature, your tree works with your home, rather than against it. 

Part of the ‘get ready to plant’ process also involves looking at the elements of the area you’ve chosen to plant. For example, does the get enough sun and shade? Is the area underneath where you’ll be planting free of cables, wires, and pipes?

Step 3: Start Planting!

After choosing a tree type that best suits your property type and preferences, it’s now time to plant. Now, unlike other plants you can throw in your garden without a second thought, trees require a bit more care.

Consider purchasing a plant tonic to help reduce the risk of your tree experiencing transplant shock. You then need to dig a hole at least twice as deep and wide as the tree’s root ball.

Start filling the hole with a peat moss-type product, with added nutrients such as gypsum and blood and bone. These are available from your local nursery and are known to assist with plant growth and root growth and ensure the tree gets enough nitrogen.

When you have the hole partly filled, take your tree from the container you purchased it in and loosen the root ball (gently!). You can then put it in the hole you’ve just dug with the root ball top at ground level.

If you find that it’s too high or too low, add or remove the peat moss until it’s flush with the earth. You can then fill the rest of the hole with a garden mix and top it off with a mulch and feed product for root protection and moisture retention.

Step 4: Give the Tree Support

A kind word to your tree won’t go astray, but we’re talking about giving your tree physical support. It’s likely still too young to look after itself.

Without damaging the roots, stake the tree into place so that it has something to anchor itself against in winds. Remember, the roots haven’t yet established themselves, so there’s nothing else to prevent it from falling over. 

Simply place three stakes evenly around the tree, making sure they are outside of the root ball and tie them to the tree with webbing or ties. If you live somewhere windy, like Wellington, use windbreak to give the tree some protection for the first few years of its life.

Step 5: Look After Your Tree

Trees may look completely self-sufficient, but they do need our help from time to time. Whether you have a new or old tree, don’t forget to fertilise them each spring and autumn with fertiliser. Mulch around the base may also be appropriate twice-yearly.

Start Planting Today

If you’re hoping for a tree to be fully grown for a tyre swing by the time your kids start bringing your grandkids to visit, now’s the time to start planting.

Do your research on trees you like, talk to experts, and nourish your tree as if its life depended on it (which quite often does). Before you know it, your new tree can be thriving and providing you with a wide range of benefits in the years to come. 

Klaris Chua-Pineda
The Best Plant Identification Apps to Use
Plant identifier apps

Plant identification apps, also known as plant identifier apps, are primarily made for Android and iOS devices that help you identify a specific plant.

 If you’re not an avid gardener, you might use such an app to determine if something growing in your garden is a plant or a weed. Or, you might spot a shrub you like on a walk in your neighbourhood and want to know what it is so you can grow it yourself.

Its versatility is perhaps why plant identification apps are growing in popularity. If you believe you could benefit from one of them, you may find that the most challenging part is deciding which one. Read on to learn about some of the best plant identification apps so you can download one with much more confidence.


PlantSnap

Asking the gardening experts in your life what a specific plant is can take up a lot of time, but you can potentially speed up the process with PlantSnap. This tool can identify plants, trees, flowers, and even mushrooms. It has an extensive database of over 625,000 of them, as well!

Using this app is simple. All you need to do is install it on your phone, take a photo of the plant in question or use one from your photo gallery, then wait for it to identify it. Once it does, it can provide some helpful information about that plant.

Pl@ntNet

Pl@ntNet is a plant-identifying tool and free app that can identify plants through images you upload. You can download it as an app or even use it on a desktop computer if you have the photo saved.

Unlike some plant identifier apps that heavily focus on North America, this one is global. It offers several identification categories, such as world flora, useful plants, weeds, invasive plants, and more.

Best of all, you can upload a photo for free and have it identify your mystery plant by a variety of features like leaves, berries, shoots, and branches.

PictureThis

If you want to learn what a plant is and how to care for it, PictureThis might be the right plant identification app for you. This app can identify over 10,000 plants with a 98% chance of accuracy. It works with plants, flowers, and trees and can provide suggestions for their care from horticulture specialists.

PictureThis even allows you to learn more about your mystery plant in case you’ve identified it to grow more of it.

LeafSnap

LeafSnap is a free plant identification tool that you can also pay to use without ads. Whether you’ve discovered a unique-looking plant in your garden or you’re curious about a weed that’s popped up, LeafSnap could be how you identify it and create your plan of attack.

Unlike some other apps that may only be able to identify a small portion of all plant and tree species, LeafSnap has an incredible range of options. It can recognize 90% of all known trees and plant species.

Using AI, it identifies trees, fruits, flowers, and plants and can even tell you what a plant is based on fruit, bark, leaves, flowers, and more. It’s easy to download on iOS and Android.

iNaturalist

If you’re a passionate gardener who would like to know more than simply what plants you have, iNaturalist might be worth your consideration. While iNaturalist is an app, it’s also a social network of biologists, citizen scientists, and naturalists who map and share their observations of nature around them. 

iNaturalist was launched in 2008 as a joint initiative of the National Geographic Society and California Academy of Sciences and now has 1.8 million users. You can use the website or download the app and enjoy a more interactive plant identification process than most apps can offer.

All you need to do is record your observations, share them with fellow naturalists, and discuss your findings.

Google Lens

Google isn’t only a search engine; it’s a multi-national technology company known for its software, hardware, and cloud computing. So, it was probably only a matter of time before it made its way into the plant identification world.

Google Lens isn’t specifically for plant identification, but it has certainly proved itself as helpful for it. You can download it in the Google Play Store, take a photo of a plant, and bring up related results in Google. It’s a helpful tool for plants, animals, and much more.

Garden With Confidence!

Even though lawn care experts can be of assistance with any gardening and lawn care queries you may have, it’s clear to see that technology can be, as well. There are many helpful plant identifier apps you can download for free that tell you exactly what a plant is in just seconds. You can be an expert gardener in no time.

Klaris Chua-Pineda
Dealing with Aphids in the Garden
Aphids are the worst

Aphids. Even the word fills most gardeners with fury. These small sap-sucking insects make it their mission in life to weaken and kill your plants and can seem next to impossible to get rid of. 

But knowledge is power, and the more you know about them, the easier it might be to stop them in their tracks. If you’re currently dealing with an aphid invasion, here’s what you need to know.


What Do Aphids Do?

A more straightforward question to ask would be what do aphids don’t do. Here in New Zealand, we mostly see green aphids, but sometimes woolly aphids and black and white aphids make an appearance. Regardless of their colouring, they’re sapsuckers. They feed on a wide range of plants, weaken them, and spread disease.

You may also notice that, sometimes, they excrete a sticky, sugary, honeydew substance. This attracts ants and wasps and can lead to the fungi growth known as sooty mould.


What Plants Do Aphids Hate?

It can sometimes seem like whatever you plant, aphids will love and destroy it, but there are plants they don’t like. If you grow aphid-repelling plants, you may be able to limit just how much havoc they wreak in your garden.

If you’re trying to protect your roses, pair them with herbs and aromatic plants like dill, lavender, onion, garlic, and basil. Aphids don’t like these plants, so you may be able to give your roses a better chance of survival.

Some gardeners also rely on anti-aphid flowers like marigolds, sunflowers, petunias, and dahlias. Not only are they beautiful, but aphids would prefer not to live in an area with these flowers. As a result, anything else you want to keep free of aphids, such as vegetables, stand a much better chance.


What Plants Are Aphids Most Attracted To?

Aphids don’t generally discriminate when it comes to what plants they are most attracted to. While they have plenty they dislike, they prefer a wide range of flowering plants, herbs, fruits, and vegetables.

Generally, aphids make an appearance when temperatures are mild, and your gardens have plenty of foliage on offer. Spring and summer are when you will likely see large numbers of them on your plants, but they are also a year-round issue on many gardeners’ fruit, vegetables, and foliage.


Do Aphids Stay in the Soil?

There are thousands of aphid species in the world, and all have different habits. Most of the aphids we have here in Aotearoa live underneath the leaves of our plants, but we also have some that stay in the soil.

These are known as root aphids, and they spend their days underground feeding on the roots of your plants. This can cause plants to wilt and discolour and, in some cases, die. Fortunately, you can attempt to solve the problem by applying an organic insect control product to the soil and planting your root vegetables in a different location the following year.


Can Plants Recover from Aphids?

Yes, plants can recover from aphids! It’s easy to think that your plants are doomed as soon as aphids take hold. While that might be true of plants that were already weak, it doesn’t have to be the case with plants you have given the best chance of survival.

Plants that are grown in healthy soil with plenty of care may be in a much better position to fight off an aphid attack than plants you haven’t given much attention to at all. In many cases, your plants can be strong enough to fight an aphid attack without you even having to interfere.

Still, you don’t need to leave it up to your plants to do all the leg work. There are plenty of aphid control products on the market and strategic planting techniques that can help keep their numbers to a minimum.


How to Get Rid of Aphids Permanently?

You will most likely never be able to get rid of aphids from your property permanently. When they have a fresh supply of foliage to enjoy, they can always make their way back.

However, there are ways to get rid of them from your garden for at least a growing season or two. You can mix a few teaspoons of mild liquid dish soap with a litre of water and gently spray or wipe it on your plants’ leaves, stems, and buds. This won’t harm your plants, but it will kill aphids.


Are Aphids Harmful to Humans?

Aphids aren’t harmful to humans, but they are incredibly annoying. If you have sensitive skin, the honeydew they produce can be an irritant. Therefore, you should always carry out gardening and aphid treatments while wearing gloves.


Say Adios to Aphids

Aphids are frustrating, and they cause no end of grief to avid gardeners who just want to watch their roses, fruit, and vegetables thrive. By being selective with your plant choices and proactive with treatment, you may be able to say adios to aphids and give your plants a fighting chance.

Klaris Chua-Pineda
What Are Those Common Noxious Weeds In My Garden?

It can sometimes seem like no matter how much weed killer you use and how often you tend to your garden, noxious weeds in NZ still seem to take hold.

As they nestle their way in between your prized peonies and other lovely plants, it can be hard to notice that they aren’t a plant you love but, rather, common weeds NZ homeowners have to contend with every day.

If you don’t have green fingers, you may not know what they are and how to get rid of them. Allow us to shed some light on the most common and noxious weeds in NZ and what you can do about them.

Oxalis

If you’ve read our previous piece about Oxalis, then you’ll know this creeping weed is not something most homeowners like. It’s a rhizomatous flowering plant that’s genuinely quite beautiful but is definitely a frustrating weed.

It’s toxic to animals and even us in high doses, and it can be tricky to eradicate once it’s in your garden. However, there are few different ways you may be able to get rid of it.

Try baking soda mixed with warm water or even boiling water. Some people also have luck with a product called Death to Oxalis, which burns the leaves and weakens the plant, starving it.


English Ivy

Rumour has it that every time you say “English ivy”, a gardener falls to their knees and weeps. Out of all weeds in lawns and gardens, English ivy in NZ would have to be one of the most persistent and frustrating.

It takes over walls, fences, and trees and even manages to form ground cover if given a chance. It’s also spread by birds and green waste, which means it’s almost impossible to avoid. However, you can get rid of it.

Use a paintbrush to cover the ivy with metsulfuron-methyl 600g/k. However, this method is not suitable if ivy is spreading over trees. Products containing 100g picloram+300g triclopyr/L (60ml/10L) may also be appropriate, but you can ask your local lawn care provider for their advice.


Periwinkle

Don’t be fooled by the beauty of this lovely green cover plant with purple flowers. Sure, it’s attractive, but it’s also quite damaging. This evergreen perennial grows quickly and forms a mat of vegetation with tough stems.  

It can grow so thickly and densely that it smothers native plants and stops them from regenerating. We’re also afraid to tell you that getting rid of it is hard work. This plant can actually stop herbicides from moving to the rhizomes, and then it can resprout. One of the best approaches to its removal is digging it out, so you might have to get dirty for this one.


Broad-Leaved Dock

Out of the many different common weeds NZ homeowners have to deal with, broad-leaved dock is among the most prevalent. It’s a perennial weed with a taproot system that seems to survive well in nearly all environments.

It can survive lawn mowing and cultivation, which means standard practices don’t tend to phase this frustrating plant. However, applying high rates of glyphosate seems to be one of the most appropriate control measures available.


Foxglove

As lovely as foxgloves look and as suitable as they are for many gardens across New Zealand, they can also become a weed. Foxgloves can also be poisonous to humans and livestock, which is why many homeowners may not want them in their garden.

Fortunately, this noxious weed in NZ can be managed. Biodegradable weed killers for foxglove weeds are available, and you can replant the area within seven days.


Hemlock

Hemlock is a foul-smelling biennial weed that is poisonous and unwanted. It has smooth stems, a thick taproot, and some red and purple colouring mixed in with green.

This noxious weed can also cause birth defects if eaten by pregnant animals. Fortunately, hemlock tends to grow in isolated patches, but it can also be quite prevalent in new pastures. Studies at Massey University have found that bentazone and flumetsulam are among the best control measures for hemlock.


Thistles

Thistles are prickly annual-perennial weeds with taproots that most homeowners have some experience with. They grow in waste areas of gardens and even in lawns, and we have several different species here in Aotearoa.

Among the most common are Californian thistle, star thistle, Scotch thistle, and nodding thistle. The most challenging to control is Californian thistle, which is identifiable by its purple flower.


Take Charge of Your Weeds

The problem with weeds is that they don’t seem to give up. You could spend hours of your free time tackling them, only for them to grow back. Free up your time by leaving weeds, lawn mowing, and other property tasks to the experts. Your local property maintenance experts are just a phone call away.

Klaris Chua-Pineda
Watering Tips for Outdoor Potted Plants
unsplash-image-yyXw1lGJypI.jpg

There is plenty of helpful information on the internet for how to care for your gardens – both in the ground and raised. However, a growing number of people are swapping those sprawling garden beds for outdoor potted plants, which means having information on keeping them thriving is also crucial.

Through a lack of space or time, you might have large pots neatly arranged in your outdoor space. We’ve included some helpful information on how to help them live their best lives. 

Position them in the sun

Even though not all plants like direct sunshine all day, it can be pretty vital to position your potted plants where they will see sunlight for at least a few hours each day. This can be quite a feat for plant owners in some parts of the country with less sun than others, but it can be necessary for plant survival.

If you’re concerned about the high intensity of the sunshine your chosen pot plant area receives, consider purchasing plants that thrive in the heat.

Portulaca Pizazz is a vibrant, gorgeous, and drought-resistant plant that thrives in full sun. Not only is it a brilliant groundcover plant, but it also does incredibly well in pots. You might also plant rosemary, flaxes, grasses, and succulents in your pots if you’re worried about the impact of drought conditions.

Keep soil damp, but not wet

Soil can be complicated. Not only do you have to buy the right type for your plants, but you also have to make sure you keep it at the right moisture level. Outdoor potted plants require moist soil but don’t tend to love it when it’s too moist. Strike a balance for the best chance of success.

Generally, outdoor potted plants need more water than those planted in the ground. Water them generously until water runs out the bottom, and make sure any containers you buy have holes for this to happen. 

You can gain a sense of when you need to water by touching the soil. Water it when it’s dry to touch and pay attention to your plant type’s specific watering instructions.

With the fear of underwatering, there is also the fear of overwatering, which some plants can be sensitive to. Always give your outdoor potted plants plenty of time to try out between watering.

Be careful with how you’re watering the plants

Now that you know when you should water, it’s a good idea to focus on how you should water. Surprisingly, there is a right and wrong method. Water from the top down so that you can avoid getting water on the leaves of your plants. This can increase the risk of fungal infections. 

However, this is unlikely to be a problem if you have tropical plants like ferns, air plants, and orchids that thrive on humidity. Their leaves are waxy, which means water mostly slides off them.

Add mulch

Mulch is any gardener’s best friend, and it can also be a helpful product to have if you’re the proud owner of outdoor potted plants.

Plants that are sensitive to over-watering can greatly benefit from it, and it may also stop soil from drying out fast. Some plant owners even rely on mulch to regulate soil temperature and improve the aesthetics of their potted plants.

Use potting mix

Digging in your garden for soil to fill your outdoor pots can be tempting. After all, it’s free and easily accessible. However, if you want to put your plants in the best possible position to thrive, leave that garden soil where it is.

Instead, invest in potting mix. Potting mix is far better for air circulation and drainage than soil. It’s also readily available from garden stores, easy to tip into pots, and affordable.

Don’t set a schedule

Pets and children signal when they’re hungry or thirsty, but plants can’t. Typically, they just start to show signs of neglect, and by that point, it might be too late to bring them back from the brink of death. 

If you’re a self-described neglectful plant parent, you may have considered setting a watering schedule so that you never forget. However, this may actually do your plants more harm than simply failing to water them often.

Plants only require water when the soil is dry, and that may not always be at the same time on the same day that your schedule calls for. Simply get into the habit of poking and prodding your soil to take note of soil moisture levels. 

Leave all yard maintenance to the experts

Taking care of your lawns and outdoor plants can take up a considerable amount of your time and energy. If you’d prefer to do something much more fun than watering plants, leave these tasks in the capable hands of lawn care experts.

Klaris Chua-Pineda
Garden Care Tips For Seniors and the Elderly
 
Gardening for the elderly

There can be a lot of uncertainty in life, but one thing that is certain for most of us is that we’ll get old. The older we get, the harder it can be to do things we once used to manage with ease. Gardening is an excellent example of that.

We may have once somersaulted through the garden, trimmed hedges within minutes, and dangled from the tallest branches, but getting older can make it hard to even drag a heavy garden hose around the lawn.

If you’re not quite ready to hand over the reins to someone else, consider these helpful tips to make lawn care and gardening just that little bit easier.


Benefits of Gardening for Seniors

Firstly, let’s look at why gardening can be so beneficial for seniors in the first place. It’s an enjoyable form of exercise, reduces stress, helps with mobility and flexibility, and even makes sure you maintain the use of all your motor skills.

So, while you might hand over some of those trickier tasks like hedge trimming to experts, there is undoubtedly value in continuing to do as much for yourself as possible.


Plant Low-Maintenance Plants

With a lifetime spent in the gardens, it’s easy to think about planting the things you like rather than what you can manage. The reality is, high-maintenance plants can require more labour than you’re able to cope with.

For example, rhododendrons are gorgeous but crave your attention 24/7. They want temperatures of 18°C and plenty of humidity, and they don’t like it when their soil is too alkaline. You may be forever pouring vinegar into the ground and doing soil pH tests. The Wandering Jew is also a beautiful plant, but you constantly need to pinch back the growing tips.

Talk to your local gardening centre about different low-maintenance plants that can grow without you needing to spend hours in the dirt each week.


Use Raised Beds

Your knees, hips, and back are probably not what they used to be. For extra comfort or to alleviate any pain you’ve been experiencing, consider making or purchasing raised garden beds. They allow you to stand in a more comfortable position while tending to your plants.

Raised garden beds can be as simple as wood frames set high on your lawn or ready-made self-sufficient planters on wheels with shade covers and water irrigation.


Change Your Watering Process

As time passes, dragging a gardening hose around your property and carrying heavy watering cans can soon take its toll. Fortunately, there are other options you may like to consider. Built-in water irrigators can be a convenient and cost-effective way to make sure your plants receive as much water as they need.

You may also see the value in a rain barrel for water collection within close proximity to the garden beds that require the most watering.

Focus On Soil Quality

It can be hard work trying to keep plants alive that are determined to die. You may find yourself spending an awful amount of time outside in the elements, praying to the plant gods to please let your precious petunias live.

But just as a house needs a solid foundation, so do most plants. Focus your attention on soil, and most of your plants can take care of themselves. This means you may need to visit your local garden centre for fertiliser, mulch, and compost and brush up on your pH soil testing skills.


Protect Yourself

It’s much harder to bounce back from gardening injuries as you get older, particularly if you are living with a chronic illness or disability. Even if you’re only going to be pruning a couple of branches, put your safety first.

Wear long-sleeved pants and shirts, and make sure you wear gloves that can withstand a rose thorn at a minimum. If you’re not competent working at heights, leave your tree trimming and hedge care in the capable hands of gardening experts.

If some tasks require power equipment like chainsaws and trimmers, question whether you’re best to leave these jobs to a family member, friend, or reputable lawn care business.

Most importantly, don’t forget to take breaks. Purchase lovely garden seating that you can use to admire your efforts and drink plenty of water. If you’re working in the sunshine, don’t forget to wear a hat and sunscreen.


Ask For Help

Even though your mind says you are more than capable of tackling all garden-related tasks, your body might say otherwise. It’s okay to ask for help if you’re no longer able to manage your garden comfortably or you need some ideas on how to make the process easier. 

Crewcut is more than happy to assist with all your gardening requirements, from lawn mowing and hedge trimming to tree pruning, gardening, and everything in between. Why not contact the friendly team and find out how they can help?

Klaris Chua-Pineda
Choosing the Best Pruning Tools for Your Garden Needs
elderly man pruning.jpg

Even if you don’t consider yourself to be a savvy gardener, you’ve likely come to understand the importance of pruning and having the best pruning tools. This one simple task can prevent disease, encourage flower and fruit production, and have your plants looking in tip-top shape.

However, if your current pruning tools are looking a little worse for wear, and you’re eager to have the best of the best, you may want to consider the following information.


How to Choose the Best Pruning Tools

Aside from looking at the price tag and brand, there are a few things to consider before buying the most suitable pruning tools for the task at hand. What your friends and family find right for them may not be ideal for you.

Weight

Firstly, consider its weight. When you’re spending a long time pruning your roses, you don’t want to experience pain in your arms and wrists from an overly heavy pruning tool. If you’re purchasing in a shop, you can compare the weights of multiple pruning tools. Online shoppers can typically find weight information in each product description.

Sharpening Process

If you’ve got quite an extensive garden clean-up project on your hands, the sharpening process is also worth considering. Are they easy to sharpen? Can you replace the blades?

Left or Right-Handed

Only around 10 percent of the world’s population are left-handed. If you’re in the minority, pay attention to whether the pruning tools you choose are suitable for your pruning style. Unfortunately, not all gardening tool manufacturers cater to the lefties among us.


secateurs.jpg

Secateurs

You might think purchasing secateurs is as easy as finding the cheapest pair and buying them. However, there can be much more to the process. You have to consider whether you want bypass or anvil blades. Both allow you to perform different cuts.

Bypass blades make up the majority of secateurs types. They allow you to perform scissoring actions because they have a beak-like cutting blade. This blade type also allows you to cut close to the stems of your plants.

Secateurs with anvil blades have both blades sharpened to make easier cuts through thick foliage. They are ideal for removing dead wood, but not so much for getting close to stems. What’s more, if you don’t sharpen them, you’re at risk of damaging the cut branch.

The best secateurs are comfortable to hold, don’t open too wide, and don’t have a stiff spring. It may also be helpful if they have an ergonomic handle for comfort.


Loppers

If you have tough foliage to deal with or an unruly hedge, loppers may be worth adding to your pruning tool arsenal. They have long handles, robust blades, and some even come with ratchet systems and extendable handles.

These handles allow you to reach further without having to rely on ladders. You can choose from bypass or anvil loppers, and both may be suitable for branches up to 45mm thick.


Pruning Saw

Branches that are much too thick for secateurs and loppers but much too small for chainsaws may require a pruning saw. The market is full of different options, but most have angled teeth that allow you to push and pull against the branch to make quick cuts.

The best type of pruning saw to buy is one that comes with sharp triple-teeth blades, a blade cover for protection, and a comfortable handle.


Hand Shears  

If you often admire the beauty of your neighbour’s box hedging, then you’ll likely find that they’re using hand shears to get the job done. Such a tool is helpful for hedge trimming, cutting topiary, and giving Buxus hedges a much-needed haircut.

If you have tall hedges to contend with, the best pruning tool in this instance will be hand shears with extendable handles.


Long-Reach Pruners

Out of the most common ACC claims, ladder falls are near the top of the list. You can reduce your risk of becoming a statistic by investing in long-reach pruners. They are, without a doubt, one of the best pruning tools to own.

This handy tool is essentially a pair of secateurs attached to a pole. They often have a lever or rope on the end that you pull to perform a cut. In most situations, but depending on the brand and quality, they can perform cuts on branches up to three centimetres thick.


Do I Really Need These Tools?

If you’ve got plenty of get-up-and-go and a passion for gardening, these five pruning tools above are going to be the best additions to your garden shed. However, you’ve still got options if you don’t like gardening.

You can leave your tree trimming, rose pruning, hedge trimming, garden clean-ups, and even lawn mowing in the capable hands of lawn care and gardening business owners. You may be surprised at just how many experts in your town or city are ready and waiting to lend a helping hand.

Klaris Chua-Pineda
Garden Art Solutions for a Warm and Welcoming Outdoor Space
garden art solutions.jpg

You could have the most beautiful gardens in the world and the most well-mowed, manicured lawns, but there can still be something missing. Creating a warm and welcoming outdoor space can require a little more than that, so why not look at garden art solutions?  

If you’re stuck for ideas, we’ve included a myriad of different options below that may just tickle your fancy.


Kiwiana Art

From a tin pukeko guarding your prized peonies to a tuatara spreading across your garden boundary, there are so many things that can symbolise your New Zealand pride. The best part is, many of the Kiwiana art pieces you find in NZ are made in NZ by innovative Kiwis looking to share their creativity and passion.

The hardest part about this form of garden art is deciding what to choose. You may end up buying more than one to decorate your quaint patio area.


Glass Features

Even though glass is more common inside your home than outside it, it doesn’t mean it can’t become a beautiful form of art for your garden to make it more welcoming. In fact, this versatile material is one that can be transformed into a variety of different ornaments, sculptures, and wall art pieces that you’ll likely adore.

Be on the lookout at your local farmer’s market or garden store for beautiful glass garden screens, staked ornaments, and even bird feeders. You may be surprised at how well this material stands up to the elements.


Clay Pots

If you’ve been working on your property’s landscape design for some time, and haven’t found the perfect piece to tie the entire look together, then why not look at some clay pots? They come in a variety of sizes and styles and can be the final warming feature your entertainment area needs.


concrete leaf impressions.jpg

Concrete Leaf Impressions

Many people don’t want to have to deal with the maintenance requirements of a stained or natural deck. As a result, they opt for a concrete patio area that just requires quick water blasting from time to time.

The problem with concrete is that it can sometimes lack character. It’s grey and dull, and painting it can make it a slip risk in the colder months of the year.

Fortunately, you can combat the sterility of concrete with beautiful leaf impressions. As your concrete is drying, you can press your favourite leaves in a random or organised pattern onto it. The result is a hint of nature that you can enjoy for years to come.


Water Features

How blissful would it be to hire a lawn care company to mow your lawns while you sit on your deck, reading a book and listening to the gentle babble of a water feature? Water features, big or small, can be the icing on the cake for any beautiful outdoor space created for your friends and family to enjoy.

They come in a variety of sizes and designs, and they can often pair harmoniously with ponds. The hardest part will be deciding what type to buy.


Wrought Iron Art

It can be challenging to find a piece of art for your backyard that doesn’t eventually succumb to the elements. Although, wrought iron is undoubtedly ready to change your view. Even though this material can be a little more expensive to buy after being crafted into a beautiful animal or design, its longevity means it pays for itself in the long run.

In comparison to other materials, it’s resistant to dents, weather events, and shock. In the fencing world, it’s often referred to as ‘100-year fencing’ – and now you know why.


Concrete Sculptures

If you live in an exposed or coastal part of Aotearoa, you probably understand the importance of purchasing garden art that doesn’t blow over to the neighbours’. You may have even learned that the hard way when your trampoline ended up at the local dairy.

Fortunately, you can buy garden art that avoids that problem – because it’s made of concrete. There’s something for every property style - from beautiful large garden pots to exquisite sculptures raw or painted.

sculptures for garden.jpg


Vertical Planters

Sometimes, all that is missing in your outdoor space is colour. But how are you supposed to get that without painting any raw materials or investing in rugs and cushions that you have to drag inside every evening? Vertical planters can be the answer.

If you install them on some trellis, a feature wall, or a fence around your backyard, you can fill them with vibrant flowers that give your outdoor area a beautiful burst of colour.


Time to Go Shopping

Even though any outdoor entertainment area can be a continuous work of progress, you may be surprised at just how easily a piece of garden art can tie the entire space together. Why not shop local and see what talented artists near you have available?

Klaris Chua-Pineda
Your Herb Garden Questions Answered
unsplash-image-9zVMF1HJiic.jpg

Having an indoor herb garden in NZ provides all kinds of benefits. You never have to worry about not having the right herbs for recipes, and you can transform a bland dish into something spectacular.

However, learning how to grow a herb garden in NZ takes time, patience, and a little bit of luck. Here are a few things you might need to know before you start trying to grow some essential cooking herbs.


Which Herbs Can Be Planted Together?

Even though many garden vegetables can be picky about their neighbours, herbs are less so. Most of the commonly used herbs in Aotearoa, like basil, thyme, garlic, chives, parsley, sage, and rosemary, can be planted together.

However, you can plant them in individual pots if you please, particularly if you believe there’s a risk you could get them mixed up and ruin a dish!

If you want to make sure your kitchen herb garden in NZ has the best chance of success, consider giving mint its own little area to thrive. If you plant it with your other herbs, there’s a high chance that it will take over and cause the demise of your other plants

If you’re a fan of fennel and plan to grow some, give it space. You won’t find too many other herbs or vegetables that enjoy fennel’s company.

It may also be a good idea to group your herbs in an indoor or outdoor herb garden in NZ based on their watering needs. For example, coriander, mint, and basil tend to require more watering than sage, thyme, oregano, and rosemary. Separate them for ease of making sure you are only giving them as much water as they need.


Do Herb Gardens Like Sun or Shade?

Many people who are creating a hanging herb garden in NZ or are learning how to make a herb garden often ask whether they like sun or shade. The more herbs you have, the harder it is to answer that question.

Just like the vast array of flora in your garden, your herbs all have different needs and preferences. But to make things easier, you can safely assume that all herbs prefer full sun. Just keep an eye on your parsley, mint, and coriander, as they can all tolerate shade, as well.


What Time of Year Should You Plant Herbs?

Even though vegetables can be quite challenging to grow in New Zealand year-round, herbs are a little bit different. As long as you choose the most appropriate options for when you are planting them, they have the opportunity to thrive.

The time of the year actually doesn’t matter so much as the time of the day. Plant them early in the morning or late in the day. The goal here is to make sure the plants aren’t immediately exposed to the hot sunshine. Though, this may not matter as much if you are planting a hydroponic herb garden in NZ.


How Do You Start a Herb Garden For Beginners?

How to make a herb garden can depend on your needs, space, and goals. You may desire a hydroponic setup if you are trying to grow an abundance of herbs, or you may just be happy with an outdoor herb garden.

However, suppose you are starting small and want easily accessible herbs while you cook. In that case, a kitchen herb garden may be more to your liking. We’ve included some helpful tips below for how to get started.

unsplash-image-HbSsikCxgds.jpg

1. Pick Your Spot

As we mentioned above, most herbs love sunshine. Therefore, it makes sense that one of your herbs' best places to live is on your kitchen windowsill. If your kitchen windowsill doesn’t get a lot of sunlight, place your herb pots on a nearby sill that will be within convenient reach.

2. Prepare Your Soil

If you want your herbs to thrive, preparing your soil is essential. Use organic matter and sheep pellets to create a solid growing foundation. Follow this up with a layer of herb mix, which you will be planting your herbs into.

unsplash-image-vcIW3PTXSAY.jpg

3. Choose Your Herbs

Learning how to make a herb garden can be an exciting time. So, it’s quite easy to get a bit too excited and start trying to grow every herb you can get your hands on.

Step back and think about the herbs you actually use. The ones you tend to buy in small amounts from the supermarket but would love to have access to for free. You might use lots of fresh mint in your new potatoes, or you may even love meat dishes with rosemary and thyme.

4. Plant Your Herbs

If pots and containers are going to form the basis of your indoor herb garden, then there’s a right and wrong way to go about planting them. If you notice that your containers don’t have drainage holes, add a layer of stones to the bottom.

unsplash-image-4FPHfF2oCPc.jpg
 

If you are planting seedlings, consider soaking them in a plant tonic first. Doing so can give your plants the best start to life while staving off transplant shock. You can then half-fill the container with a herb mix.

When transplanting your herb seedling from the container you purchased it in, gently loosen the root ball before planting it in the middle of your new container. Fill it up the rest of the way with your herb mix before firming it around the base and watering it.

We hope that we were able to answer your pressing herb garden questions. If you need additional gardening help, contact us at 0800 800 286 or email info@crewcut.co.nz.

Klaris Chua-Pineda