Your Guide to Evergreen Trees

Not everyone likes watching their beloved trees and plants go through their autumnal cycle. Not only do you have to rake up dead leaves, but the trees can end up looking nowhere near as beautiful as you know they are. That’s why evergreen trees in NZ may capture your attention.

Evergreen trees remain green throughout an entire growing season. Unlike deciduous plants and trees, they don’t lose their foliage during winter or dry seasons. When you want your property to look as pretty as a picture regardless of the season, it can be worth asking, what are the best evergreen trees? Well, you’re about to find out.


Which New Zealand trees are evergreen?

It’s not hard to know why evergreen trees are so popular. They’re beautiful, and you can even buy fast-growing evergreen trees in NZ that assist in providing your property with shelter and privacy. The fact that you don’t have to worry about cleaning up dead leaves is just a bonus. 

But when you start your hunt for small evergreen trees in NZ or even medium-sized ones, how do you know which ones tick all the boxes? Here are some of the most popular options.

New Zealand Kauri

We are blessed here in Aotearoa to have the Agathis Australis – or NZ kauri. This slender, wind-tolerant tree can grow in most conditions and up to 50m tall. They are also one of the largest and longest-living trees in the world, with some as old as 2,000 years old. If you decide to plant evergreen trees for privacy, you can guarantee a 50m kauri would do the trick.


Image source: Wikipedia

Image source: Wikipedia

Bottlebrush

If you type ‘what are the best evergreen trees’ into Google, you’ll likely see the bottlebrush near the top of the list; you may also see it referred to as the Callistemon Kings Park Special. It’s a large shrub that grows flowers that look like bottle brushes and manages to produce flowers throughout spring and into summer. These flowers stand out brilliantly on a vibrant, dark green backdrop.

If you have been searching for small evergreen trees in NZ, the bottlebrush isn’t one of them. They can grow up to 5m tall and 3m wide unless you focus on tree trimming to keep it in check. People often purchase bottlebrush shrubs to use as screening, shelter, and hedges, which means they are truly versatile plants worth your inspection.


Titoki

When looking for evergreen trees in NZ that encourage birdlife, don’t look past Alectryon excelsus, or Titoki. This shade tree grows up to around 4m tall and can produce green, glossy foliage up to about 4m wide.

Alongside their aesthetics, people also love Titoki trees because they are semi-hardy and require no pruning. Other than assisting with early shaping, you can ultimately leave these fast-growing evergreen trees NZ residents love to their own devices.


Image source: Gardenia.net

Image source: Gardenia.net

Ponytail Palm

Suppose you only want small evergreen trees in NZ rather than large, imposing ones. In that case, turn your attention to the ponytail palm or Beaucarnea longifolia. It only grows up to around 1-2m tall and has a width of about the same.

They thrive in well-drained soil and have long, narrow green foliage and a chunky, short stump. The best part is, you don’t have to water them during winter. In fact, it’s recommended that you don’t, to avoid root rot.  

If you have been asking nursery workers, what is a good small evergreen tree? You’ll be amazed at how many people recommend the ponytail palm.


 How to Care for Evergreen Trees in NZ

Many people contact landscaping and lawn care experts to take care of everything grounds-related. While they can also help take care of your evergreen trees, there’s no harm in learning a bit about their needs so that you can play a role in their care, as well. 

The cultivation, mulching, watering, fertilising, and pruning process of most evergreen trees is relatively straightforward. You just need to know how to begin.

Cultivating

Where you plant your evergreen tree can play a massive part in whether it survives or thrives. Most evergreen trees love full sun during the summer months but shade in the winter. They also need well-drained soil and acidic soil conditions. 

Watering and Mulching

While you’re mulching your gardens, set some aside for your evergreens. Shredded bark and coarse wood chips mixed with compost can add nutrients to the soil and slow down evaporation. Make sure you give your evergreen plenty of water during the warmer months of the year.

Fertilising

If you have deciduous trees, you may feel like you are always giving them fertiliser to keep them in peak condition. The most popular evergreen trees in NZ are less demanding. It’s generally only when you notice slow growth or a change in the colour or size of their leaves that you should follow a fertiliser programme.

Pruning

Not everyone has the time to dedicate to tree pruning, even if it’s in the best interests of the tree. Fortunately, evergreen trees rarely require it. The only times you may need to prune your evergreens is if they are showing signs of damage, disease, or dead branches. However, it’s a good idea to prune them when they are young to begin forming a shape.


Is it time to plant evergreen trees?

Out of all tree types, evergreens are some of the most popular in NZ, and now you know why. They require very little care and maintenance yet reward you by remaining green year-round. Say goodbye to leaf raking by planting evergreen trees today. If they ever do need care, you’ll surely find a tree expert who is more than willing to assist.

Guest User
Garden Styles and Ideas for Your Property
 
suburban-garden-child-watering.jpg
 

When you buy a new property, it’s relatively easy to decide on paint colours and fence materials. Perhaps a little trickier, though, is selecting garden styles. It can be hard to envision how your garden and yard can look any different than it is now.  

However, whether you’re looking for low maintenance garden ideas or something more specific, we’ve got you covered. You’re bound to find a tip, trick, or idea below that piques your curiosity.


The Small Garden

Kiwis have long talked about the quarter-acre dream – the perfect slice of paradise for a vegetable garden, a game of backyard cricket, and a few flowers. Although, not everyone has that quarter-acre section.  

Instead, they might only have a small garden with space for a couple of chairs and a quaint raised vegetable garden bed. In that case, you may need to get quite creative with the space.

Consider the use of vertical planters since usable areas are precious, along with tiered garden walls to add much-needed height. As challenging as a small garden can be, it’s one of the easiest to landscape while also taking no time at all to mow.


The Large Garden

A large garden can be an avid gardener’s dream or a busy homeowner’s nightmare. Whichever way you look at it can determine what you do with the space. 

If you don’t have much time for gardening, consider plenty of ground cover plants that inhibit weed growth and require minimal care. You may also see the value in turning some of that garden back to lawn and having a lawn mowing company taking over the task.

If gardening is your passion, then the sky is the limit. You can liven up the space with perennials, fruit trees, and lovely seating areas that look out over your prized grounds.


unsplash-image-pC4TwbF0lFo.jpg

Contemporary and Low Maintenance

Cottage gardens with wild flowers and meandering paths are some people’s cup of tea, but they aren’t everyone’s. If you want to transform your yard into a contemporary and low-maintenance space for relaxing, there are a few ways to go about it.

You can incorporate pavers to break up your garden and lawn space and plant plenty of easy-care plants like tussocks and grasses. Stones or bark in the garden may also be able to inhibit weed growth.

For an additional touch of contemporary elegance, consider a stunning stone sculpture by a local artist. It will surely be the talking point of any guests you welcome into your space.


Unique and Charming

If you’ve got time to spare and want to step out of your comfort zone with a unique garden that stands out from the crowd, go for it! There are so many things you can do to transform your backyard garden into a whimsical wonderland.

The best part is, the entire process doesn’t have to cost a fortune. You can transform wood tree stumps into chairs, tables, birdbaths, and other creative features. You can also incorporate string lighting, path lighting, and unique plants.

Even an ordinary flower garden can become something extraordinary with the simple inclusion of rare or unique plants that don’t grace the average home garden.

If you’re worried about how much extra maintenance such a garden will require, you don’t need to. There are plenty of gardeners out there who would be more than willing to lend a helping hand. 


Indoor Gardens

Apartment life is a reality for many Kiwis, especially in built-up cities like Auckland and Wellington. If you don’t have a patch of land to call your own, there’s no reason why you can’t have a special type of garden.

Welcome the outdoors into your interior with pot plants, vertical planters, and small herb gardens. You can now even buy wall planters that sit flat against your wall while still having enough space to house your favourite plants like succulents.

Even your kitchen bench can be the ideal platform for delicious cooking herbs like chives, rosemary, and thyme. The only limit is your imagination.


A Luxury Paradise

Many people desire large backyards so that they can have a flower garden and vegetable garden to toil away in, in their spare time. Although, some people want an easy-care, elegant, and luxury backyard that’s fit for entertaining and relaxing.

While it can take some time to transform a regular backyard into one of luxury, it can ultimately be worth it. Focus on simple elements like landscaping bark or stones, pavers, and a comfortable outdoor seating area. You may even like to pave out a seating space or add decking to tie this space to your home.

Landscaping experts can help create a plan, but there are also plenty of DIY ideas out there that give you the inspiration you need to make such a contemporary space for yourself.


How Will You Transform Your Space?

Whether you have a small garden, a large garden, an outdoor oasis, or a private paradise, there is so much you can do to make it your own. Why not start by nailing down what you like and don’t like about your current space?

You can play with different design ideas, hire some experts to assist, and end up with a yard that makes you proud every time you come home.

Guest User
All Your Questions About Mulch, Answered!
 
Crewcut team prepares to lay down tree bark as mulch

Crewcut team prepares to lay down tree bark as mulch


Mulch is a layer of material that you apply to the soil’s surface for better soil fertility, health, moisture, reduced weed growth, and aesthetic appeal. The process of mulching can sound complicated and even unnecessary, but we’re here to tell you there’s more value in it than meets the eye. 

Whether you’re an avid gardener or just starting out, we’ve included a few mulching tips and general advice to get you started. Once you start, you’ll be a mulching expert in no time.

What Can I Use for Mulch?

While you can simply pop to your local garden store to pick up bags of pre-made mulch, there’s really no need! Did you know you can make mulch yourself? If you’re wondering what you can use in your magical mixture, you’ll be surprised at what everyday materials make up the perfect recipe. 

  • Sawdust

If you can get your hands on untreated sawdust from timber, it can work beautifully as a mulch when paired with animal manure or a nitrogen-rich fertiliser. On its own, it can negatively impact the nitrogen levels in your soil.

  • Lawn Clippings

If you prefer something the birds don’t love as much, lawn clippings may make up the majority of your mulch mixture. Just ask your lawn mowing company to leave them behind when they have finished mowing your lawns. They are easy to spread around and work wonders for ground health when applied in thin layers.

  • Compost

Any avid gardener who can stay on top of weed growth may like to use compost as a mulch type. It contains plenty of nutrients and can be safe next to young plants. Some people also like to cover the compost with a bark layer or pea straw to suppress weeds.  

  • Pea Straw

If you’ve got an endless supply of pea straw, then use it to your advantage. While pea straw breaks down quickly, it can be a welcome addition to any garden for both its aesthetic appeal and soil health benefits.

  • Newspaper

If you want to keep weed growth at bay, you can lay thick layers of pre-soaked newspaper down before adding a heavier mulch type on the top. The beauty of newspaper compared to many other base materials is that it’s easy to cut through to add plants.  

unsplash-image-TotPuK3GfMU.jpg
 

What Are the Benefits of Mulch?

Not everyone is passionate about gardening or even knows if they are doing right by their gardens. But if you are looking for a way to make sure your gardens and grounds are as healthy as possible, then mulching is an excellent way to begin. You may be surprised at just how many benefits are associated with this one simple task.

  • Drought Survival

A lack of rainfall can genuinely take a toll on anyone’s grounds. While you may not prevent a few garden casualties, using mulch in the garden can end up being a saving grace. It can reduce how much water evaporates from the soil, preventing you from needing to water your plants as often.

  • Insulation

When you add a layer of mulch to soil, you are actually adding a layer of insulation. Keeping soil cooler in summer can significantly benefit your plant roots.

  • Improves Soil Quality

If the soil quality is lacking in your garden, mulch may be able to assist. Its job is to break up the clay, leading to better air and water movement through the soil. Depending on what you used, the nutrients within the mulch can also improve the nutrient value of sandy soils that typically struggle to hold water.

  • Prevents Weed Growth

You won’t find too many people who enjoy weeding. The weeds just don’t seem to give up! You may never get rid of them entirely, but the process of mulching can stop them from growing as frequently. When they do grow, they end up being a lot easier to pull out.


Is Mulch Really Necessary?

But my gardens grow just fine without mulch,” you say. Many gardens indeed thrive without mulch, and some could definitely do a little better. If you refer to the benefits of mulch above, you can see that in some challenging weather conditions, mulch acts as a much-needed form of support for your plants – especially the more vulnerable ones.


What Is the Disadvantage of Mulching?

You can have too much of a good thing, and that’s including mulch. It’s essential to strike a careful balance when applying mulch. Too little, and your garden won’t experience the full effects. But too much, and you’ve got a much larger problem on your hands. 

Too much mulch can suffocate your plants, bury them, and cause them to die. It can also be a convenient hiding place for pests while even baking your plants if they experience excessive heat.


What Is Mulch Made Out Of?

unsplash-image-1VADcH6X8bI.jpg
unsplash-image-mGQfQe3EOBI.jpg
unsplash-image-9Jb3kENfNwE.jpg

If you were to purchase a mulch product from your local garden store, instead of making them out of the materials mentioned above, you’d find some of the following components:

  • Tree bark

  • Wood chips

  • Grass clippings

  • Pine straw

  • Leaves


Is Mulch Bad for You?

There is very little solid evidence to suggest that mulch, in general, is bad for your health. However, it’s worth being aware of what’s inside your mulch. Some mulch components, such as treated wood, may contain harmful chemicals, like chromated copper arsenate, which is a type of arsenic. If you purchase commercial mulch, pay attention to what use instructions are listed on the bag. At a minimum, the manufacturer may recommend that you wear a mask while opening the bag and dampening it before use.


What Is A Good Mulch?

Given how many different materials can form mulch for your gardens, is there truly a winning recipe? Essentially, anything that was once a living material can become a form of mulch. You may be onto a winner if your mulch consists of leaves, compost, wood chips, bark, sawdust, straw, grass, and paper.


Mulch in NZ?

If, even after all this information, you’re confused about what mulch is and how to create and use it in NZ, then you’re in luck. No matter where you live in Aotearoa, you can likely find a gardening or lawn mowing expert near you who is more than willing to take the reins on improving your garden’s health. Happy mulching, everyone!

Guest User
5 Fast-Growing Climbing Plants, Creepers, and Crawlers in NZ
unsplash-image-IOxO_amkuIc.jpg

When you’re trying to cover an unsightly neighbouring fence, a boring wall, or even a part of your home’s exterior, you might start looking for climbing plants in NZ. After all, you can’t make an ordinary plant climb up your wall, and you may not want a hedge. Therefore, you need to look specifically for plants that can naturally spread outwards and upwards, like creeper plants, crawlers, and vines.

Once you’ve decided to buy climbing plants, you’ve then got to think about the best ones for your needs that grow quickly and require minimal maintenance. Whether you’ve after climbing vines, creepers, crawlers, or something else, we’ve listed some of the most popular plants in New Zealand below.

Common Search Terminology

If you’ve never had much to do with your gardens before now, you may not know what you’re looking for. You may know you want a plant to climb up your fence to offer privacy, but it can be a little tricky to put that into search terms when you’re looking for the right plant.

Climbing plant – Here in NZ, a climbing plant is one that climbs up tall objects like trees, fences, and walls. Many climbing plant varieties are vines, which have steps that wrap around things like fence posts.

Creeping plant (creeper) – A creeping plant, or creeper, is a small, viny plant that grows close to the ground. Most varieties don’t produce long enough vines to climb, even with training, so they tend to creep along the ground and act as ground cover. Such plants are useful for people who don’t want to have to deal with weeding and general garden clean-ups.

Crawling plant – Like creeping plants, crawling plants are those that potentially could climb but are not as adept at it. They also go by the name of scrambling, scandent, or clambering plants.

Bougainvillea Glabra – Magnifica

If you’re looking for a fast-growing climbing plant in New Zealand that doesn’t require much of your attention, the bougainvillea glabra or ‘Magnifica’, might be right for you. Even though it doesn’t need much love, this climber is a show-stopper in any property.

It grows up to around three metres by three metres and produces stunning magenta-coloured flowers all summer long. It can also scramble or climb, with beautiful glossy green leaves forming an attractive layer over pergolas, sheds, and walls. They don’t have too many problems with pests, but they do have thorns to watch out for.

Ficus Pumila – Creeping Fig

If you’ve got low walls or foundations that you’d like to cover, the Creeping Fig climbing plant may be worth considering. While slow-growing compared to others, this evergreen climber will eventually be able to cover an area of around 4m2.

It’s not all that showy, but it doesn’t have to be. Its small, petite bronze leaves transform into a beautiful shade of green to offer your yard a burst of colour. All you have to do is trim it and remove woody branches from time to time.

Clematis

One of the most popular climbing plants in New Zealand is the Clematis, and it won’t take you long to work out why. Not only are there several varieties like Rubens and Snowflake, but whatever type you buy, you get to benefit from its fast growth.

This versatile, hardy, and stunning climber will cover walls, fences, trellis, or anything you please. If you’re tired of your neighbours being able to see into your entertainment area, you can quickly erect a trellis and let Clematis work its magic.

They can spread out like a creeper or climb like a vine. They will also produce stunning flowers while only requiring a small amount of pruning.

Muehlenbeckia Complexa - Maidenhair Vine

If you live in or around Auckland, one of the most popular climbing vines you’ll come across is the Maidenhair vine. It’s native to New Zealand and produces a thick living wall on whatever surface you need to cover.

It has a dense mass of interlaced branches and slender stems that twine over other plants or rocks. Maidenhair vine is also incredibly persistent, as it will climb over itself without any form of support.

Star Jasmine

When looking for groundcover plants or crawling plants, you may have come across Star Jasmine or Trachelospermum Jasminoides. While this plant is indeed a successful groundcover plant to save you time weeding the garden, it’s also an attractive and fast-growing climbing plant.

Star Jasmine follows your instructions for how you want it to grow. You can form shapes with wire, let it run free, or encourage it to provide dense coverage for privacy. While it doesn’t work well in areas with many frosts, it ticks all the boxes for most other parts of the country. 

What Climbing Plant in NZ Are You Going to Grow?

We’ve got such an expansive variety of climbing plants, vines, crawlers, and creepers, that it can sometimes be challenging to know what’s right for you. See if any of these options above suit your needs. Otherwise, talk to your local gardening experts who can point you in the right direction.

Karan Kikani
Plotting Your Way to a Bountiful Garden
Proper garden plot preparation is the key to a bountiful garden

For a structure to be suitable as a house, it has to have a strong foundation. The same rules apply to a garden. For it to provide you with delicious vegetables and herbs, it, too, has to have a strong foundation. Are you about to begin your garden plot planning? Enjoy our step-by-step garden plot preparation guide. You’ll be harvesting your delicious bounty in no time.

Step 1: Pick the Right Spot

One of the most critical steps for garden plot planning is the location. You might have spare space for a garden in your back yard, but is it the right space?

Most vegetables, and even flowers, require at least six hours of sunlight a day to survive and thrive. However, some plants prefer only a little bit of sun but plenty of shade. There is no one-size-fits-all approach, but there is a ‘one-size-fits­-best’ approach.

Research the needs of the plants you will include in your garden. If they need both sun and shade, watch your property over a few days to understand where the sun hits and for how long. You can then choose an area that best suits your plants and your preferences.

However, there can be more to the picture than purely sunshine. You also have to ensure that the area in which you’re putting your garden plot is level. Otherwise, water distribution won’t be even, and some plants may suffer. If you have sloping land, terrace the beds with wood, rocks, or boards.

Step 2: Factor in Your Climate

Where you live can play a part in what you use to grow your vegetables. If you live in the coldest parts of New Zealand, typically found in the South Island, raised beds can be worth factoring into the decision-making process.

Raised beds above the ground allow the soil to warm up quicker in spring. You can build these garden boxes yourself or purchase them pre-made in plastic or wood.

If you live in a warmer climate, in-ground beds may be more than suitable. They require less watering but can be harder to maintain, given that you have to bend down.

Step 3: Decide on a Quantity

Think about all the plants you want to grow and the space they will need. Unless you plan on planting potatoes or carrots, you’re going to need more than one bed.

Not only do multiple beds allow for more variety, but they also allow you to rotate your crops annually to keep them healthy. Garden beds should be around 1.2 metres wide, with pathways between them of at least half a metre.

Step 4: Prepare the Earth

If you are using raised garden beds, you can skip this step. Otherwise, put measures in place to start removing the lawn where your new in-ground garden beds will go.

Mark and line the area you will be digging out. You can then slice the sod with a spade and put it into your compost heap. Alternatively, if you have bald spots in your lawn, you can patch these up, so they look as good as new. Remove any weeds, debris, and surface garbage before you begin preparing your soil for planting.

Step 5: Prepare the Soil

If you haven’t purchased soil from your local garden store that’s ready for planting, you’ll need to make sure your dirt is healthy for growth. Carry out a soil pH test that ensures your soil has the best balance of nutrients for plants to thrive. These tests are easy to find at your local hardware store.

If your soil isn’t as fertile as you would have hoped, you can add organic matter such as plant and animal manure or compost. Layer it up to 5cm over the plot, then dig it into the top 15cm of soil. You’re now ready to plant!

Helpful Gardening Tips

An essential part of garden plot planning is making sure you create the best plot for your climate. However, we’ve also included some helpful tips that may also prove useful as you commence your gardening journey.

Keep a Gardening Journal

During your plants’ early stages of growth, you may not know how to tell the difference between each plant. Yet, they may all require different levels of care. If it helps, draw a diagram of what you planted and when. You can also outline any extra nutrients you may have given some plants.

Don’t Plant Vegetables and Flowers Together

As tempting as it can be to plant flowers and vegetables together, it’s not a match made in heaven. Particular flower varieties may grow faster and taller than your vegetables, which means they have the potential to steal your vegetables’ much-needed sunshine.

Rotate, Rotate, Rotate

It’s easy to get into the habit of planting your vegetables where you did in previous years. Though, that’s not always in their best interest. Crop rotation can be paramount for making sure your soil remains healthy and rich.

Ready to Start Gardening?

Planting a new garden and growing your own vegetables can be quite exciting and rewarding. Follow these steps above, and you can be on your way to success! However, if you have any questions or require a helping hand, don’t forget to reach out to your local gardening expert for help.

Guest User
Drought-Tolerant Plants to Bring Your Garden Back to Life

Throughout north and central New Zealand, December to February are the driest months of the year. However, due to a lack of rainfall in March and April 2020, some regions were getting ready to face some of their worst droughts on record.

Even in spring, which typically sees plenty of rainfall, farmers in South Canterbury and North Otago were putting their heads together to develop drought management strategies. It’s looking dire for some regions, and even homeowners are having to think outside the square when it comes to what they plant.

Drought in Wairarapa

If New Zealand continues to see drought conditions in the lead-up to summer and beyond, it’s worth making a plan of attack for your gardens in the months and years to come. The more thought you put into drought-tolerant or resistant plants, the hardier your garden will be to tackle whatever mother nature throws at it.

Succulents

Have you ever wondered why succulents have been sky-rocketing in popularity in recent years? Not only are they beautiful, but they thrive on neglect. In fact, give them too much love, and you are more likely to kill them.

Succulents come in several different varieties and tend to thrive in areas where many other plants wouldn’t. They love the sun and don’t tend to have too many wants or needs. All you need to do is plant them in free-draining soil in the sun, then forget about them. They’ll take care of themselves.

Rosemary

If you want your plants to be both hardy and delicious, then rosemary ticks those boxes. This herb looks great, smells divine, and is even a friend to the bees. What’s more, it’s hardy and doesn’t need a helping hand to survive.

So, whether you’re a neglectful plant parent or you want something to handle drought conditions, rosemary can be the answer. It’s also incredibly versatile. You can plant it in pots to keep it under control, use it as a garden border, or even create a form of hedging from it.

When the time comes to whip up a lamb or chicken roast, you can pop out to the garden for a sprig of rosemary without too much disruption to its growth.

All you need to do to grow rosemary is plant it in full sun within free-draining soil. Mix some sheep pellets and compost into the soil and water deeply for around a week until the plant settles. You can then let the neglect set in with minimal concern.

Libertia

If you are on the hunt for an easy-care plant that takes up a lot of space, looks great, and tolerates drought conditions, then it’s time to buy libertia. This beautiful plant is endemic to Aotearoa and looks stunning at any time of the year.

It’s also incredibly easy to plant and maintain. Plant it in full sun, in free-draining soil. You can then mix sheep pellets and compost into your topsoil and water it for a few weeks until it appears to be well-established.

Thyme

Thyme

What could be better than an aromatic plant that wants you to leave it alone? Thyme is a delicious addition to cheese, tea, lentils, omelettes, poultry, and more. Yet, it’s also an aesthetically pleasing plant to add to your garden that thrives in drought conditions.

The bees love it as much as you will, and you can use it as a groundcover plant to stop you from having to weed the gardens so much. Of course, if gardening isn’t your thing, you can always hire someone to take care of that task.

Thyme loves full sun, compost, and a few sheep pellets for good measure. It also gets a good start to life if you water it deeply for a week while it gets settled into its new environment.

Agapanthus

Even though drought conditions can lead to your most vibrant flowers dying off, that won’t be the case with agapanthus. This flower is that hardy that it has earned an official weed status.

People love them for holding up sandy banks and for adding vibrancy to an area that struggles to keep other plants alive. You can buy blue, white, purple, green, and yellow varieties from various nurseries across the country.

Flaxes and Grasses

Drought-tolerant plants tend to go hand-in-hand with busy homeowners. The more self-sufficient and low maintenance the plant is, the more desirable it can be for people who don’t want to do a lot of gardening. That’s why several flax and grass varieties are flying off the shelves.

Not only do many of them withstand the drought conditions mother nature throws at us, but neglect, as well. Some of the most popular flaxes and grasses include carex, libertia, and chionochloa. Talk to your local gardening expert about the best variety for your unique climate and soil type.

Making it Through the Droughts

Drought conditions hit farmers hard, but a lack of water can wreak havoc on urban environments, as well. Water restrictions mean you aren’t often able to water your garden, and the sky isn’t doing it for free, either.

Fortunately, with a few simple plant additions, your gardens can end up being relatively self-sufficient. Whether drought conditions last a short while or a long time, you can rely on these plants above to handle the jandal.

Not sure where to begin? Get in touch with lawn care and gardening experts who can point you in the direction of the best drought-tolerant plants available.

Guest User
Gardening for Mental Health
gardening-mental-health.jpg

As COVID-19 spread around the world, citizens of several countries were being told to bunker down. But instead of spending all day binging TV and baking banana bread, there was also a remarkable spike in the number of people getting out into their gardens.

Some people saw it as a family-friendly hobby to keep the kids entertained. In contrast, others planted fruits and vegetables to combat their food security concerns. There were also plenty of people who just decided to use their downtime as an opportunity to tame their backyard jungle.

But surprisingly, many people also saw the value of gardening for mental health. Plenty of studies show the psychological benefits of gardening, and it’s only once a global pandemic takes place do many people experience them for themselves.

Mood Improvement

Think about how you feel when you get out in the sunshine. You can’t help but feel warm and happy when the rays are beaming down on you. That’s one of the many reasons why gardening can improve your mood. You’re outside in the elements, spending time with plants and nature, and you’re productive at the same time.

But don’t just take our word for it. Four San Francisco Bay Area hospitals were included in a survey with patients. Seventy-nine patients said they felt calmer and more relaxed by being with plants. A quarter said they felt stronger and more refreshed, while 19 per cent felt more optimistic.

Stress and Anxiety Relief

Nothing makes you more stressed and anxious than a highly contagious illness that’s claiming the lives of hundreds of thousands of people. But rather than spend all day curled up in a ball, many people decided to head out into their gardens for stress and anxiety relief. And it worked.

It helps that viewing plants and spending time with them is a stress-free exercise. And when you literally take the time to smell the roses, your cortisol levels drop.

A study published in the Journal of Health Psychology also noted that reading and gardening both decrease your cortisol levels, but your stress levels drop dramatically with gardening.

Once you finish gardening, you are then more likely to enjoy a positive mood, free from the anxiety and stress of your daily worries.

Self-Esteem Boost

Social media has become a convenient way to keep in touch with family and friends. But it has also had a dark side effect – allowing us to compare ourselves to others and decrease our self-esteem as a result.

By taking a break from technology and social media and heading out into the garden, you can experience a self-esteem boost. Children, in particular, can benefit from this activity. They can learn how to be nurturers while taking a break from the online world's social pressure.

Attention Span Improvements

Children who have attention deficit hyperactivity disorder may be able to reduce their symptoms by taking part in outdoor activities such as gardening and nature walks. According to an American Journal of Public Health study, gardening and surrounding yourself with plants can strengthen your attention span, which then improves focus and learning.

Gardening can also prove useful for academic settings. Another study in the American Society for Horticultural Science showed that children who learned science through gardening rather than in a traditional classroom achieved higher scores.

And Then There Are the Physical Benefits

Gardening has many proven benefits in the mental health realm, but it can also be beneficial for your physical health. First and foremost, it’s a form of physical activity.

While many people like to go for walks, hit the gym, or go for bike rides, they can also achieve their 150 minutes of weekly moderate-intensity exercise through gardening. If you don’t like exercising, then you can at least inadvertently reach your exercise goal, at least partly, in a rewarding and productive way.

Gardening can also promote and encourage healthy eating. If you’re growing a delicious variety of fruits and vegetables, you are more likely to eat them. After all, you are literally getting to enjoy the fruits of your labour.

Gardening may also be able to decrease your risk of illness if you bring your plants inside. House plants can reduce the amount of dust in the air by as much as 20 per cent while also aiding the healing process if you’re unwell. In a 2009 study, patients in hospital rooms with flowers had lower anxiety, lower fatigue, and lower blood pressure than those in rooms without plant life.

Get Out Into the Gardens

If you’re feeling a bit low, why not head out and get some gardening therapy? If, however, you find yourself feeling more stressed because you realised you’re lacking a green thumb, then don’t worry. There are experts out there like Crewcut ready to take care of your gardening requirements. Most importantly, don’t hesitate to reach out for help — whether it’s about your gardens or your mental health.

Guest User
32 Useful Gardening Tips Every Beginner Needs to Know
gardening-beginner.jpg

Gardening can be seen as an activity only certain people like doing. Many people think of it as being either too complicated or too boring. But now that the pandemic has forced people to spend more time inside, many of them took up gardening as a hobby. And indeed, gardening has brought positive benefits to their mental health. even having a plant on your desk can reduce stress.

But many people started gardening without having any prior knowledge, and this could cause several problems eventually. To make your gardening journey more successful, you need to pay extra attention to the plants’ needs and also to know some practical gardening tips. Here, we list down 32 useful tips and tricks that could help you take better care of your plants if you are a beginner.

1. Consider the plant’s position or location

One of the most important things to decide on when starting to arrange your garden and choosing the plants and flowers you want to plant is their position or location. When choosing the right spot for your plants, it is helpful to consider exactly where you’ll put them. For example, some plants need direct sunlight, so maybe you need to find a spot in your garden that meets these requirements. On the other hand, there are plants that love some shade, so you need to make sure that you put these on cool shady spaces.

2. Think about height arrangement

One of the common mistakes beginner gardeners do is to not anticipate the heights the plants are supposed to have in the future. They need to have good space and height arrangements between them so they develop healthily. A tip that could help you create a “balanced” garden is to plant taller plants at the back. This will allow you to easily care for them and they will not kill the smaller plants next to them.

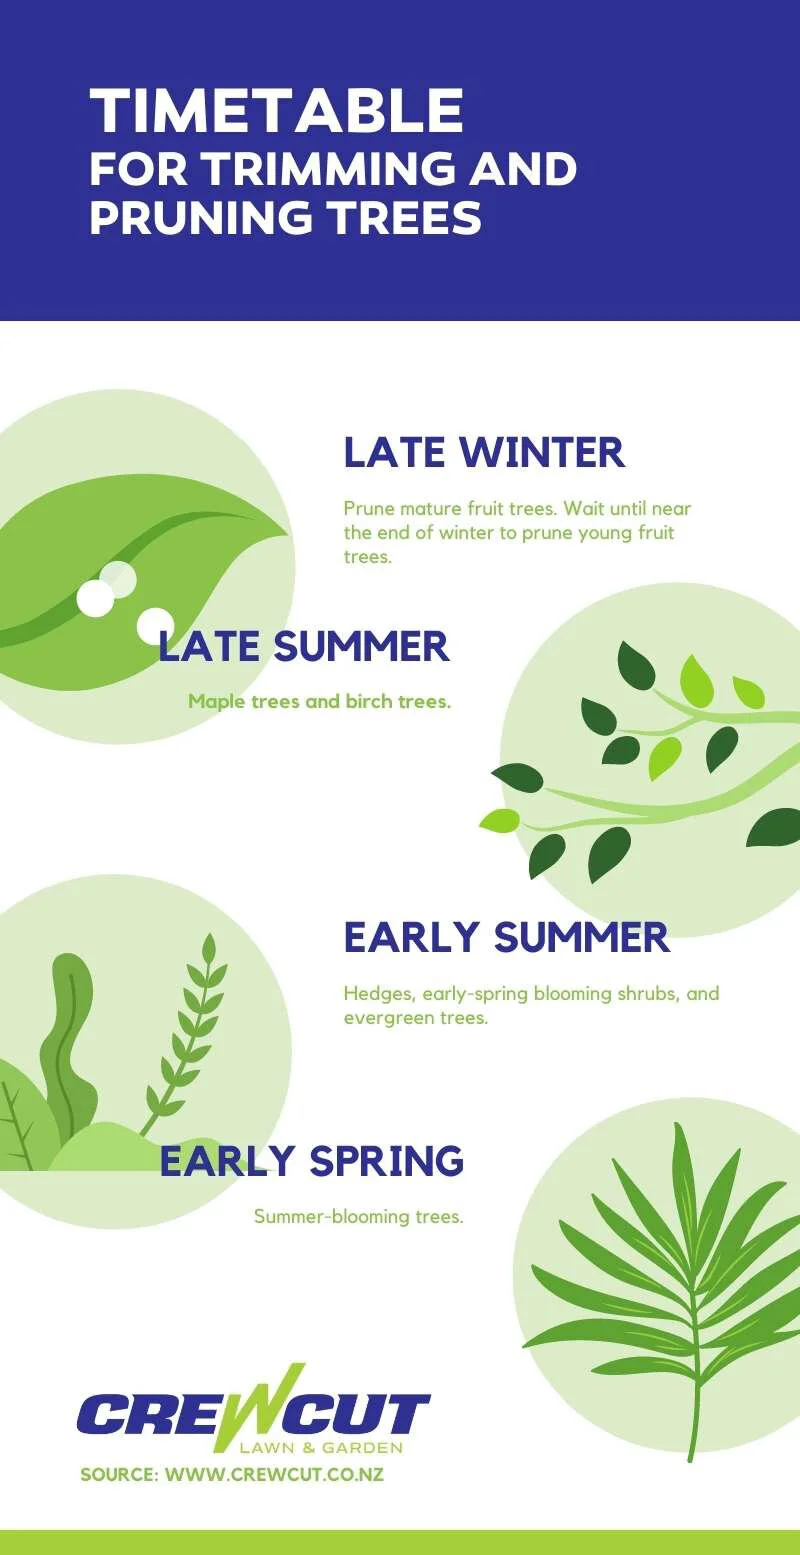
3. Choose the right timing

As you may know, there are plants specific to every season. The time you choose to plant certain varieties can have a huge impact on their development and growth. In many cases, the right plant time would be in the dormant season, meaning from late fall to early spring. Of course, this highly depends on your location’s climate conditions too. Do some research beforehand and choose the right timing according to your country or area. Some plants can be planted throughout the whole year, although they will require extra attention from you. 

4. Know your soil type 

Gardening seems easy on paper, but it involves so many factors that plants depend upon that could affect their growth. Soil type is a major, and knowing the exact soil type you have can help you choose the right plants. Loam, clay, and sand are some of the most common types of soil. Knowing the type you have in your property will help you discover what additives you need to choose to improve your soil’s existing properties.

5. Do a rapid soil test 

One of the easiest ways to know what exactly your soil needs is to do a rapid soil test. There are kits available online that give you results for Nitrogen, Phosphorus, and soil pH levels instantly. Because feeding your soil means feeding your plants, knowing what exactly it needs can help you choose the right soil amendments. 

6. Consider organic compost

Compost is a natural fertiliser proven beneficial for garden plants. It is made of organic matter that has been decomposed, so it has all the nutrients plants need. You can buy compost from your local gardening store or you can try making it yourself. To get it started, you need to have a compost bin and add in your kitchen and yard waste. 

7. Keep a gardening journal

No matter how big your garden is, you need to keep track of the assortment of plants you put in. Maybe you have planted vegetables and harvest time is close by. Or maybe you have planted some beautiful flowers that need seasonal care. Knowing where you have planted each specific type will help you keep track of what’s going on and also give your plants the care they need. 

8. Don’t put vegetables next to flowers

One of the mistakes many gardeners make is to plant vegetables next to flowers. If you want your vegetables to grow and harvest some of them later, you need to put extra attention to where you put them. Tall flowers can shade vegetables, so it’s not a good idea to put them next to each other and it’s better to keep them separate.

9. Be careful with watering 

Watering your plants too much or too less can affect them in so many ways. It is therefore important to know exactly how to care for each variety, including how much water they need and how often you need to water them. When watering your plants, there are also recommended times — some you’re supposed to do early in the morning while others in the evening. 

10. Pick native plants

People love plants that are colourful and bright. They instantly turn regular-looking gardens into splendid-looking ones. However, when choosing the right plants for your garden, it is important to pay attention to your location and the conditions in your area. If winters are very cold for example, you cannot choose plants that usually grow in tropical climates. So the best option would be to choose plants native to your area, to make your gardening easier. For sure you will discover plenty of options. 

11. Choose low maintenance plants

If the variety of plants in your area is limited, you can look for low maintenance plants. These are easy to grow almost everywhere and they only require basic or minimal care. Among these are shrubs, flowering perennials, and ornamental grass. 

12. Rotate your crops every year

One mistake many beginner gardeners make is to plant the same vegetables and flowers in the same place all the time. However, doing this can deplete the soil of its nutrients and it may negatively affect the growth in your garden. So every year you can rotate where you plant your veggies and flowers to keep the soil healthy and rich. 

13. Consider planting herbs

Herbs are used both in gastronomy and as decoration, so they make great choices for beginner gardeners. Some of them need little maintenance and even produce beautiful flowers. Some of these take longer to germinate, so just be patient and they’ll soon turn into lovely ornaments and tasty ingredients.

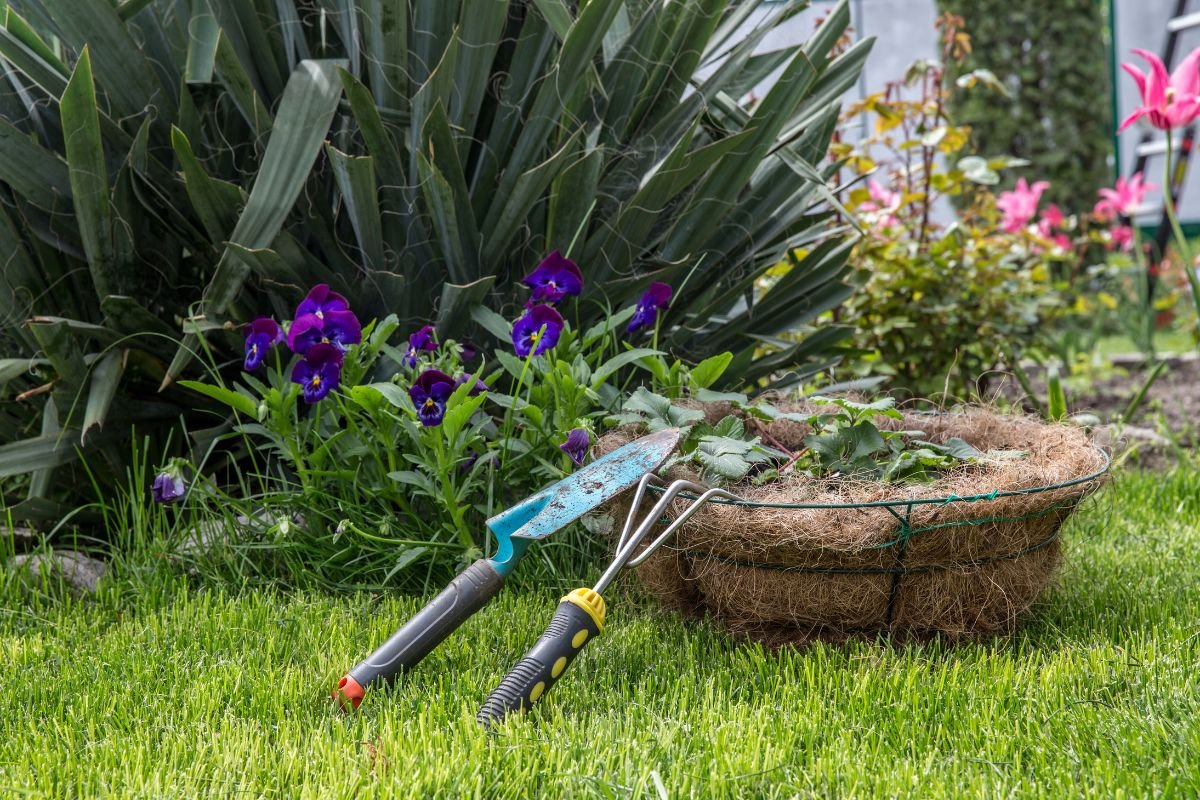
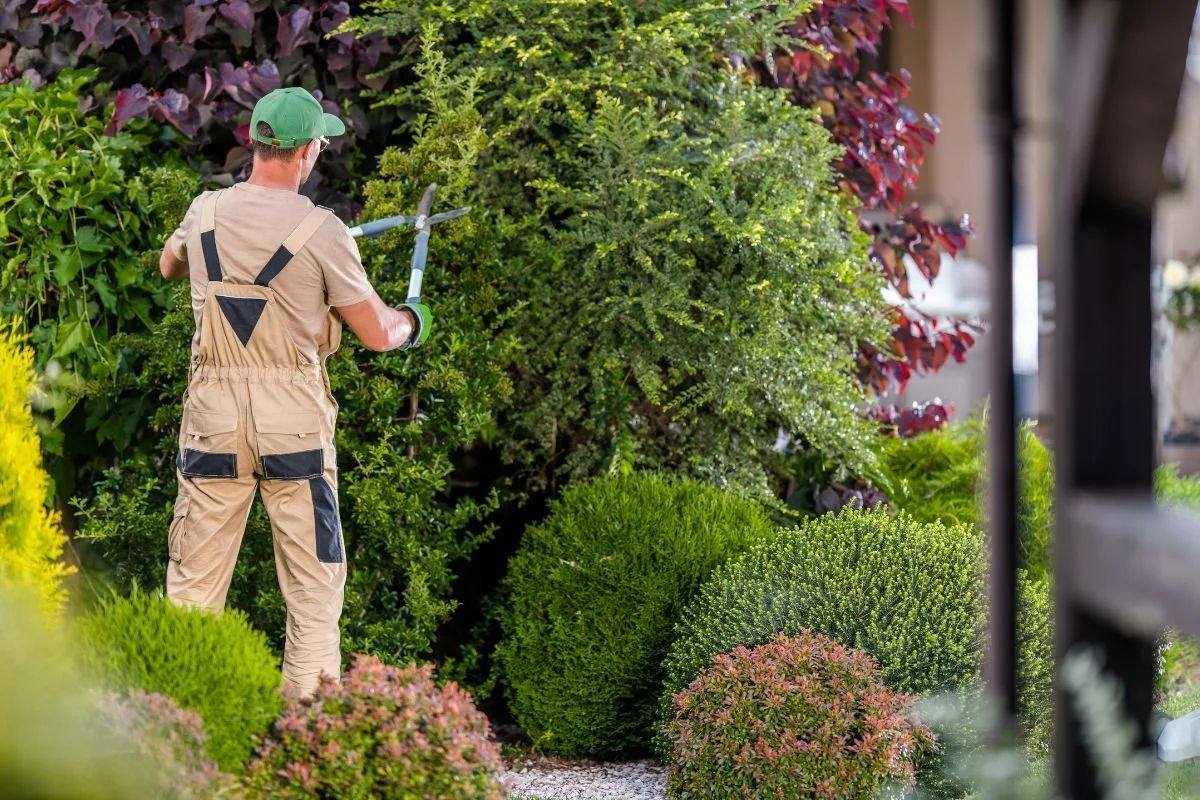
14. Use the right gardening tools

You can’t be serious about your gardening if you do not have even the basic tools. The right gardening tools are a essential whether you’re gardening in pots, garden beds, or directly in your yard. A good pair of gloves, shovel, spade, fork, and a rake are some of the things you need to get started if you want to be serious about this craft.

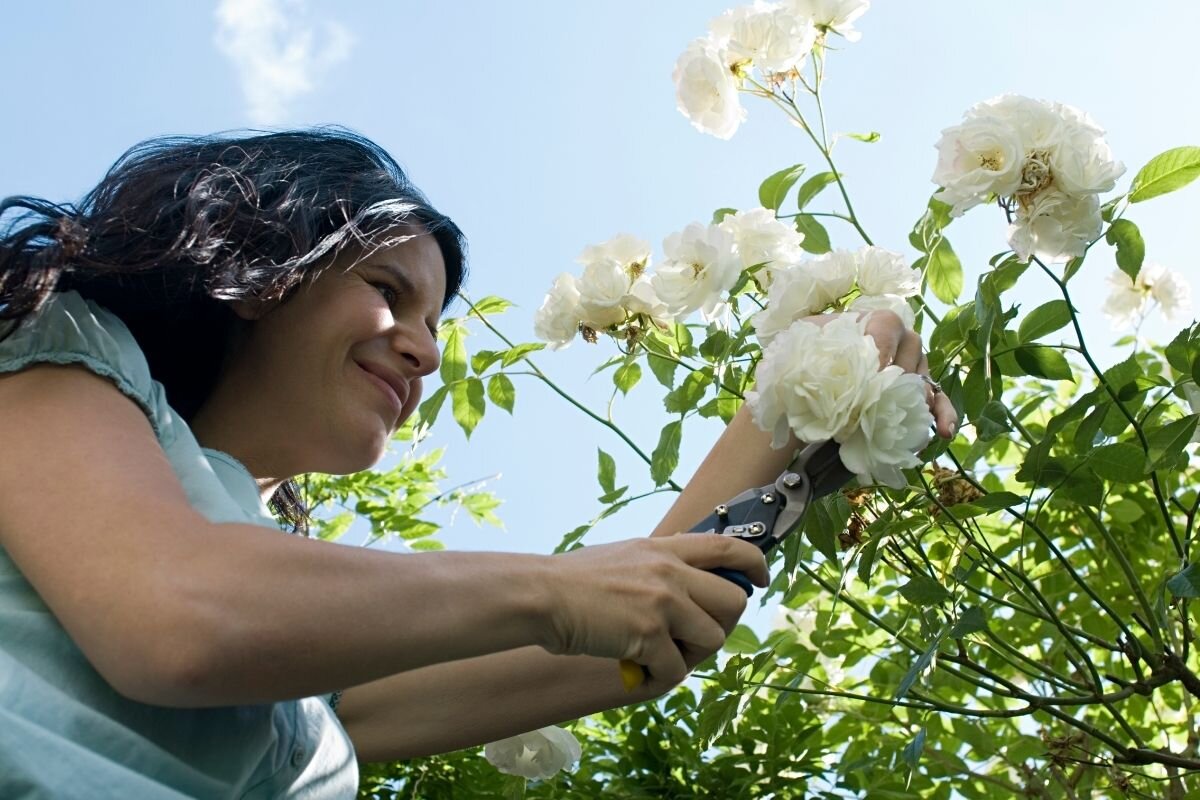
15. Companion planting 

One of the most amazing things about plants is that some of them have learned to grow together and mutually benefit each other. When planting vegetables, you could consider companion planting. Some plants protect others and help them have control over the pests. For example, you could plant tomatoes, onions, carrots, and cabbages together.

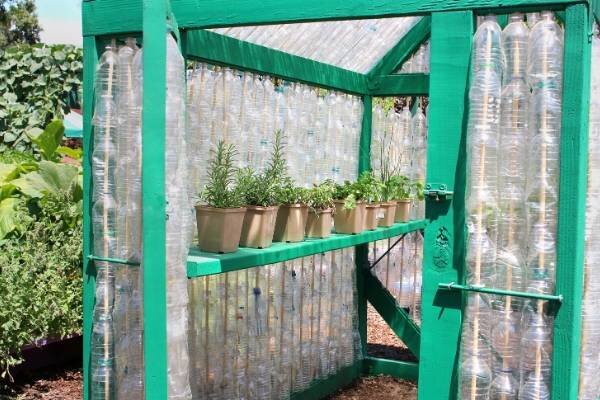
16. Container gardening 

As more people became interested in gardening during the lockdown, some have realised that their patio space or backyard is limited. Container gardening is a great way to start, especially if you are a beginner. You can choose plants that need extra attention and maintenance and keep them inside during the cold season. 

17. Use eggshells to start seeds 

Eggshells contain a high amount of calcium, a natural nutrient many plants need. You can start seeds in eggshells, and then plant the eggshell. The plant will take in all the nutrients it needs to grow. 

18. Or just add eggshells to your plants

Simply smashing eggshells and adding the bits to the soil will make nutrient-rich pots or plant beds. Among the plants that benefit the most from eggshells include tomatoes, eggplants, broccoli, cauliflower, and peppers among others.

19. Citrus peels 

If your soil is not acidic enough and you happened to have purchased a plant that loves acidic soil, this tip is for you. To make your soil more acidic, you can rinse the citrus fruits peels from your kitchen, grind them, and add them to the soil. 

20. Or make citrus pots 

Another way to help your plants grow is to start seeds in citrus pots. This works best with tomatoes, who take nutrients from the citrus pots. When the plants start growing, you could move them in a bigger pot. 

21. Build a bee house

We all know that bees have incredible benefits for our gardens, pollinating the flower and producing honey. But many gardeners use solutions that are unfriendly to the bees and these might negatively affect them and significantly reduce their population size. Building a bee house for your garden can help the bees survive. Many online videos and internet resources can help you want to do it yourself. 

22. Add a bug hotel 

Bugs are also part of nature and an attempt to completely eliminate them from your garden wouldn’t do any good. Building a bug hotel can help you keep them away from the veggies and plants if you suspect some of them would harm plant growth.

23. Pet-friendly plants

If you are a beginner gardener who also has pets, you should know that some plants that look good can be toxic to both cats and dogs. For example, spring bulbs should be kept away from dogs, especially from the ones that like digging. Lilies are deadly for cats, while oleanders are toxic for all animals. 

24. Organic pest control

One of the most challenging things in your garden involves pest control. They can eat your crops and leave you with nothing to harvest, so keeping them under control is important. Instead of choosing a chemical pest control, you could choose an organic one. This will ensure the health of the soil for a long time. 

25. Use mulch 

Mulch is a layer of material applied over the soil to protect the roots from direct sunlight and during cold seasons. But apart from these, mulch is also used to moist the soil, regulate its temperature, and suppress weed growth. 

26. Root out grasses

Some weeds can be intrusive for your plants, affecting their growth negatively. So, you need to root out highly resistant grasses to create space for the root of your plants. 

27. Learn about the beneficial insects

There are less than 5% intrusive insects for your plants. Many of the insects you probably saw in your garden help you keep pests away, so don’t get rid of them. Among the beneficial insects in your backyard are ladybugs, spiders, and ground beetles. 

28. Choose cloudy days to plant

How the weather is on the planting day can indeed affect the survival rate of your plants, especially the newly bought ones. On sunny days, the survival rate of the plants decreases, as their roots are exposed to high temperatures. Cloudy days are better and you can actually increase the chances of survival for your new plants.

29. Don’t use chemical pesticides

Pests are the nightmare of every gardener. Many desire to protect their flowers and plants and keep them away from awful critters, so they use pesticides. While chemicals can be useful for shooing pests away, they can be damaging to people’s health. Spraying pesticides on fruit-bearing and flowering plants is a huge mistake, so you need to avoid it completely.

30. Do not rake fallen leaves

Fallen leaves are often considered garbage to make the yard look neat and tidy, but actually, you can just leave them and you’ll be fine. Leaves will eventually break down like most organic waste. They cover up root systems, and preserve soil moisture, suppress weeds, and attract beneficial insects. In the long run, they can provide your plants with the nutrients they need.
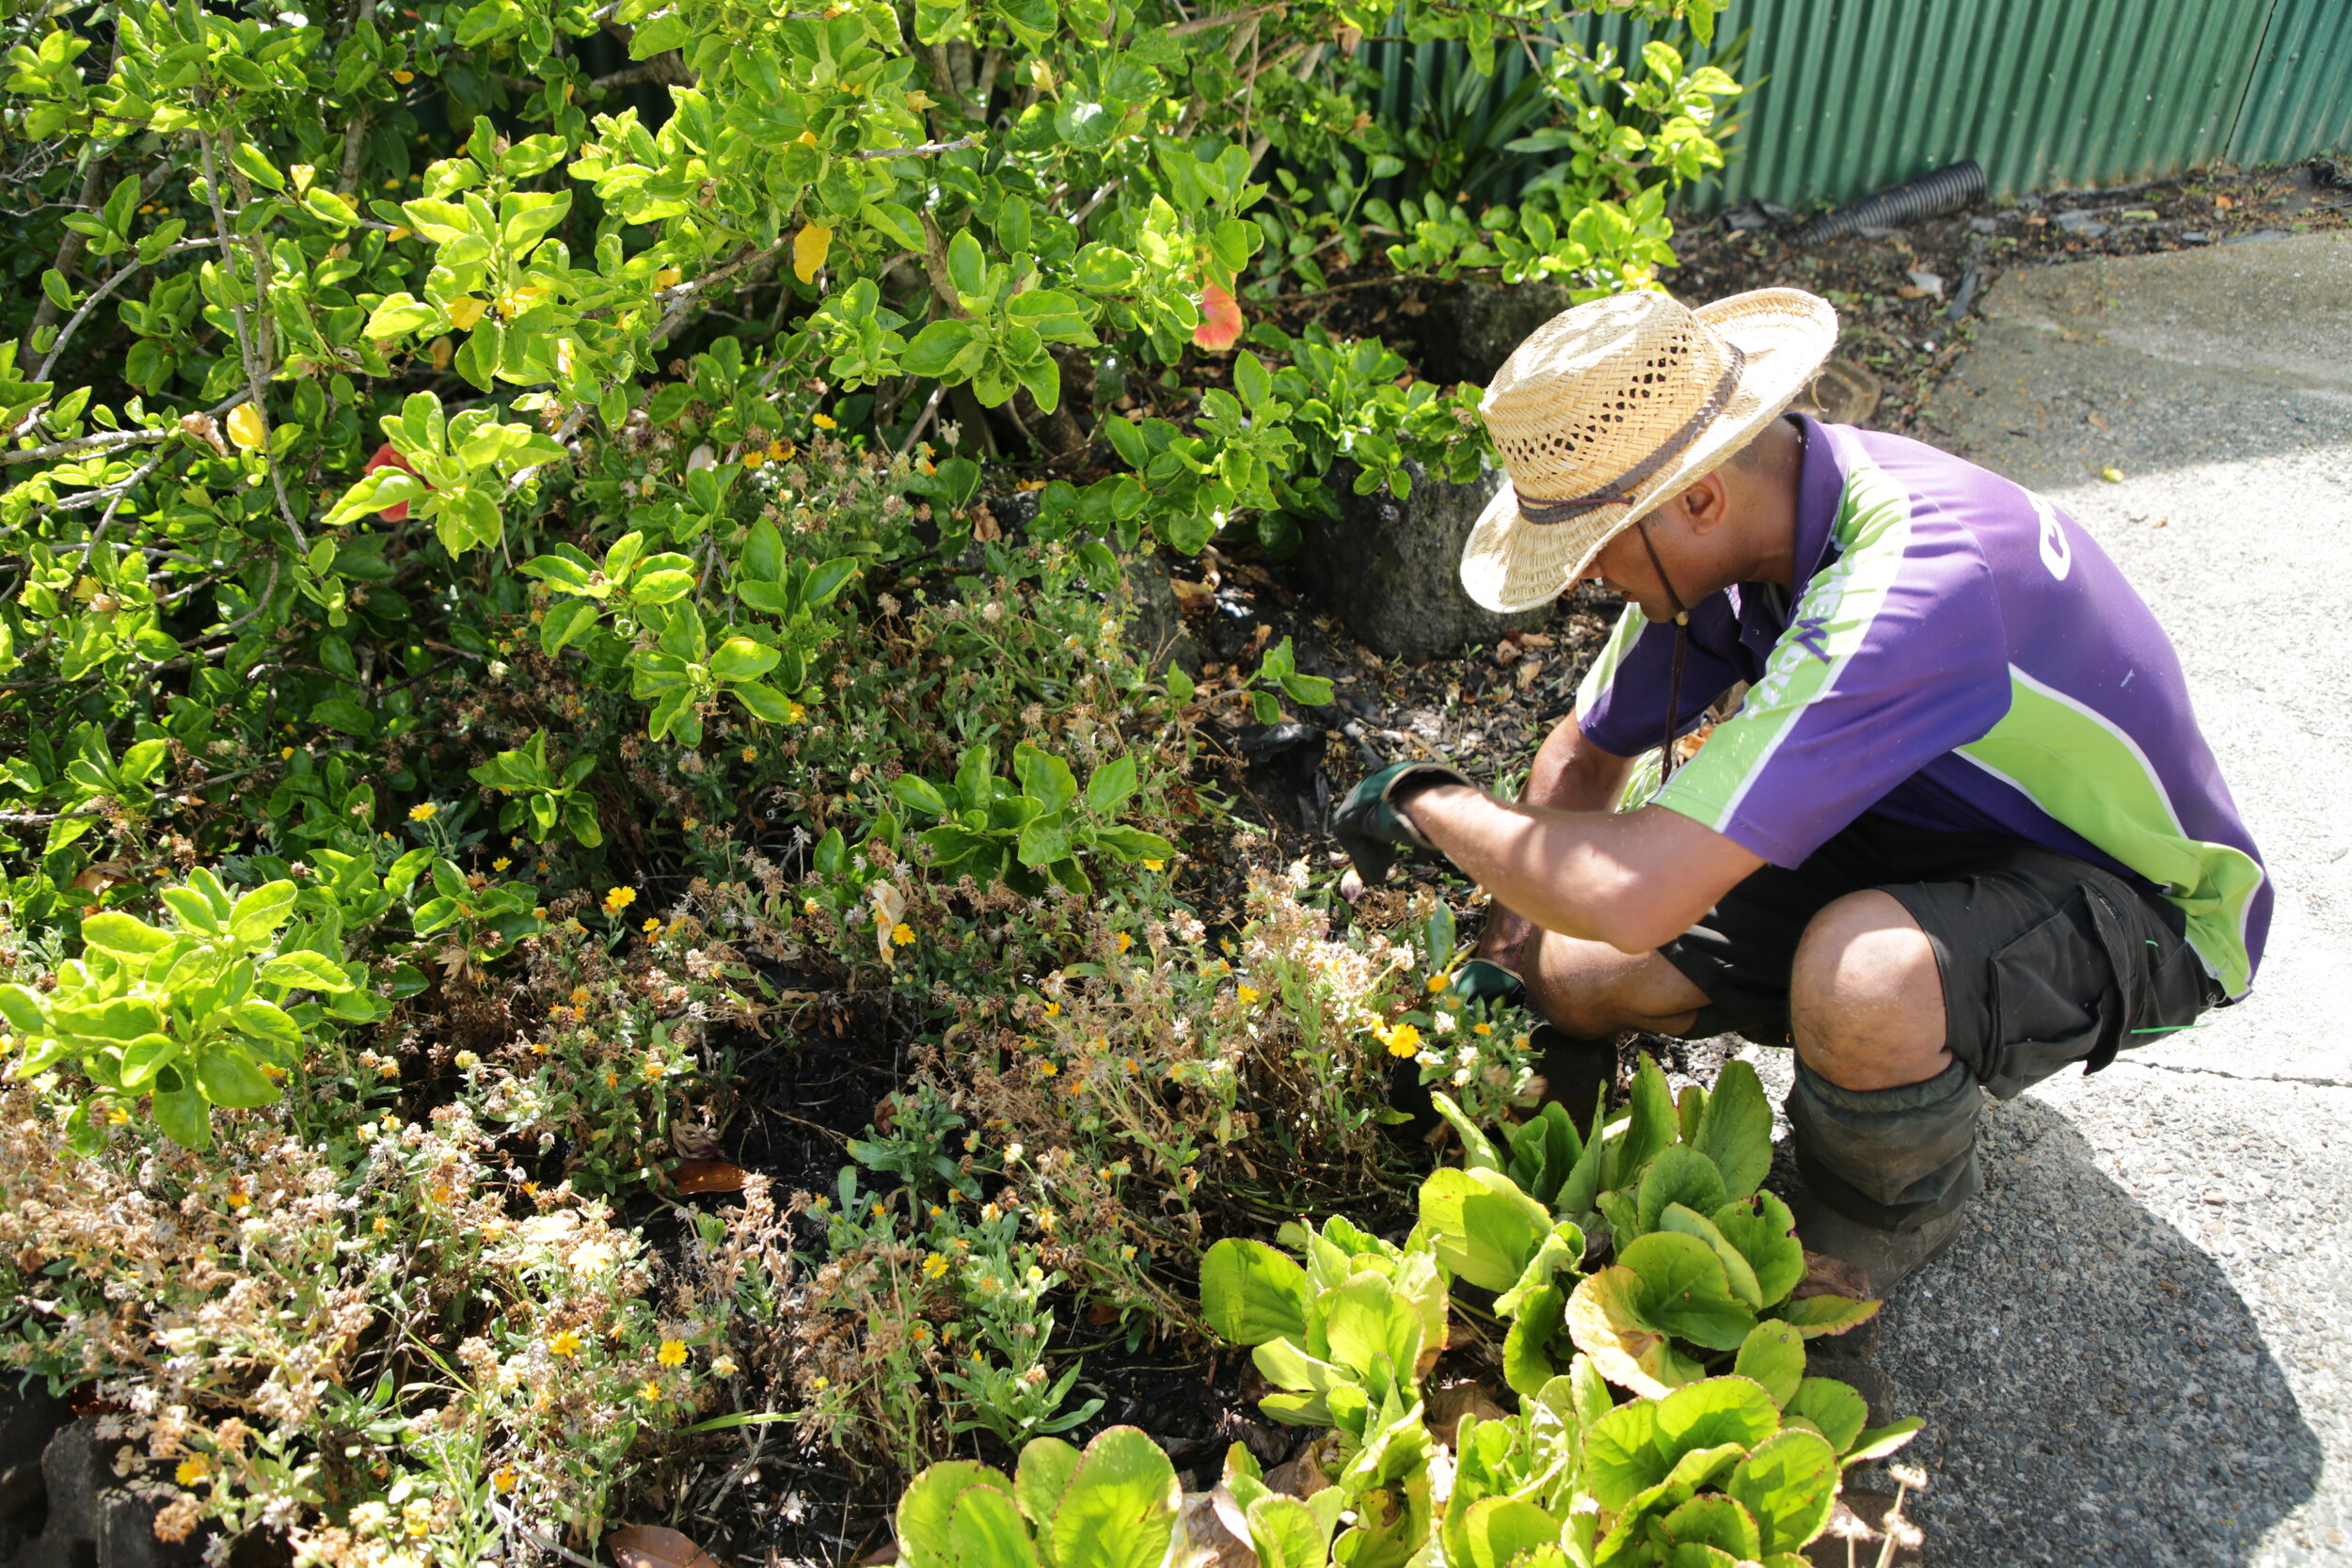
31. Start small

Many beginner gardeners want to go big right away and plant everything at once. This can lead to chaos and disorder not just visually but also in the functional aspects of your garden. You can easily commit mistakes in not setting the right spacing, lighting, and other important conditions for your plants. Some plants may not be beneficial to others. This is why it’s better to start with a smaller gardening area and just fill your space with plants over time once you’ve mastered the art of gardening.

32. Make your own fertiliser

Instead of buying fertiliser from the gardening shop, you can make some yourself at home. Tea is a good liquid fertiliser for potted plants. Dandelion, yarrow, and seaweed tea are all good fertilisers

Conclusion

Every beginner needs to know the practical tips and tricks to make gardening a less complicated task. Apply some of the suggestions above and start looking at your plants in a different light. Better yet, start the garden of your dreams!

For any questions or comments about this story, please email the author at chaliesvson [at] gmail.com.

Guest User
Pruning Roses in New Zealand

When it comes to roses, New Zealanders are big fans. We join the New Zealand Rose Society, meander through the various rose gardens our beautiful country offers, and look up information on pruning roses in NZ. 

And while you might be familiar with the many rose varieties that grace gardens countrywide, do you know when to prune roses in NZ? Now, that part is tricky. Still, we’ve got the information you need to do a great job and be the envy of all your neighbours.

Lady pruning roses in NZ

When to prune roses in New Zealand

Being a gardener is hard work. Sure, the fruits of your labour make it worth it, but knowing when to prune all your different plant varieties can take a lot of research. Learning when to prune roses is no different. It’s always worth looking at various resources and talking to experts so that you can squirrel away information for use at another time.

The best time for pruning roses in NZ is in the middle of winter and towards the end of winter. During this time of the year, your roses are dormant. If you prune too early, your roses may become confused by the haircut and decide to bloom early.

Many gardeners also prefer to prune their roses in August. New growth is just around the corner, and your roses can bounce back quickly. 

What you need to prune roses

If you’ve got a green thumb, then there’s every likelihood that you already own everything you need to prune your roses and bring them back to optimum health. However, if you’ve only just realised that roses need pruning, then it might be time to hit your local gardening store. (Remember, shop local!)

  • Rose pruning gloves

  • Secateurs

  • Loppers or pruning saw

The best rose pruning gloves are those that extend past your wrists and up your arms. However, if you only have short ones, wear long sleeves to reduce the risks of being scratched. 

Any secateurs you own must be sharp enough to allow for a clean cut. Remember to clean your secateurs after each use with hot water and dishwashing liquid. Wipe away any dirt and keep your blades smooth with steel wool or a wire brush. To prevent corrosion, oil them regularly.

If your rose has thick canes that your secateurs can’t handle, then it also pays to invest in loppers, or a pruning saw. Both can be convenient additions to any gardening arsenal.

The step-by-step process for pruning roses in NZ

If you’re new to gardening, or at least new to rose pruning, then having a step-by-step guide can be quite helpful. Let the experts deliver! Read on to learn how your roses can look at their best.

Remember: your rose bush should be about half the size after pruning, put some people prefer only to remove a third – and that’s okay, too!

Step 1: Remove dead and damaged limbs

Life in the garden can take its toll – even for the hardiest of plants. So, in the middle of winter, use your secateurs or loppers to remove damaged or dead limbs. They serve no purpose other than to take up space. Remove them at the base of the plant to promote new growth in their place.

Step 2: Remove crossover and small branches

Branches that cross over each other are doing nothing for your rose plant’s growth or aesthetics. To direct new growth where you want it, use your secateurs to remove any branches that are crossing over each other.

While you’re doing that, take the opportunity to remove branches that are thinner than the average pencil. You can then focus on thick, strong branches that have outward-facing buds.

Step 3: Prevent diseases

Roses can be prone to all sorts of diseases. Fortunately, many products on the market can assist with most of them. However, while pruning roses in NZ, there is something you can do to help, as well.

Make a 45-degree cut above your rosebuds. By doing so, you’re helping with water run-off when it rains. If you can prevent water pooling on the stem, you may be able to prevent disease.

Step 4: Make sharp cuts

Having taken note of appropriate secateurs care above, you should be making clean cuts. By doing so, you can prevent dieback. Stand back and look at your handiwork. After pruning, your roses should look beautifully shaped and ready for new spring growth.

Or, leave it to the experts

You may enjoy having beautiful roses to look at on those sunny days, but not everyone has time to get them to that point. Rather than get your hands dirty, why not hire someone to take care of your gardens and lawns? You then don’t have to worry about when to prune roses, because an expert gardening team will worry about that for you.

Guest User
The Cheapest Ways to Get Rid of Garden Waste Quick

Are you looking for the cheapest way to get rid of garden waste? It always seems like you’re fighting a losing battle against lawn clippings, twigs, branches, and leaves. As soon as you finally get rid of the last lot, you’ve got a pile of it to take care of again. 

So, wouldn’t it help if you had some contacts and know-how to ensure it’s never a problem in the future? And, wouldn’t it help if it was affordable? It’s actually easier than you think to take care of green waste and garden waste in New Zealand.

Try your hand at composting

Many of us are fortunate here in Aotearoa to have fairly sizeable yards. The further out of the main centres you get, the larger they tend to be. So, there’s every reason to believe there’s room on your sprawling lawn for a compost bin. These magical bins and boxes can end up being the cheapest way to get rid of your garden waste – and much, much more.

Garden waste collection bag by Crewcut

All manner of natural and produced goods can break down when taken care of and established correctly. Build up around one cubic metre of composting materials and make sure everything you put in there is in small pieces and layered.

Grass clippings, leaves, wood chips, sawdust, straw, hay, weeds (except perennial weeds and seed heads that grow from roots and stems), and wood shavings can all make excellent compost. Essentially, if it was once alive, it can break down. 

You can even add fruit and vegetable scraps, tea bags, eggshells, and coffee grounds. However, avoid citrus skins, glossy printed cardboard, bones, and meat.

Once you’ve got your compost established, there’ll be no need to worry about how you’re going to get rid of lawn clippings, leaves, and other garden waste products.

Give it to your gardens and lawns

Much of what you remove from your gardens and lawns can go back into it – within reason. If you haven’t let your lawns grow too long, consider mowing without the catcher. By doing so, you can provide an even layer of lawn clippings that break down and release nutrients back into the lawn. 

The same rule applies to dead leaves. You can rake them into the soil underneath your trees where they will break down quickly.

Make mulch

If you don’t like the idea of leaving a pile of leaves under your trees or clippings on your lawn, then make mulch. While you can buy commercial mulch containing pea straw and bark, it’s equally as easy (and more affordable) to make your own. Even those without green fingers will find the process easy.

Shredded leaves, grass clippings, newspaper, bark, straw, and hay, can all come in handy for this process, while also saving you green waste dumping fees. Mulching is undoubtedly the cheapest way to get rid of garden waste.

Cut up wood for fires

If you’ve dabbled in a bit of tree trimming in your spare time, then you may be wondering what you can do with all the tree branches. While you could spend money on dumping them at an appropriate facility, you can actually make use of them at home.

If you have a wood burner that complies with the Government’s air pollution standards, then your tree branches can become a handy source of fuel. Chop them up to an appropriate size then wait for them to dry. Never attempt to burn green wood in an indoor fireplace. While you might be waiting some time, having small branches for firewood can prove convenient during the coldest months of the year.

Council green waste disposal centres

While this isn’t always the cheapest way to get rid of garden waste, it can be a popular option for many people. What’s more, the price tag for green waste disposal in NZ can be quite affordable, depending on where you live.

For example, in Gore, Southland, you can get rid of green waste for free at the town’s transfer station. Other towns and cities countrywide also adopt competitive rates to ensure people dispose of it appropriately. 

Give it to friends and family

If you don’t have any need for compost, mulch, or firewood, then what are you supposed to do with your green waste? You probably want the cheapest way to get rid of garden waste, and that’s where your friends and family come in. 

Avid gardeners in your life may love the chance to take mulch products and clippings off your hands. You never know until you ask.

Let the lawn care experts take care of it

If you rely on a lawn care company to mow your lawns and maintain your yard, then you may also be able to add green waste removal into the mix. Many lawn mowing companies in NZ will take away your lawn clippings and other natural products as part of their service. Why not get in touch with your local lawn mowing service provider and find out how they can help?

Guest User
The Best Time to Prune Trees
Determining the best time to prune trees

Whether you're an avid gardener or a novice, you may be wondering when is the best time to prune trees. After all, it’s possibly not something you have needed to give a lot of thought to. As a result, that arduous task can fall by the wayside.

While you could leave tree pruning to the experts, what’s the harm in having a little bit of extra knowledge? Prep those green fingers and read on to find out more about tree pruning.

Why do you need to prune your trees?

Before we focus on when is the best time to prune citrus trees, shrubs, and similar, it’s a good idea to work out why you need to prune your trees in the first place. Do they really need it? In short, yes.

Think about it this way. Your hair always looks at its best and healthiest when you visit your hairdresser regularly. Haircuts promote healthy growth, beautiful hair, and make it easier to maintain. The same rules apply for tree pruning and trimming. When you work on making your tree as strong as it can be, it is as strong as it can be.

Your job, or that of the landscaping and lawn care company you hire, is to take out the weak branches to strengthen the overall structure. Remove broken branches, diseased limbs, and encourage new growth. The more time and effort you put into your trees and shrubs, the healthier and stronger they can be.

Tree pruning in early spring

If you’re wondering whether the best time to prune trees is in early spring, then the answer is yes. But, also no. You can prune trees in early spring but focus on those that you can class as summer-flowering trees.

Crepe myrtle, for example, is a beautiful feature plant that produces lovely autumn foliage. For the most part, they are care-free. However, they do benefit from early spring or late winter pruning sessions to remove twiggy growth. Other summer-flowering trees and shrubs should also be pruned in winter or spring while they remain dormant. The trick is to get in before new growth begins.

Tree pruning in early summer

If your hedges are looking a little worse for wear, or you have early-spring blooming shrubs and evergreen trees, then the best time to prune is now! While now is not the best time to prune lime trees or other citrus trees, it is the ideal time to focus on those trees that tend to thrive in summer.

Evergreen trees tend to take off once the weather warms up. Free up your weekend to tackle the task, or hire a tree pruning business near you to take care of it for you. Just remember, now is definitely not the best time to prune lemon trees or any stone fruit trees.

Tree pruning in late summer

If you don’t mind battling the rising mercury at the tail-end of summer, then now’s an excellent time to tackle your maples and birches. Remove dead, damaged, or diseased branches, and any that are rubbing against each other. At this point, you can also remove narrow or weak limbs that could break once they are much larger.

Tree pruning in late winter

Winter is the time of year when you want to spend the least amount of time outside, but it can also be when a lot of trees require pruning. For example, it’s the best time to prune fruit trees, and even the best time to prune peach trees, apple trees, fig and plum trees, too. So, if you can brave the freezing-cold temperatures, then your trees will thank you for it!

Winter is also the best time of year to take care of tree trimming on nearly every other type of tree. Unless it falls into the category of summer-flowing, evergreen, and early-spring blooming shrubs, then get your secateurs ready. If you’re not sure how to do so safely or correctly, then consider hiring tree trimming businesses to take care of it for you.

When is the best time to prune citrus trees?

We’ve just said that the best time to prune fruit trees is in winter, but is that always the case? Just to confuse you further, it’s not. Sometimes, citrus trees don’t require pruning at all.

If they are starting to become misshapen or too large, then, of course, tree trimming is necessary. You can trim branches to achieve your preferred shape, and take care of diseased stems. At the same time, you’re also improving the tree’s air circulation.

However, often, the best time to prune fruit trees is after they have fruited in spring. You can prune them in winter (and sometimes other parts of the year) but only in frost-free regions. If you do it in a frost-prone area during winter, then you may discover frost damage on delicate new growth.

Given how finicky pruning fruit trees can be, you may find that asking for help or advice from a lawn care company is the best step to take.

Call in the experts

Tree pruning can be a complicated task. It can also be a dangerous one if you’re not sure what safety precautions to take. If you don’t feel confident tackling the job on your own, then call for help. There are plenty of gardening businesses across New Zealand that will be more than happy to assist.

Guest User
The Difference Between Tree Trimming and Tree Pruning
Tree trimming and tree pruning expert from Crewcut

If you’re not a lawn care expert, then you may not be familiar with all the care your property needs. Lawn mowing is one requirement, but what about tree trimming and tree pruning? But wait, you say. Aren’t they the same thing? Believe it or not, there is quite a difference between tree trimming and tree pruning – and you might require both

If you find yourself in an enduring battle with yard maintenance, then keep reading. You may have just found the answers for which you’ve been hunting. All that’s left for you to do now is hire a lawn care expert to take care of business.

What is tree trimming?

Tree trimming is the process of trimming the growth of hedges, shrubs, and trees. By doing so, you are promoting healthier growth and maintaining your plants, so they don’t grow out of control.

Tree trimming can also involve canopy reduction, canopy lifting, and canopy thinning – all with the idea that you can improve the presentation of your natural growth. If you choose the right lawn care expert, you may even be able to request the shaping of your trees that can contribute to your home’s street appeal. 

What tools are necessary for tree trimming?

What tools you use for tree trimming can depend on the extent of the trimming. If it has been some time since your trees saw attention, then bringing in the big guns could be a requirement. It can also depend on if you are trimming trees, hedges, or shrubs. Secateurs and clippers may be all that’s necessary. Still, power tools like chainsaws and power trimmers can speed up the process for big jobs.

What is Tree Pruning?

It’s easy to assume that tree trimming is tree pruning, but there are some differences between the two. Making it even more confusing is that some lawn mowing companies may use the two terms to refer to the same process.

However, tree pruning is not just about tree maintenance. It’s essentially giving your plant life the full manicuring package. You may need to remove branches that are dangerous or in the way, and sometimes even tree roots.

Dead, damaged, or diseased tree branch removal can also be a part of the tree pruning process. If you’re not sure what you require, but you just know your yard has seen better days, then consult a garden expert in NZ for assistance.

What tools are necessary for tree pruning?

If you plan on carrying out tree pruning yourself, then it’s helpful to know what you need to buy or own already. Often, though, it can be more cost-effective and convenient to bring in an expert team that knows how to handle the job. 

Some of the best tools for tree pruning are hand shears or lopping shears. They can cut through most thin branches. If you have thick branches, then you may require a hand saw, which can take a little more effort.

When is the best time to trim and prune trees?

Tree pruning or tree trimming timetable

Trimming and pruning trees can be a complicated task at the best of times, but did you know there’s a “right” time to do it?

If you have a damaged or diseased limb to remove, then you can tackle it at any time of the year. The earlier, the better, in fact. But when it comes to maintenance pruning, never prune after early spring growth. By doing so, you can end up stunting your plant’s growth.

There is a general timetable you can follow, but you may like to save yourself the hassle and hire an expert tree trimming team to assist.

  • Late winter

    Prune mature fruit trees. Wait until near the end of winter to prune young fruit trees.

  • Late summer

    Maple trees and birch trees.

  • Early summer

    Hedges, early-spring blooming shrubs, and evergreen trees.

  • Early spring

    Summer-blooming trees.

Safety tips for tree trimming and tree pruning

Did you know that Kiwis cost ACC millions of dollars in gardening injuries? Soft tissue injuries are among the most frequent, but chainsaws, ladders, and lifting are quite common, too. If the time has come to carry out tree pruning and tree trimming, then make sure you can do it safely. Otherwise, it might be best to contact a lawn care business to assist.

Never trim a tree while you are standing on a ladder. Instead, secure yourself to a tree from at least two points. Wear a safety hat and safety glasses while doing it, and don’t climb up the ladder while carrying your tools. Instead, climb the ladder and ask someone to pass them to you. Otherwise, haul them up on a rope.

If a job seems too complicated or dangerous, then it probably is. Listen to those inner alarm bells and call in the experts to assist.

Tree trimming and tree pruning services

Let’s face it. Life gets busy. Before we know it, the yard looks like a jungle, and we just don’t know where to begin. It’s okay to admit defeat, but you’ll be pleased to know that help is at hand. Call upon your local yard maintenance specialists for a helping hand. You’ll be back on track in no time.

Guest User
DIY Greenhouse Ideas to Flex Your Creativity
Creative greenhouse ideas would be fun for the kids

There is no denying the benefits of a greenhouse, especially here in New Zealand. They offer plant protection, much-needed climate control, and even a more extended growing season. In some of the cooler parts of the country, greenhouses offer keen gardeners the chance to grow something that may never have survived outdoors. To see the type of greenhouses available, check SteelMates. They provide a wide range of greenhouses in New Zealand.  

But there’s a sticking point with greenhouses, and it’s that they are all the same. When you want your garden to be noticed and stand out, a standard greenhouse may not be the way to achieve it.

Still, that doesn’t mean you can’t enjoy all the benefits of a greenhouse, but without the stock-standard model. Read on to find out what DIY greenhouse ideas could be to your liking.

Old windows

If you were to describe a greenhouse in any way, it would be a structure with transparent materials. So, not to get technical, but old windows can become a structure with transparent materials.

If you, like many New Zealanders, are replacing wooden windows with aluminium ones, then don’t be in a hurry to throw the old ones away. With enough DIY knowledge, you can turn them into a makeshift greenhouse that looks as pretty as a picture.

Portable greenhouse

Another common problem that gardeners face is that they don’t want a permanent greenhouse in their yard. What happens if they want to play around with their landscaping or carry out a garden clean-up? Something more temporary, but equally as useful, could be on the cards.

So, why not look at your options in the realm of portable greenhouses? Often, you can purchase a frame and a UV-protected cover to go with it. Such a greenhouse can be set up and pulled down in a matter of minutes.

Recycled plastic bottle greenhouse

Window cold frames

In the gardening world, cold frames are boxes with no bottoms that you put over plants to protect them from the elements. They have a transparent roof to let light in, and these are often attached with a hinge.

While you can buy cold frames as a ready-made structure, why not flex your creative muscles? After all, we are a nation of DIYers.

You can use old wooden windows to form the foundation and lid of your cold frame. It can then be a smaller and often more manageable version of a greenhouse that you may not have used to its full potential. 

Trampoline frames

If you like the idea of owning a greenhouse, but you don’t want to spend a lot of money, then why not use what you already have? Old trampoline frames are a dime a dozen, with many families having had at least one trampoline damaged or lost to high winds.

Take advantage of the now-redundant trampoline by turning it into a greenhouse. Cut a circle frame in half and secure plastic over the top. Install a basic wooden frame door, and there you have it!

Umbrella greenhouse

Not everyone is blessed with a quarter-acre section to build the garden of their dreams. But just because you don’t have endless landscaping opportunities, that doesn’t mean you can’t have a greenhouse of sorts

Plant your favourite fruits and vegetables in whatever planter box or barrel you have, then invest in transparent umbrellas. You can then secure these over the top of the plant to protect it from the elements. Not only does an umbrella greenhouse solve the problem of space, but of affordability and creative design. 

Frame greenhouse

Picture frames

If you have a few prized plants that are particularly sensitive to New Zealand conditions, then you are probably wondering if investing in a greenhouse is worth your time. For a few small plants, it might not be, but that doesn’t mean you can’t come up with a DIY solution.

Make use of old photo frames and turn them into a tiny structure that can shelter and protect your favourite flowers. You can then put it indoors or outdoors where it will be safe and climate-controlled.

Mason jars

One of the hardest things about growing new plants is getting them to grow roots and thrive. In the ground outside, you may not find that you have the ideal conditions for that to happen. But what if your pickle jar could help? 

Save your old mason jars and use them as a form of protection and temperature control for those young plants. Place your plant in the ground, put the jar over the job, and job done! Because it can retain moisture and keep the temperature consistent, your young plants will have a chance to grow roots and thrive in their new environment.

Plant protection, the creative way

Many people are put off the idea of growing their own produce because they are worried the ever-changing New Zealand climate will make it a pointless exercise. Sometimes, though, all it can take is a bit of Kiwi ingenuity to come up with a solution.

Why not create your own greenhouse using some of these DIY greenhouse ideas and tips above? You never know, your local garden expert may even be able to offer some helpful advice to get you started.

Plastic bottle greenhouse
Guest User
Natural Pesticides You Should Use in Your Garden
Using natural insecticide is the way to go

Natural insecticide is something that any avid gardener will have a massive selection of in their gardening shed. Because even though we have very few critters in little ol’ Aotearoa trying to harm us, we have plenty that want to harm our plants. 

The problem is, what do you use when you want the pests taken care of, but you have pets and children?

Believe it or not, natural insecticide for vegetable gardens and plants is something you can both buy and make yourself. 

For aphids and caterpillars

If your plants are overrun with caterpillars and aphids, then an excellent natural garden pest control measure is garlic. Not only is it a natural anti-fungal, antiviral, and antibacterial vegetable with a myriad of health benefits, but it’s something those nasty little critters will hate

Gather vegetable oil, water, a bleach-free dish soap, and a head of garlic. Crush the garlic with the oil and add water and the dish soap. Sit it overnight, strain it, then spray it on the plants. This natural insecticide for your garden even has a pleasant odour while it’s making quick work of your pests. 

For fungal problems

If you live in one of the wettest parts of NZ, then you might find yourself combating fungal problems in your garden from time to time. It can be tempting to purchase a powerful, chemical-laden product to take care of it, but natural plant insecticide can be as helpful. 

You just have to know what to use. And the winner? Baking soda

Fungus is quite common in wet or humid areas, or even in gardens with plants that are too close together. You can combine baking soda with vegetable oil, bleach-free dish soap, and water. Mix these ingredients thoroughly, put them in a spray bottle, and get to work. You’ll have fungus-free plants in no time. 

For pests and bugs

Are bugs getting to your vegetables before you? You need a natural insecticide for your vegetable garden. Believe it or not, the answer lies in three common kitchen ingredients: garlic, chilli, and onions. 

To create an effective natural plant pesticide, crush or puree four onions, two garlic cloves, and four hot chillies. Mix these with two tablespoons of bleach-free dish soap and two cups of water. 

Let it sit overnight, strain it, then add five litres of water. Pop it into a spray bottle and take action on those pesky bugs and insects.

For aphids and insects 

If you are having trouble with many different insects, then have you considered what tomato leaves can do for you? More and more people are seeing the value in this amazing plant as a natural plant insecticide. 

Tomato plants contain alkaloids that control aphids and various other insects. All you need to do is chop up two cups of tomato leaves with one litre of water. Let it sit overnight and then strain the plant matter out of it. Put the liquid in a spray bottle and spray it onto your affected foliage. 

Aphids and insects

For beetles and mites 

If you’re facing an uphill battle with mites or beetles, or even aphids and whiteflies, then a soap spray could be the best form of natural pest control for you. It’s also far easier and safer to use than many other chemical-laden pesticides for sale. 

Mix one and a half teaspoons of liquid soap with one litre of water. Spray it onto the infected surface. Avoid applying it during a hot or sunny day.  

For aphids and mites

Aphids and mites can do significant damage to your favourite plants, but why give them a chance? You can make a vegetable oil-based spray that will take care of business. They’ll be gone before you have an opportunity to say ‘nature knows best’. 

Mix one cup of vegetable oil with a tablespoon of mild liquid soap. Cover the container and shake it until it has mixed. You can then add two teaspoons of the blend and mix it with one litre of water. Shake it again in a spray bottle, then spray it onto the affected plants. 

The oil in this mixture covers the insects’ pores, which stops them from being able to breathe.

Are you ready to go natural?

It can be quite overwhelming to go from using commercial pesticides that may not be the most environmentally-friendly, to trying your own. Still, you will undoubtedly find that these options above are easy to create. When in doubt, get in touch with your local lawn care company who can lend a helping hand.


Guest User
Indoor and Small Garden Solutions for Living in Urban Environments
Small garden indoors

Sprawling lawns and cottage gardens are something that many Kiwis aspire to have. But with postage stamp sections and concrete jungle apartments more of a reality, it can be hard to achieve that ‘slice of paradise’ vibe you’d always thought you’d have.

It might be a challenge to welcome nature into your humble abode, but it’s not impossible. Read on to learn about some fresh garden ideas for urban living.

Vertical Gardens

You may not have a lot of space to grow plants outwards, but what about all that spare space in the sky? There’s no reason why you can’t look at options around vertical gardens. A vertical garden is like turning your walls into living art. You can buy or build vertical planters that you can then use for flowers, herbs, and vegetables.

The beauty of such a garden is that not only does it take up minimal space, but it’s something you can have inside or outside. Companies are continually coming up with different trellis-style planters that allow you to produce fruit and vegetables year-round – yard or no yard.

Furniture Terrariums

The median floor area of a multi-unit home in New Zealand was around 100 square metres in 2019. That might give you plenty of space for the essentials like lounge suites and beds, but not so much for “non-essentials” like gardens.

While you may not be able to fill your weekends up with lawn mowing and hedge trimming, you can experience plant life in your home. You just have to get creative. One way to do that is with a piece of furniture that acts as a terrarium at the same time.

A coffee table, for example, can have a beautiful succulent garden underneath the top but still remain as a functional piece of furniture.

Wall Planters

The only thing you used to be able to put on your walls was art. Now, however, the sky’s the limit. You can now buy unique wall planters that have one flat side to sit flush against your wall but can be filled with your favourite plants.

Sure, you might not have lawns or gardens for planting seasonal produce, but you can take advantage of free wall space for a few of your favourite flowers and herbs. 

Plant Walls

An obvious way to bring plants into your home is with pots. But a boring pot positioned at various intervals around your home doesn’t exactly scream “home décor.” We’ll tell you what does, though, and that’s plant walls

There is something desirable about adding definition to areas in your home, and plant walls can help with that. You can set them at the heights you want, add your favourite plants, and watch as they thrive. Why buy a folding partition wall when you can have one that grows instead?

Windowsill Planters

You might not have the ground space for your favourite cooking herbs, but what about in the kitchen? Windowsill planters take up minimal space, but they add a burst of colour to any kitchen. What’s more, they are perfect home additions for growing those essential cooking herbs.

Balcony Gardens

Many apartments have small balcony areas, and it’s up to you to decide how to use yours to its full potential. Such an area is normally excellent for patio furniture, but what about plants? Think about how much sunshine your balcony gets, then decide accordingly what kind of plants you’d want to put in that space.

You can consider adding pots – big and small – to the space or installing small planter boxes. This area may even have the potential for hanging planters and vertical gardens, too.

Many delicious vegetables only require a small amount of sunshine. If you know your balcony doesn’t get a lot of sun, plant lettuce, spinach, kale, cabbage, broccoli, and cauliflower. For sun-drenched balconies, plants that can thrive include tomatoes, peppers, and cucumbers.

Tiny succulents by the window

Gardens for All

It’s true, only those with yard space get to enjoy generous entertainment areas and large, sprawling lawns. But even if you live in an apartment or a property without a yard, that doesn’t mean you can’t enjoy a garden of your own. It just looks a little different.

From vertical gardens and furniture terrariums to wall planters and herb gardens in your kitchen, the sky’s the limit. Welcome greenery into your home without feeling like you need to have a huge yard to do so.

Guest User
Lockdown Gardening: What to Make from Your Harvest

Many New Zealanders have had a lot of time on their hands lately, with alert level four lockdown keeping all but essential workers at home. While you could make your way through Netflix from start to finish, why not get outside and discover what’s ready to harvest in your garden? There are plenty of lockdown treats and food to make from the plants you’ve lovingly grown.  

Tomatoes for sauces and salsa

Many gardeners will be picking through the last of their tomatoes on the vine. If you still have an abundance of them, think about what delicious things you can make over and above tomatoes on toast.

Tomatoes from your garden

Homemade tomato sauce, puree, and salsa are wonderful ways to make use of tomatoes so that they can form part of a more substantial meal. You can even slow roast them or make a pasta sauce. Why not pair those tomatoes with some of the cooking herbs you’ve been growing, too?

If your vines are overloaded with tomatoes, consider picking as many as you can. The more fruit on a plant, the less energy that plant has to fight off diseases and pests.

Feijoa treats for the kids

Now’s the time to harvest the last of your feijoas. Fortunately, even if you’re left with an abundance of them, you won’t be short of delicious treats to make. Get the kids involved and curb that boredom for a short while.

Feijoa and cream cheese muffins are always a hit, as are feijoa and honey muffins with coconut. Swap out the apples in your crumble for feijoa, or even poach them. Poached feijoa pairs beautifully with vanilla cream and toasted pistachio.

Feijoa jelly, pudding, chutney, and feijoa strudel are bound to be household winners. You’ll be surprised at just how many treats you can create with this delicious fruit.

Kumara wedges

If you’ve put a lot of effort into your crop rotation, then you may be seeing that your kumaras are ready for harvest – or have been for some time. Kumara is equally as versatile as potatoes. Create sweet potato wedges or mash, or why not change it up a bit with mashed kumara cakes?

If you’ve been growing coriander in your kitchen, then pairing it with kumara in a soup is sure to go down a treat, too. Just remember to store your kumara in a cool, dark part of your home. 

Fig and cheese

Fig chutney

As soon as you notice that your figs have softened, and their skin has changed colour, then it’s time to harvest! Use snips or secateurs and make sure you keep the stems intact. Wearing gloves can also minimise the risk of skin reactions from the fig tree’s sap.

Once you’ve harvested all the goodies, it’s time to make some delicious lockdown treats. Fig jam or chutney is sure to be a hit, or why not dry them to add to muesli or as a snack? Fresh figs are also a match made in heaven with walnuts, honey, and cheese. Check out some independent Kiwi businesses for fresh bread and other ingredients you can pair with them.

Rhubarb for sweet and savoury dishes

If you’ve noticed that your rhubarb has large leaves and thick, long stems, then get ready to harvest. The harvesting season extends right through June, but autumn and spring are the most common months for doing so.

Rhubarb can be worked into both sweet and savoury dishes. Create a rhubarb upside-down cake, chutneys, or even a pie. This sweet treat also pairs beautifully as a condiment for meats. 

What’s Next?

With lawn care operators unable to offer lawn mowing services in New Zealand right now, it’s on you to keep your property in tip-top shape. 

Autumn is the perfect time to sow new lawns or give your existing grass a facelift. Start by removing weeds then cultivating the ground down to around 15cm. Fertilise the soil around a week before you sow your grass seed.

If you’re working with your existing lawn, then rake it to get rid of old or undecomposed grass. You can also take care of dips or holes with potting mix, sand, and grass seed.

You can also look at preparing your property for the colder weather by cleaning and storing away outdoor furniture. Sweep out patio areas, get rid of cobwebs, and weatherproof anything that might suffer from moisture in the wintry weather to come.

Alert Level 4 has allowed many of us to flex our culinary muscles in the kitchen with homegrown produce. However, it has also been the perfect time to take care of those outside tasks that you may have previously neglected.

In the weeks to come, you can then look forward to your local and trusted lawn care expert to take over once more!

Guest User
Pruning Hydrangeas: How and When to Do It

Hydrangeas are the showstopper of the plant world. It doesn’t matter what variety you get – be it the mophead or lacecap, or even the paniculate or oakleaf, they turn heads and win hearts.

Even those who aren’t typically plant lovers can’t help but be mesmerised by the vibrancy and generous proportions of a hydrangea bush in full bloom.

Hydrangeas don’t really need to be pruned. Your lawns need to be mowed, your hedges trimmed, and your gardens weeded, but hydrangeas will trundle along without a care in the world and without demanding all that much attention. They are the perfect plant for any neglectful plant parent.

prunung hydrangeas

In saying that, any proud plant owner may see the value in occasional pruning to ensure they look at their best. Dead flowers and occasional dead stems should be cleared away to encourage healthy growth – and to ensure it remains as pretty as a picture.

Believe it or not, there is a right and wrong way to go about trimming your bush, which means you shouldn’t let yourself loose with a pair of secateurs just yet. Read on to learn not only how to prune your hydrangeas, but when the best time to do it is.

When to prune hydrangeas

The good thing about household chores is that you can do them at any time of the year and day that suits you. Even the most-hated tasks aren’t on a time limit. But the window of opportunity for hydrangea bush trimming is.

Any hydrangea bush – from the vivacious mophead and lacecap variety, to the tamer Quercifolia, can be pruned in mid to late winter. That’s right – you can put on your winter woollies, grab your pruning scissors, and do some gardening with snow on the forecast. 

Some people also decide to carry out pruning in early spring, intending to avoid late frosts that can damage new buds. 

Pruning techniques for mophead and lacecap hydrangeas

Two of the more common hydrangeas varieties include mophead and lacecap. Mophead hydrangea bushes have large, round heads with many small, vibrant flowers forming a ball. Lacecap, on the other hand, tends to have single flowers on a little head.

Lacecap hydrangeas

Lacecap hydrangeas

These two bushes flower on old wood, which are the stems that produced flowers the year before. As a result, plant owners have to be careful about how they undertake pruning. If you get too overzealous with your pruning, you may find your bush doesn’t produce any flowers during the next growing season.

Start with your damaged and dead stems. Snip them back at the base and remove any old, weak, or spindly growth at the same time. If you notice that any branches are trying to cross over or grow into each other, cut them back. By doing so, you can promote growth into the shape you prefer. It also pays to cut back flowering shoots and leave any shoots that don’t have any flowers.

How to prune other hydrangea bushes

Most people will be pleased to know that Oakleaf, Paniculata, and Quercifolia hydrangea varieties are low maintenance. In fact, many of them just want you to leave them alone!

Oakleaf, which has leaves shaped like those from an oak tree, is quite happy to grow and look pretty. However, should you see any dead, diseased, or dying branches, you can haul out your secateurs for a spot of light maintenance. Just like the mophead and lacecap variety, oakleaf bushes flower on old wood, so take care of pruning in winter or early spring.

Paniculata hydrangea bushes are a little bit different. Their flowers bloom on new wood, which means they are easy to prune, and you can go crazy with the pruning scissors without worrying about stunting new growth. Unlike other hydrangeas, you can also prune this variety annually – either back to the ground or at the flower heads.

How to plant hydrangeas

A plant that wants you to leave it alone – that sounds like the dream plant. If you believe that hydrangeas are going to suit your property, then why not head to your local garden store and buy a few varieties? 

The planting process of hydrangeas in garden beds is effortless, but make sure you plant them early or late in the day to avoid exposing the plants to a lot of sunshine. Water them thoroughly before you plant them, then allow them to drain. While you wait, take a look at the root ball of the plant, then dig a hole that’s twice as deep and wide as it.

Loosen the ball of roots of the hydrangea plant, then place it in the hole you just dug. Fill it with flower mix from your local garden nursery, and press the soil around the plant base. Water it thoroughly and regularly.

Planting and caring for hydrangeas is a straightforward process. However, you can rest assured that there will always be a gardening and lawn mowing expert near you who will be more than happy to lend a helping hand.

Guest User
Looking for Low Maintenance Garden Ideas?
Low maintenance garden ideas

Being a modern-day adult is hard. Sure, our problems no longer involve running from sabre-tooth tigers or fighting mammoths for our vegetables, but a new problem has taken their place – and that’s a lack of time.

From working full time to arranging school pick-ups and drop-offs, not to mention sports practices, there never seems to be enough hours in the day. Something has to give, and garden maintenance is usually one of the first things to get the chop.

But having no time for gardening doesn’t mean you can’t have a garden. It just means you need to focus on a low maintenance garden in New Zealand, and preferably one that’s easy to establish and to maintain.

We know it sounds impossible, but with the right ideas and the right team, it’s entirely achievable. Are you looking for low maintenance garden ideas on a budget? Then read on.

How do I make my garden low maintenance?

It’s the million-dollar question: how do I make my garden low maintenance? Well, the trick is to make sure that every component on its own needs little to no work, which equates to an overall area that requires little to no work.

For example, if you have no idea how to take care of your lawns, as many people don’t, then you may not be all that inclined to have a large, sprawling lawn that requires countless hours of your time. In that instance, you can either hire a lawn care company, or make use of gravel, paving stones, concrete, and decking to cut down on the time you’ll need to spend behind a mower.

Making sure you have a low maintenance garden in NZ can also require weed-suppressing materials around gardens, easy-care plants, and a flowing layout that makes it easy to implement low maintenance backyard landscaping ideas.

What are the best low maintenance plants?

The average homeowner can be caught between a rock and a hard place. They want a low maintenance garden, but they also want plants. It can almost seem like you can’t have both. The key is to seek out the plants that won’t demand your time. Believe it or not, such plants exist.

For example, ground cover plants can be lifesavers for the busy homeowner who doesn’t have hours to spend on their hands and knees pulling weeds. Dwarf Agapanthus, also known as Tinkerbell, will fill the gaps, stabilise banks, and offer a vibrant freshness in any garden. It also grows in clumps and is as low maintenance as they come.

If you prefer something with a little bit more versatility, then start looking at photos of low maintenance landscaping ideas for small yards. You will surely find that Star Jasmine features in many of them. Star Jasmine may take a long time to mature, but it can form shapes, climb, or stay put on the ground. It’s also ideal for nearly any part of the country, except for areas that experience heavy frost.

The average homeowner with a garden to fill also can’t go wrong with flax, succulents, New Zealand Cushion Bush, and tussocks. Attaining that low maintenance garden is easier than you might think. And, remember, there is always a gardening expert near you who can be of assistance!

How do I make my garden more manageable?

At one time or another, you may have relished in the opportunity to spend countless hours in the garden. You may not have even had all too many issues with pulling weeds, bringing plants back from the brink of death, and playing around with soil pH levels for the perfectly lush lawn.

But for whatever reason, that may now not be your idea of a good time. Life may have gotten busier, or the aches and pains of getting older may have decided to rear their head. If that’s the case, then you may be wondering how you can make your gardens more manageable.

Fortunately, the changes you make don’t have to be all too dramatic, but it is worth looking at low maintenance garden photos online to see what you may like.

Some popular options can include:

  • Hiring an expert to take care of your lawns and gardens

  • Removing high-maintenance plants and putting easy-care ones in their place

  • Paving a section of the lawn

  • Investing in ground cover plants to minimise weeds

  • Opting for evergreen

  • Choosing perennials over biennials and annuals

  • Selecting garden boxes and container gardens over in-ground gardens

  • Opting for hard landscaping options

Love the low maintenance look

A cottage-style garden in full bloom is the picture of perfection, but anyone with such a garden will be all too aware of the time it takes to make it look like that. A low maintenance garden can be equally as attractive, but just in a different way.

Hire an expert to take care of all the hard work for you, or make a few changes so that you manage your fast-paced life without the stress of an overgrown garden. It’s time to look for low maintenance landscaping ideas today.

Guest User
10 Best Autumn Flowers to Make You Fall

As the curtains close on summer and autumn rears its head this March, gardeners drag out their pitchforks and gloves in preparation for a new planting season.

Autumn is an excellent time of year for planting, even if it might not seem like it. There’s still a warmth in the soil, but rainfall adds much-needed moisture that new plants and flowers need to survive and thrive. Therefore, if you’ve been thinking about renewing your garden or giving it a tidy up, there’s no better time than now. Start with some of the best autumn flowers below.

 
Cosmos flower

1. Cosmos

Poor soil can be quite frustrating for any gardener, but it’s not something that can destroy all opportunities for having a bright and beautiful garden come springtime. Cosmos are an excellent autumn flower for properties with poor soil, but with decent drainage and plenty of sunshine.

These beautiful flowers are pink, purple, or white, and are frilly for a point of difference. They are also available in various heights and make for beautiful garden presentation. If you’re partial to gift-giving, then they make for an attractive vase option, as well.

 
Pansies

2. Pansies

Gardening is a popular pastime in this country, with just a little over half of the participants in a 2007/2008 survey having dabbled in the year before. However, not everyone is as talented in keeping their plants alive as they would like. If robust but beautiful is the aim of the game, then some of the best autumn flowers to plant in NZ will be pansies.

Pansies are available in a wide variety of colours and don’t ask for much care. You can plant them in pots and hanging baskets, or even garden borders. All you need is well-drained soil or potting mix, some protection from snails, and a bit of liquid fertiliser to promote new growth.

 
Alyssum

3. Alyssum

Keep your garden as pretty as a picture year-round with alyssum, a dainty flower that’s self-sowing and fragrant. This beautiful flower grows in poor soil, drought, partial shade or full sun, and grows as a cream, red, pink, purple, white, or apricot flower. Plant it with your herbs and vegetables, or add vibrancy to a hanging basket.

 
Sweet peas

4. Sweet peas

Don’t let autumn pass you by without planting sweet peas. They are beautiful to look at in a posy but are even more attractive to have flowering in your own garden. Construct bamboo stakes or a tepee for them to climb and invest in compost-rich soil and liquid fertiliser to keep them healthy. Within as little as three months, you can be looking at a fully-formed sweet pea plant.

 
Forget-me-nots

5. Forget-me-nots

If you’re looking for a ground cover plant that will ultimately take care of itself, then forget-me-nots could be the answer. While many gardeners consider them a weed, they are an ideal option for those who would prefer to cover the soil with something beautiful. They are self-seeding, fill barren areas under shady trees, and can partner well with spring flowering bulbs.

 
Ornamental kale

6. Ornamental kale

Enjoy a vibrant range of colour in your garden with the planting of ornamental kale this autumn. Ornamental kale is available in cream, green, and pink, and can be planted in soil or containers. The closer together you plant ornamental kale, the more suitable the stems will be for picking.

 
Calendula

7. Calendula

Calendula is the name for around 20 species of flowers, also known as Marigolds. When in full bloom, they are a lovely shade of red, orange, and yellow, and often add a beautiful vibrancy to a summer garden. Calendula flowers look the part in flower pots or mixed borders and should be planted after the last frost. Full sun and compost-rich soil can have them grow to their full potential.

 
Stock flower

8. Stock

If you have fertile and well-draining soil, then one of the best autumn flowers to plant at the changing of the seasons is stock. Stock, known as Matthiola incana, is a fragrant flower that blooms in red, white, pink, purple, and cream.

Once you plant stock in autumn or early spring, it will thrive in the cool weather. You can then enjoy their fragrance every time you step outside – particularly on overcast days and once night falls.

 
Cornflower

9. Cornflower

And, no, we don’t mean cornflour – the ingredient you use in home baking and cooking. We mean cornflower, the lovely blue, white, or pink flowers that grow to be tall or dwarf-sized. They love full sun but are cool-season flowers that thrive when planted in autumn or early spring.

 
Lobelia

10. Lobelia

If you’re looking for a plant that completes the look in your hanging baskets, then lobelia could be it. Throw on the gardening gloves and get stuck in! Lobelia blooms into a blue, red, pink, white, or purple flower that can grow upright or in a mound. Enjoy colourful edging in your hanging baskets courtesy of this autumn flower.


Get planting

With summer waving goodbye, it’s time to start planning for a brand new planting season. Take advantage of the warm soil and wet weather and get those new autumn seedlings in the ground. If you need a helping hand, there is always a local gardening expert who is only too willing to get stuck in.

Guest User
Tiny succulent plants to grow in New Zealand

Everyone is good at something, but for many of us, that isn’t gardening. Fortunately, that’s why gardening services exist – so you can get the help you need without sacrificing a little greenery in your yard. But if you’re tired of giving the final salute to plants that haven’t survived or thrived, then read on. Succulents, a particularly robust type of plant, might be just the solution.

The name succulent comes from the Latin word sucus, which means sap or juice. And it’s no exaggeration, for these plants boast thick, fleshy parts that retain water. As a result, they are the most forgiving type of plant in arid conditions – or for forgetful plant parents.  

But if you are after a certain type of plant that’s fit for neglectful owners, then read on. Here are a few of the best tiny succulent plants to grow in New Zealand.

Echeveria

Echeveria

Echeveria is a type of succulent that’s native to Mexico, Central America, and South America. It belongs to the Crassulaceae family and can either be deciduous or evergreen. It boasts bright, leafy, and fleshy rosettes, and some have the crucial environmental role of becoming a host plant for butterflies. 

Aside from being a tiny succulent, this plant will fit in right at home with any neglectful plant owner. It’s drought-tolerant, loves the sun, and prefers well-drained soil. It also handles dry conditions like a pro and will continue thriving even in the face of full neglect.

What also appeals to people about the Echeveria succulent is that it’s available in a myriad of different colours. Whether you want a tiny succulent plant to grow in New Zealand to set on your windowsill, or you want a lovely plant for container planting, borders, or rockeries, the Echeveria will tick all the boxes.

Crassula

Crassula

Crassula is the broad term for 200 species of succulent that are native in various parts of the world. If you are looking for a tiny succulent that’s both beautiful and drought-resistant, then you’ll find a friend in Crassula.

Aside from how attractive and low maintenance this succulent is, people also love it for how fast it grows and thrives. It establishes far quicker in your garden than many other succulents in New Zealand, while also adding much life and zest to an indoor or outdoor area.

It adds a tropical vibe to an outdoor entertainment area, works pool-side for those warmer parts of the country, and will adapt to constrained growth in a container, or freedom in a full patio area.

Most importantly, it’s ideal for people who forget to water their plants. The Crassula is a hardy, multi-branched succulent that thrives in the sun with a bit of shade and minimal watering. If you compare this succulent to box plants, its robustness is second to none.

Aloe vera

Aloe vera

Plants offer a whole host of benefits. They can improve your mental health, offer you an immune boost, improve your productivity and learning abilities, and, of course, benefit your air quality. But then there’s aloe vera – which is in a league of its own.

This tiny succulent can do not only many of those things above but also offer medicinal properties. Aloe vera improves your digestive health, heals burns, clears acne, improves oral health, and even relieves anal fissures. If you’re not all that much of a plant lover, then one with purpose is undoubtedly going to appeal.

What’s more, this succulent will tolerate neglect and dryness, thrives in full sun, and can grow in pots. You can cut it back, break off its leaves for use, and watch as it grows back with ease. You can also plant it inside or outside.

You might not have green fingers, but you can’t deny that aloe vera is an altogether versatile, hardy, and useful plant to have in your home.

Aeonium

Aeonium

House plants are great in theory, but if you don’t have a natural talent with plants, they are not great in practice. Many houseplants can be finicky, temperamental, and hard to keep alive. While those who offer garden services and watering can help, it’s still not a fail-safe method for survival. So, what can you do?

Rather than give up greenery for good, you can invest in succulents that both fill that need for a house plant, but also don’t need as much TLC as an average pot plant. Aeonium, for example, can be a large or tiny succulent plant and is popular in horticulture.

Also known as tree houseleeks, the name encompasses over 35 different succulent species. The leaves form around a basal stem, with a spreading rosette that’s sure to add to its appeal. This succulent, unlike others, also has free petals, which form in up to a dozen different sections. Most aeoniums come from the Canary Islands, but several have been introduced around the world.

Be sucked in by succulents

What more could you ask for? When you buy succulents, you are purchasing an attractive plant that requires minimal watering, attention, or love. You place it in the sunshine, offer it an occasional drink from time to time, then let it naturally enhance the appeal of your home. There are many tiny succulent plants to grow in New Zealand, so why wait any longer? Talk to your local gardening expert about the best type for your property.

Guest User